# Getting started

Shopwaive is a leading commerce technology platform that provides tools such as Customer, Employee, Checkout, B2B, Marketing and Payment APIs

## What is Shopwaive?

{% hint style="info" %}
Want to learn about Shopwaive's newest feature releases? Check out the [Change log](https://changelog.shopwaive.com/) to peek inside Shopwaive's latest advances in technology and AI-powered features
{% endhint %}

Shopwaive at its core is an AI platform. Shopwaive has developed an AI-powered Customer Relationship Management (CRM) system for Shopify brands that assists in creating automations and efficient customer service and resolution tools that solve complex business problems. Running a business on Shopify Plus is made easier and faster with Shopwaive's AI tools.&#x20;

{% hint style="info" %}
Want to get rid of your clunky cookie-cutter Loyalty program that generates discount codes? Need advanced tools to transact money between brands, customers, employees, and affiliates? Need enterprise features designed for revenue growth? Need it all to be seamless for your Shopify Plus brand and that has a world-class API for Hydrogen and headless frameworks? Look no further, we've got you covered with Shopwaive. Ready to get started? Install today on the [Shopify App Store](https://apps.shopify.com.com/shopwaive)
{% endhint %}

With an API-first design, Shopwaive ensures seamless integration and functionality across various platforms and environments. Our tool is built to enhance customer engagement, increase conversion rates, and provide a robust solution for brands looking to improve their marketing and customer conversion strategies. Whether it’s personalized offers, targeted promotions, or employee incentives, Shopwaive is dedicated to driving significant business growth and optimizing marketing efforts through advanced AI technology.

## New! B2B Partner Dashboards

Brands on Shopify Plus can now offer dedicated partner dashboards to businesses they do business with (B2B). Your partner's dashboard is a white-label portal that you manage and expose resources available from your Shopify Admin via Shopwaive's scope and permissions without granting permissions directly to your Shopify Admin. Partners will access their portal using a dedicated url provided and hosted by Shopwaive.&#x20;

Even if you currently do manage access to your Shopify Admin through collaborator access or Staff permissions, offering a limited view and access to specific customer segments and their resouces is not currently possible. Now, this problem is solved as Shopify Plus brands can offer Shopwaive's B2B login portal. Shopify Plus brands can offer an unlimited number of B2B partner dashboards on the Shopwaive Checkout subscription plan.

<figure><img src="/files/pjf3dh2vtMxDIfFUOL8y" alt=""><figcaption><p>Shopwaive's B2B Partner Login</p></figcaption></figure>

<figure><img src="/files/kKE5jHLqYSvDABwNkvvy" alt=""><figcaption><p>B2B Partner Dashboard main page</p></figcaption></figure>

<figure><img src="/files/1Z12jbI6Au7mdjiws7HI" alt=""><figcaption><p>Import, export, limit access to partner admins and users</p></figcaption></figure>

## Shopify Flow actions and triggers

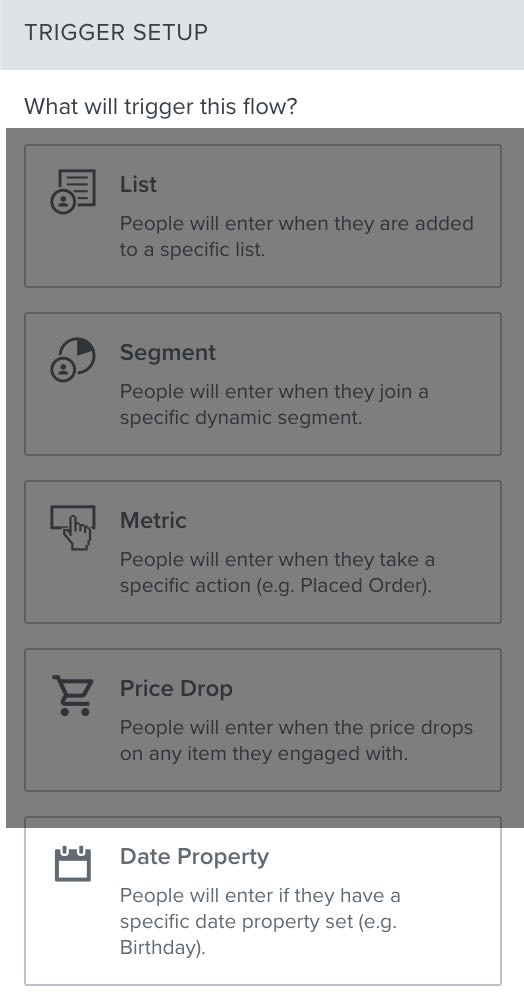
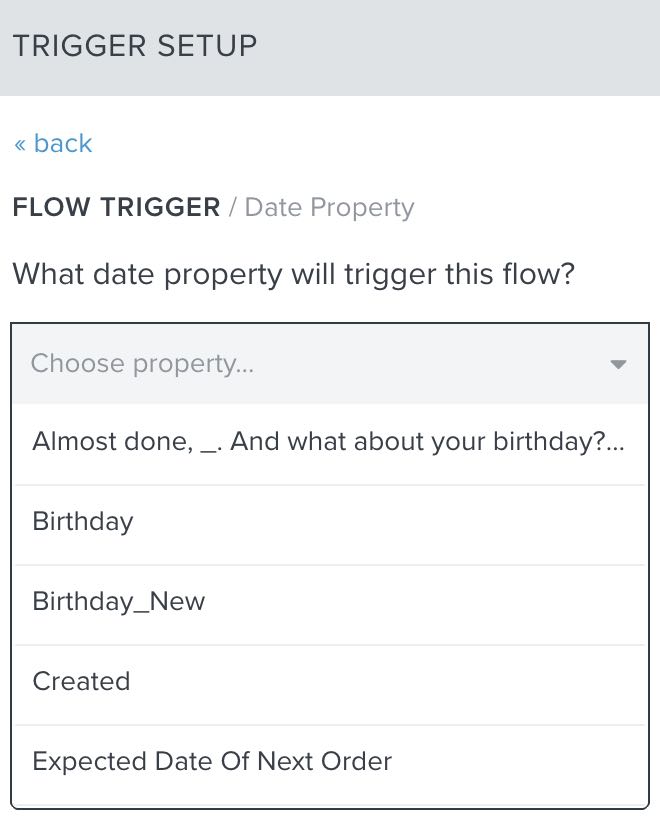
Streamline your automations with Shopwaive's Flow actions like <mark style="color:$primary;">**Send HTTP request**</mark> or <mark style="color:$primary;">**Create discount**</mark> after any Shopify event like <mark style="color:$primary;">**Order created**</mark> and connect it with 1,000s of other apps.

<figure><img src="/files/NGM9pxYhcdjNTWGgz6RL" alt=""><figcaption><p>Join the 1,000s+ of global brands, agencies, marketing and launch teams already leveraging Shopwaive's powerful platform</p></figcaption></figure>

## Why choose Shopwaive?

Shopwaive is an industry leader in customer incentivized marketing, helping brands build meaningful, trust-based relationships with their customers.

{% embed url="<https://youtu.be/CHjCsrGAcqo?si=X5UgrxwmDOIQcV1F>" %}

Built-in compliance tools, trusted deliverability, and our best-in-class REST Admin API, Shopwaive helps brands launch and scale their businesses globally. Our Business Suite includes:

* Cash Back and Loyalty Programs
* B2B Integrations and Orders
* Gift Card Management
* Store Credit
* Employee Credits, Incentives, and Offers
* Affiliate Marketing Commissions
* Enterprise Email and SMS Campaigns
* Shopify Flow integrations

Shopwaive empowers developers, brand agencies, marketing teams, store admins, and business owners. Built on a modern React framework, it leverages automation and AI to drive messaging campaigns, store credit, cash back, and gift cards.

{% hint style="info" %}

### Shopwaive: Boost Your Brand's Revenue

Shopwaive drives 2.5x+ revenue and generates double the triggered email revenue for leading global brands. It supports Retail/eCommerce, Health & Beauty, Apparel & Accessories, Travel & Hospitality, Consumer Packaged Goods (CPG), and Media & Entertainment sectors. Shopwaive engages shoppers throughout the buying lifecycle, enhancing ROI for SMS and email marketing campaigns.

[Learn more or request a demo](https://shopwaive.com)
{% endhint %}

### Powering D2C and B2B Automations for Global Businesses at Scale

#### Use Cases

* **Order Issues:** Deposit store credit
* **Refunds and Campaigns**
* **Checkout and Gift Cards:** For prepaid crowdfunding, pre-orders, and backorders
* **Gift Cards and Subscriptions Sales**
* **B2B Vendors:** 3rd-party credit requests and approvals
* **D2C Brands:** Employee/vendor deposits for brand swag
* **Affiliate Marketing:** Automatic credit deposits and post-purchase flows

#### Powering Commerce with Financial Technology

Enhance customer experiences and streamline operations across various scenarios with cutting-edge technology.

{% hint style="info" %}
Shopwaive's technology creates bespoke customer buying journeys. The platform enables seamless integration of powerful work flows across your Sales channels, like Headless commerce, Website builder platforms, CRM, Point-of-sale, Mobile, Social, iOS, Android, and more
{% endhint %}

### <mark style="color:blue;">Gift Cards, Checkout extensions, and Store Credit</mark>

Shopwaive provides world-class Software-as-a-service subscription plans that add measurable value to global brands access to and versatility of [Gift cards](/shopify/gift-cards), [Store credit](/shopify/accounts), [Cash Back and Loyalty](/shopify/cash-back-and-loyalty), [Discounts](/shopify/discounts), [B2B Orders](/shopify/draft-orders), [Refunds](/shopify/refunds), [Combinations](/shopify/accounts/app-embed/combinations), [Checkout](/shopify/checkout-extensions), [Analytics and Reporting](/shopify/accounts/export-accounts), Cloud services, Database, APIs, Messaging, Authentication and ID verification services

<figure><img src="/files/CliC5exnUArQUEJ62nGy" alt=""><figcaption><p>Checkout extensions like Upsells, Store credit, Offers, Cash back and more</p></figcaption></figure>

### <mark style="color:blue;">Cash Back and Loyalty Program</mark>

#### Shopify Flows and Shopwaive for Cash Back, Loyalty, and Rewards Programs

Brands often struggle with designing Loyalty and Rewards programs that align perfectly with their business strategy. Our solution? Start with Shopwaive today and regain control and cost savings with our in-house feature to create custom programs.

**New! Create Cash Back Programs with Shopify Flows**

Leverage Shopify's native Shopify Flows app to design your own Cash Back program. Avoid the limitations of other Loyalty and Reward platforms. You know your customers best, so having full control over how, who, and when you reward is crucial. Use Shopwaive to customize your strategy today!

### <mark style="color:blue;">Powerful Work Flows</mark>

Connect your [Klaviyo](https://www.klaviyo.com/) account with Shopwaive to automate powerful SMS messaging and email flows. Flows are powered by the Shopwaive API and integration of partner APIs

<figure><img src="/files/EiMB39hvUouJ25eMMpJQ" alt=""><figcaption><p>D2C account management just got a lot easier</p></figcaption></figure>

### <mark style="color:blue;">Flexibility with Payments</mark>&#x20;

Provide Cash Back, Rewards, Points, or Tokens to your customers. Enable a digital wallet for them and issue store-exclusive refunds and cash.

<figure><img src="/files/k7TRmY6AUzwQRmzMAqH4" alt=""><figcaption><p>Flexible payments with store credit, cash, points, or tokens</p></figcaption></figure>

### <mark style="color:blue;">AI-Powered World-Class Customer Support</mark>

Our team is available to assist you and typically responds within 24 hours. For immediate help, our AI chatbots can get you started quickly.

### <mark style="color:blue;">Automations that Make Your Life Easier</mark>

Use our design canvas to craft your pixel-perfect, branded customer interface. Automatically trigger email templates, access our API, and explore additional features.

<figure><img src="/files/QuSsUpZmIcupL514ZFZ9" alt=""><figcaption><p>Shopwaive for online and in-store customer accounting</p></figcaption></figure>

## <mark style="color:blue;">Built for D2C</mark>

Shopwaive offers cutting-edge internet business and commerce technology to enhance customer growth and scale your brand, all at a competitive price. Transition your customers to Shopwaive in minutes and save valuable time and money.

Here are some highlights:

* [Store credit](/shopify/accounts/import-accounts). Bulk import simplifies the process of importing customer accounts and making changes across thousands of customers in just seconds. Easily migrate from other platforms with just a few clicks

<figure><img src="/files/93DeFiT1RAq2JNJPUAMR" alt=""><figcaption><p>Customer profiles sync your customer's Shopwaive and Shopify data in a convenient dashboard</p></figcaption></figure>

Then, customers can view their balance and offers at checkout; apply with just one-click:

<figure><img src="/files/cNI037sHCMsqUSnynDNV" alt=""><figcaption><p>One-click redemption creates a seamless customer UX, higher conversion rates and AOV</p></figcaption></figure>

* Discounts with Shopwaive, you can create automations in Shopify Flow that automatically create discounts and send the discount code in an email&#x20;

<figure><img src="/files/PcU8k5vhVNhelAte02TD" alt=""><figcaption><p>Increase retention by sending automatic emails with discount codes for new customer orders</p></figcaption></figure>

* [Refunds](/shopify/refunds) with Shopwaive, you can issue partial store credits for various quantities and line items of an existing order. This includes the option to credit or exclude the costs of shipping fees and taxes.

<figure><img src="/files/3WLd6m7sFQKFWJIoHeXz" alt=""><figcaption><p>Line-item refunds enables making it right with customers a breeze and precise</p></figcaption></figure>

* [Checkout extensions](/shopify/checkout-extensions) allow customers of Shopify Plus merchants to redeem with a single click at checkout and combine credit with other promotions or discounts. Apply credit to the full cart costs, including merchandise, shipping, taxes, and fees
* [Top up flows](/shopify/shopify-flow) with [Zapier](https://www.zapier.com) let you automatically add credit to a customer's account based on their purchases or other actions
* [Shopify flows](/shopify/shopify-flow) enable you to connect [Google Sheets](https://sheets.google.com) to record all your customer transaction history

<figure><img src="/files/1rXmcmvC3GYkJtEeVELG" alt=""><figcaption><p>Shopify Plus Checkout extensions enable customers to checkout with their credit with one-click</p></figcaption></figure>

* Crowdfunding pledges and Pre-Orders can be handled seamlessly with issuance of pre-paid credit or [Gift Cards](/shopify/gift-cards) in the amount of the pledge or pre-order to facilitate checkout on your launch site

<figure><img src="/files/EK7nvrsjJXBs9zmLRzxU" alt=""><figcaption><p>Send gift cards and store credit for preorders, backorders, and crowdfunding pledges</p></figcaption></figure>

* [Klaviyo Integration](/shopify/email-and-campaigns/klaviyo-email-and-sms) enables you to connect your customer's Shopwaive data in email and SMS flows defined in [Klaviyo](https://www.klaviyo.com)
* [Draft orders integration](/shopify/draft-orders) enables B2B merchants to apply store credit to open draft orders
* [Requests and approvals](/shopify/b2b-requests-and-approvals) enables B2B merchants to review 3rd-party and vendor store credit requests, natively integrated with our email services for a streamlined experience
* [Zapier Integration](/shopify/shopify-flow) enables you to power a Zap using a webhook `POST` to update a customer's credit after they purchase a product or take some other action
* [Bulk Rewards and Discounts](/shopify/discounts) enables you to create thousands of discount codes in seconds using CSV import
* [Shopify POS](/shopify/shopify-pos) enables you to checkout customers in-store with smart grid tiles, use Shopwaive's POS Credit or Invoicing system for Buy-Now-Pay-Later and NET30 functionality&#x20;

<figure><img src="/files/LQLRihxgHCDYXDqQLWzB" alt=""><figcaption><p>Shopwaive smart grid tiles let you refund, redeem, or remove customer credit from the Shopify POS checkout cart</p></figcaption></figure>

* And the [Shopwaive API](https://api.shopwaive.com) provides your developers tools that integrate seamlessly with your existing framework

{% embed url="<https://youtu.be/Qsmr_TdhDE0?si=fQXsrJYwatUtrUUu>" %}
Struggling to convert customers at checkout? Think Shopwaive. Work Smarter not harder
{% endembed %}

## Quick links

{% content-ref url="/spaces/R7BwDfJhPObShd4z9nqx" %}
[REST API](https://api.shopwaive.com/)
{% endcontent-ref %}

{% content-ref url="/spaces/dE1hkXcFy2GeHW4Uy47J" %}
[Webhooks](https://webhooks.shopwaive.com/)
{% endcontent-ref %}

{% content-ref url="/pages/yYViLIPx0ZQOqqZuEkEv" %}
[Shopify Flow](/shopify/shopify-flow)
{% endcontent-ref %}

## Get Started

We've put together some helpful guides for you to get setup with our product quickly and easily

{% content-ref url="/pages/y4qxv4v2ukhS6UkCNHVd" %}
[Product Tour](/product-tour/dashboard)
{% endcontent-ref %}

## Install on Shopify

{% content-ref url="/pages/HEHj85mMQTyp3Q5JA6rt" %}
[Install](/shopify/install)
{% endcontent-ref %}

<table data-view="cards"><thead><tr><th></th><th></th><th></th><th data-hidden data-card-cover data-type="files"></th><th data-hidden data-card-target data-type="content-ref"></th></tr></thead><tbody><tr><td>Global brands use Shopwaive Checkout to create ultra-converting customer buying journeys </td><td></td><td></td><td><a href="/files/LQLRihxgHCDYXDqQLWzB">/files/LQLRihxgHCDYXDqQLWzB</a></td><td><a href="/pages/730SPkN7pQ46Qx7xg9eo">/pages/730SPkN7pQ46Qx7xg9eo</a></td></tr><tr><td>Create a Shopify Flow to connect Shopwaive's powerful APIs seamlessly with your existing funnels</td><td></td><td></td><td><a href="/files/1rXmcmvC3GYkJtEeVELG">/files/1rXmcmvC3GYkJtEeVELG</a></td><td><a href="/pages/yYViLIPx0ZQOqqZuEkEv">/pages/yYViLIPx0ZQOqqZuEkEv</a></td></tr><tr><td>Create email templates and custom messaging, set expiration dates, and much more</td><td></td><td></td><td><a href="/files/2es6UOTd66LaS2j90qUD">/files/2es6UOTd66LaS2j90qUD</a></td><td><a href="/pages/1Ifm7q150tRgDOwbdqMZ">/pages/1Ifm7q150tRgDOwbdqMZ</a></td></tr></tbody></table>


# Dashboard

Get to know your way around Shopwaive's leading customer acquisition and marketing platform

This guide introduces the sections, features, and menus of the Shopwaive app. Begin by installing the app or logging into your account on the website platform.

### Menu bar

<figure><img src="/files/0uAynzuhXqw8WLLgOV3n" alt=""><figcaption><p>The left side menu bar in the Shopwaive app</p></figcaption></figure>

The menu bar is the section located at the left of the app.

The menu contains:

* **The** [**Shopwaive**](https://www.shopwaive.com) **homepage link**\
  The homepage link provides convenient quick access to the Shopwaive website, where you can access documentation, tips, and tutorials for getting started and support
* **Your dashboard home** <img src="/files/XyK0QUh9XVVTVqYrdB1s" alt="" data-size="line">\
  Find the main dashboard home at the top-left corner of the app inside the menu bar and below the Shopwaive logo
* **Settings** <img src="/files/XyK0QUh9XVVTVqYrdB1s" alt="" data-size="line">\
  Find the gear icon labeled Settings. Click to open the settings menu to access personal and organization settings, enable app features, import or export accounts, or get help from the support team. Also, you can access developer API keys and delete customer accounts here
* **Account Plans**\
  Subscriptions provide access to various features and functionality of Shopwaive. You can upgrade your subscription by clicking the Account plans button on the topbar
* **Export** <img src="/files/XyK0QUh9XVVTVqYrdB1s" alt="" data-size="line">\
  Click to export all of your Shopwaive customer account data to CSV

{% hint style="info" %}
**Quick tip.** If you plan to delete all of your Shopwaive customer account data, we recommend to first use this option to export all your customer data to CSV which serves as a backup in case you change your mind later
{% endhint %}

* **Import** <img src="/files/XyK0QUh9XVVTVqYrdB1s" alt="" data-size="line">\
  You can bulk import existing customer credit accounts into Shopwaive by downloading the import template, a CSV file that provides columns to include existing customer account balances, notes, and email address

<figure><img src="/files/murWS9YUjdjzp6jW1cQq" alt=""><figcaption><p>Bulk import your existing customer credit accounts into the Shopwaive app</p></figcaption></figure>

### Email verification status

{% hint style="info" %}
**Good to know.** If email addresses are imported into your Shopwaive account using the bulk Import feature that do not previously have an account with your website, unverified customer accounts are automatically created for you on the Shopify platform. You can request your newly imported customers to verify their email address by navigating to the Shopify Admin and send an email request that asks them to verify their email address with your website. Customers must have an **Email Verified** status to be able to access their credit account
{% endhint %}

### Customers

The customers dashboard provides a search field to find customers that have signed up and registered an email address on your website.&#x20;

{% hint style="info" %}
Note that registering an email address does not necessarily mean the customer has verified their address. When a customer register's an email address on your site, they are sent an email confirmation they must use to verify
{% endhint %}

The dashboard contains the following menu options:

### <mark style="color:blue;">Accounts</mark>

* **Your customer accounts**\
  The accounts page provides a search field with a list of customer accounts that have been synced from your eCommerce platform to Shopwaive. You can search by account status or email address. An **Email Verified** status is required before customers can access their credit account. You can use the **Adjust balance** button to quickly adjust customer account balance or notes, send an email notification, or modify credit expiration dates

### <mark style="color:blue;">Recent transactions</mark>

* **Your customer recent transactions**\
  Your feed provides helpful insights of recent activity, including adjustments you've made to customer accounts and also Order transactions that included credit. If customers placed an order with credit, you are provided a link to the Order details page. You can export transactions to CSV for your records or analytics

### <mark style="color:blue;">Performance</mark>

* **Your analytics and performance**\
  Click to open your performance dashboard, where you can view a snapshot of your data metrics, including cumulative outstanding balance, cumulative redeemed balance, total credit issued (sum of redeemed and outstanding), total customers with credit, total sales, and orders

<figure><img src="/files/Fys4UVeZqGGrX9Bia53g" alt=""><figcaption><p>Performance dashboard within the Shopwaive app</p></figcaption></figure>

### <mark style="color:blue;">Flows</mark>

* **Your connected Klaviyo flows**\
  Setup an existing Klaviyo flow and connect it to Shopwaive. You have options to trigger flows defined in Klaviyo including Email and SMS notifications for low balance, account activation requests, and unspent balance reminders. With Klaviyo, you have many powerful options including using Time delays, such that if a customer makes a purchase with credit that reduces their available balance below a defined threshold, then a low balance email can be sent on a delay (i.e. 3 days after the purchase that triggered the flow), rather than immediately after the purchase. In this case, the email notification delay can include a link back to your store as reminder credit still remains to be spent

<figure><img src="/files/jKWUWKK2mPbUreMzLxmK" alt=""><figcaption><p>Klaviyo flows dashboard within the Shopwaive app</p></figcaption></figure>

### <mark style="color:blue;">Settings</mark>

On the Settings page, make selections for your profile and brand logo and much more

<figure><img src="/files/NWdrfVmAJI5NXCP1GtGp" alt=""><figcaption><p>Upload a profile image and brand logo from the Settings panel</p></figcaption></figure>

* <mark style="color:blue;">**Store Currency**</mark>\
  Click to modify your Shopwaive currency setting. With Shopwaive, you have options to combine credit with normal forms of payment (eg. Visa or Mastercard, PayPal, Apple Pay). Alternatively, you can offer custom store currency such as with points or tokens, or other major currencies in their local format

{% hint style="info" %}
**Note.** If you change the Shopwaive currency format, you still need to update your website platform currency settings as well. In Shopify, you can make changes to your store currency settings by navigating to **Settings** > **Store details** > **Store currency**
{% endhint %}

* <mark style="color:blue;">**Email status**</mark>\
  Click to open the main Shopwaive app settings page where you can toggle the Email status display setting. Enable this setting to show an email verification status badge in the Customers search dashboard
* <mark style="color:blue;">**Multiselect**</mark>\
  Click to open the main Shopwaive app settings page where you can toggle the multiselect display setting. Enable this setting to conveniently select and export only selected accounts when exporting customer data. If not enabled, you will export all customer data by default
* <mark style="color:blue;">**Delete accounts**</mark>\
  Click to open the main Shopwaive app settings page where you can delete all Shopwaive customer data. This action zeroes out all existing balances. You can import new credit or update balances of all your customers quickly using the bulk import feature or contacting our team at <support@shopwaive.com>. To Bulk Delete accounts by email through the Import template, please see [Bulk Delete Accounts via Import](https://docs.shopwaive.com/shopify/accounts/delete-accounts)

{% hint style="info" %}
**Note:** Deleting customer account balances is irreversible. It is recommended to create a backup by exporting all data prior to deleting. This action does not affect any other website platform customer data outside of Shopwaive. If you delete data by mistake, you can always contact our team at <support@shopwaive.com> who can help with restoring a backup
{% endhint %}


# Pricing

Our pricing plans are published with our Shopify App Store listing with features and costs of each subscription plan

All pricing is billed in **USD**, with a **7‑day free trial** available, and **additional monthly usage charges apply** on each plan.&#x20;

Visit our [App Store listing](https://apps.shopify.com/shopwaive) for the latest details on our subscription and pricing plans.

#### Subscription Plans that provide Platform Access

* **Shopwaive Starter**: **$15/month**\
  Includes: Store Credit & Profiles, Offers & Expirations, Loyalty & Rewards Program.&#x20;
* **Shopwaive Pro**: **$45/month**\
  Includes Starter features, plus: Export Transactions, Give Shipping Credits, Design Editor.&#x20;
* **Shopwaive Checkout**: **$60/month**\
  Includes Pro features, plus: Checkout Extensions & Upsells, Cash Out Direct Deposits, Shopify Flow Email & AI Tools, API & B2B Checkout.&#x20;

#### Usage fees

The monthly subscription plans above provide access to the platform and do not include usage. Additional usage charges apply. Account usage is $0.75 per Shopwaive customer for the first 4,000 customers, and $0.00 after that (i.e. 1M+ customers will cost the same as 4,000 customers). Account usage only applies to the number of Shopwaive customers which may be less than your total Shopify customers, as a Shopwaive customer is only created when an API request or deposit is made for a Shopify customer.&#x20;

An additional $1,499 semi-monthly Feature usage charge less the total capped usage cost applies to brands that use B2B Checkout, Multi-currency conversion, Shopify POS Invoicing or Enterprise features designed exclusively for Shopify Plus. A total monthly capped usage cost of $2,998 USD is in place for all subscription plans. If you use all Enterprise features and have more than 4,000 customer accounts you'll never be charged more than the total capped usage cost amount. Beginning services with Shopwaive and/or purchasing a subscription plan managed by Shopify Billing requires you to consent and adhere to our Terms and Conditions provided at <https://www.shopwaive.com/terms-conditions>

Example cost calculation for the <mark style="color:$primary;">**Pro**</mark> plan: 100 customer accounts \* $0.75 USD + $45 platform access = $120 USD per month

Example cost calculation for the <mark style="color:$primary;">**Starter**</mark> plan: 1,000 customer accounts \* $0.75 USD + $15 platform access = $765 USD per month

Example cost calculation for the <mark style="color:$primary;">**Checkout**</mark> plan plus all Enterprise features including B2B Checkout, Multi-currency, and Shopify POS: 800,000 customer accounts \* $0.75 USD + $60 platform access.&#x20;

Total usage costs are capped at $2,998 USD per month for each domain, therefore the total usage cost in this scenario is $2,998 USD per month.

#### Monthly caps on Usage fees

Independent of the total number of Accounts you service or the Features you may be using, the monthly maximum usage costs of any plan is capped at $2,998 USD per domain. Capped fees only apply to usage not the platform subscription plan. To calculate your total monthly costs if your usage is capped, simply add $2,998 USD per domain to the fixed cost of your Subscription plan.


# Install

Launching Shopwaive on your store is easy. Use the steps outlined below to get started

{% hint style="info" %}
Need assistance? Send us a message in the chat, and our team will be happy to guide you through the setup.
{% endhint %}

<figure><img src="/files/QOBHAFe0U2dywGfB35i2" alt=""><figcaption><p>Flexible checkout, store credit, rewards and discounts with Shopwaive</p></figcaption></figure>

## Install on Shopify

To install Shopwaive on your Shopify store, visit the Shopify App Store and add the app.

<figure><img src="/files/tyESu1qrXOOnI6pYJG8h" alt=""><figcaption><p>Install Shopwaive on the Shopify App Store</p></figcaption></figure>

## Pricing

Our pricing is maintained on our Shopify App Store listing where you can find full details of our subscription plans. All pricing is billed in **USD**, with a **7‑day free trial** available, and **additional monthly usage charges apply** on each plan.&#x20;

Visit our [App Store listing](https://apps.shopify.com/shopwaive) for the latest details on our subscription and pricing plans.

#### Subscription Plans that provide Platform Access

* **Shopwaive Starter**: **$15/month**\
  Includes: Store Credit & Profiles, Offers & Expirations, Loyalty & Rewards Program.&#x20;
* **Shopwaive Pro**: **$45/month**\
  Includes Starter features, plus: Export Transactions, Give Shipping Credits, Design Editor.&#x20;
* **Shopwaive Checkout**: **$60/month**\
  Includes Pro features, plus: Checkout Extensions & Upsells, Cash Out Direct Deposits, Shopify Flow Email & AI Tools, API & B2B Checkout.&#x20;

#### Usage fees

The monthly subscription plans above provide access to the platform and do not include usage. Additional usage charges apply. Account usage is $0.75 per Shopwaive customer for the first 4,000 customers, and $0.00 after that (i.e. 1M+ customers will cost the same as 4,000 customers). Account usage only applies to the number of Shopwaive customers which may be less than your total Shopify customers, as a Shopwaive customer is only created when an API request or deposit is made for a Shopify customer. An additional $1,499 minimum semi-monthly usage charge applies to brands that use B2B Checkout, Multi-currency conversion, Shopify POS Invoicing or Enterprise features designed exclusively for Shopify Plus. A total monthly cap cost of $2,998 USD is in place for all subscription plans. If you use all Enterprise features and have more than 4,000 customer accounts you'll never be charged more than this total capped amount. Beginning services with Shopwaive and/or purchasing a subscription plan through our listing and Shopify Billing requires you to consent and adhere to our Terms and Conditions provided at <https://www.shopwaive.com/terms-conditions>

Example cost calculation for the <mark style="color:$primary;">**Pro**</mark> plan: 100 customer accounts \* $0.75 USD + $45 platform access = $120 USD per month

Example cost calculation for the <mark style="color:$primary;">**Starter**</mark> plan: 1,000 customer accounts \* $0.75 USD + $15 platform access = $765 USD per month

Example cost calculation for the <mark style="color:$primary;">**Checkout**</mark> plan plus all Enterprise features including B2B Checkout, Multi-currency, and Shopify POS: 800,000 customer accounts \* $0.75 USD + $60 platform access. However, total costs are capped at $2,998 USD per month for each domain, therefore the total cost in this scenario is $2,998 USD per month.

## Get started with these steps

<details>

<summary>Step 1 (Optional): Turn on the popup (on Shopify Plus? Skip this step)</summary>

If you are using Shopwaive on Shopify, you are not on Shopify Plus, and you do not have access to our Checkout extensions, then this step is for you. After installing the app enable the Popup by navigating to the **Shopify Admin** > **Sales Channels** > **Online Store** > **Customize**. Then click the <mark style="color:blue;">App embeds</mark> icon on the left menu pane. Find the Popup listed and toggle on.

If your theme does not support Shopify's Theme app extensions or app embeds, [contact](mailto:support@shopwaive.com) our team and we can provide integration support to get you setup in minutes.

</details>

<figure><img src="/files/qDY1GYhDtmDSCLdfGBBU" alt=""><figcaption><p>Not on Shopify Plus? Enable the Popup on your Shopify theme </p></figcaption></figure>

<details>

<summary>Step 2 (Optional): Shopify Plus Checkout Extensions (not on Shopify Plus? Skip this step)</summary>

Shopify Plus brands can add the [Redeem](/shopify/checkout-extensions) and [Upsells](/shopify/upsells) extensions at checkout to unlock powerful checkout features that increase AOV and provide a seamless one-click redemption experience. Using the [Redeem](/shopify/checkout-extensions) extension, you'll get to choose from [Store credit](/shopify/accounts), [Loyalty](/shopify/cash-back-and-loyalty), and [Offers](/shopify/offers) solutions.

</details>

<figure><img src="/files/Wg3NrpLiJ90gC5BYEdE4" alt=""><figcaption><p>Shopify Plus brands can add the Redeem and Upsells Extensions at Checkout</p></figcaption></figure>

<details>

<summary>Step 3 (Optional): Add other app blocks</summary>

Brands can choose to add the <mark style="color:blue;">**Facade**</mark> app block, which displays a button at the bottom of the screen only if customers are not yet logged in. Clicking the facade will redirect your customers to login, communicating to them that log in is required to access their account

Brands can also choose to add the <mark style="color:blue;">**Account**</mark> app block, which displays their balance and transactions on their Classic Customer accounts page and the newly released Customer Profile page for New customer accounts

</details>

<details>

<summary>Step 4: Enable customer accounts</summary>

If you are using Shopwaive on Shopify, ensure you enable customer accounts by navigating to the **Shopify Admin** > **Settings** > **Checkout** > **Customer accounts**. Then enable the setting <mark style="color:blue;">Accounts are optional</mark> or <mark style="color:blue;">Accounts are required</mark>. Accounts are required for customers to receive and use credit on Shopify.

</details>

<details>

<summary>Step 5: Setup branded email</summary>

Follow the steps outlined in [Setup branded email](/shopify/install/setup-branded-email) to begin sending branded email and campaigns to meet Google and Yahoo's sender domain requirements

</details>

## Add your root and subdomains

Navigate to **Settings** > **Notifications** within Shopwaive. Enter your Root domain and Sending subdomain. Click **Generate DNS records**

## Shopify POS

If you're using Shopify POS in a brick-and-mortar shop and would like to use Shopwaive for customer credit accounting for in-store purchases, see [Shopify POS Credit](/shopify/shopify-pos). If you prefer to allow customers to charge to a NET 30 account, see [Shopify POS Invoicing](/shopify/shopify-pos/invoicing).


# Setup branded email

Send branded email campaigns with Shopwaive and meet Google and Yahoo's sender requirements by following this guide

{% hint style="info" %}
Use this guide to setup your branded sending domain. If you still need help refer to [Troubleshooting branded sending domain issues](/shopify/email-and-campaigns/troubleshooting-branded-sending-domain-issues). Or, send us a message in the in-app chat and one of our team members will be glad to guide you through setup
{% endhint %}

<figure><img src="/files/d1hwbFN4R2DKoSvjxsCa" alt=""><figcaption><p>Flexible checkout, store credit, gift cards, rewards and discounts with Shopwaive</p></figcaption></figure>

## Verify branded sending domain

New email sending requirements from Google and Yahoo, effective Feb 1, 2024, mandate brands to update their DNS settings. This includes adding CNAME host names, values provided by Shopwaive, and an MX record for a sender subdomain to continue using branded email addresses. These updates enhance email authentication and delivery, ensuring emails reach customer inboxes reliably. For bulk senders (>5000 emails/day), unauthenticated emails will be flagged and sent to Spam, maintaining standards and improving user experiences.

To meet the new sender requirements, Shopwaive Merchants will follow these steps to remain compliant:

* Sign In to Shopwaive, visit **Settings** > **Notifications**
* **Authenticate** Shopwaive to send emails for your domain by following the guide provided below
* [Add a DMARC policy](https://apps.google.com/supportwidget/articlehome?hl=en\&article_url=https%3A%2F%2Fsupport.google.com%2Fa%2Fanswer%2F2466563%3Fhl%3Den\&assistant_id=generic-unu\&product_context=2466563\&product_name=UnuFlow\&trigger_context=a) for your domain, with a minimum **p=none** policy setting.

You can check if you already have a valid [DMARC record](https://dmarcian.com/dmarc-inspector/) or [Learn how to create a DMARC record](https://apps.google.com/supportwidget/articlehome?hl=en\&article_url=https%3A%2F%2Fsupport.google.com%2Fa%2Fanswer%2F2466563%3Fhl%3Den\&assistant_id=generic-unu\&product_context=2466563\&product_name=UnuFlow\&trigger_context=a)

## Add your root and subdomains

Navigate to **Settings** > **Notifications** within Shopwaive. Toggle on to enable **Notifications**. Enter your Root domain and Sending subdomain. Click **Generate DNS records**

{% hint style="info" %}
**Tip:** Your root domain is the domain purchased from a registrar, reflecting your website and verified sender email domain. For the sending subdomain, use 'message' or 'send'. This subdomain won't be visible to customers. For example, if your email is <support@yourdomain.com>, then message.yourdomain.com or send.yourdomain.com will meet Google and Yahoo's requirements and match the MX hostname in your DNS provider's site.
{% endhint %}

{% hint style="info" %}
Note that after you enter your root domain, in the Sending subdomain field we automatically append your root domain as a suffix and you should not include it here, only the subdomain like 'message' or 'send'. You can choose any unique subdomain that does not already exist as an MX record with your DNS provider
{% endhint %}

<figure><img src="/files/N6dHp6Tx6xLuU5zCFnsK" alt=""><figcaption><p>Provide your root domain and sending subdomain to begin authentication</p></figcaption></figure>

## Add the CNAME and MX records to your DNS provider's site

DNS records will populate with pending status. Add the 3 CNAME records, 1 TXT and 1 MX record to your domain provider's site. After adding all 5 DNS records to your DNS provider's site, click **Authenticate domain**

{% hint style="info" %}
For the MX record, if your domain provider has an entry for priority, use **10**.&#x20;
{% endhint %}

<figure><img src="/files/cnHo7wcS0KKEru5mEUtp" alt=""><figcaption><p>Copy and paste the CNAME, TXT, and MX records to your domain provider's site</p></figcaption></figure>

## Receive confirmation

If DNS records are found, you will see a confirmation message indicating your sending domain has been authenticated. Keep in mind most DNS records propagate within minutes, but in some cases can take up to 48 hours.

<figure><img src="/files/RmEPSZI84uYOr2CeMF1K" alt=""><figcaption><p>Receive confirmation your sending domain has been authenticated with Shopwaive</p></figcaption></figure>

## Add a DMARC policy

Add a DMARC policy with a minimum p=none policy setting. [Learn how to create a DMARC record](https://apps.google.com/supportwidget/articlehome?hl=en\&article_url=https%3A%2F%2Fsupport.google.com%2Fa%2Fanswer%2F2466563%3Fhl%3Den\&assistant_id=generic-unu\&product_context=2466563\&product_name=UnuFlow\&trigger_context=a)

{% hint style="info" %}
If you get stuck on any of these steps, reach out to our team at <support@shopwaive.com>. One of our team members will be glad to help
{% endhint %}

You're finished. You can now begin sending email with store credit, create campaigns with gift cards and much more. See more at [Email and Campaigns ](/shopify/email-and-campaigns)


# Headless commerce

Shopify Headless sites built with Hydrogen and Oxygen are fully supported and can integrate seamlessly with Shopwaive's API and headless application features

{% hint style="info" %}
Need assistance? Send us a chat message, and our team will guide you through the setup.
{% endhint %}

## Install on Shopify

You can skip this guide if you are not using Shopify Plus with a Headless site integration. Shopify Plus merchants with such an integration can use this guide to subscribe to Shopwaive Checkout and access advanced features exclusively designed for them.

#### Headless Commerce on Shopify

{% hint style="info" %}
If you do not have access to the Shopify App Store, contact our team directly at <support@shopwaive.com> for help. We're on standby and glad to help get you started
{% endhint %}

If you install apps from the Shopify App Store, visit our [app store listing](https://apps.shopify.com/shopwaive) to install and subscribe.

<figure><img src="/files/wX6aM0I1Scs7hcFeqZOV" alt=""><figcaption><p>Install Shopwaive on the Shopify App Store</p></figcaption></figure>

Alternatively, you can sign up and subscribe from our [pricing page](https://www.shopwaive.com/pricing).

## Get your access token

After installing the app, you can navigate to the Settings page and copy your Access Token for easy login to your main app dashboard. You'll also use this same token to make API requests to the [Shopwaive API](https://api.shopwaive.com/)

<figure><img src="/files/3fcHfWGSvY31fItvnaBm" alt=""><figcaption><p>Navigate to the Settings to find your login Shopwaive access token</p></figcaption></figure>

## Sign In to your dashboard

To sign in to your dashboard outside of Shopify, navigate to the following url and provide your Access Token. Alternatively, if you are an Admin of the email account associated with your store you can use your Google account to sign in.

> #### Sign In Url
>
> <https://app.shopwaive.com/?headless=true\\&shop=**yourshop**.myshopify.com>

<figure><img src="/files/TUjWuH7uUYVcxGnQUe8h" alt=""><figcaption><p>Sign In page for merchants that use Shopify's backend services with a Headless site</p></figcaption></figure>


# Features

Shopwaive develops advanced internet business and digital commerce technology for global CMS and website builder platforms

## Features and functionality

{% hint style="info" %}
**Tip:** Bookkeeping for store credit is handled separately from gift cards, rewards, shipping, and discount balances. By combining these distinct offerings with email marketing, Shopwaive can elevate your brand to the next level.
{% endhint %}

{% hint style="success" %}
Store credit can be combined with gift cards, shipping credit, rewards, and discounts. These can be used strategically to boost conversion rates and enhance checkout completion. Refer to the feature table below for more details.
{% endhint %}

<table><thead><tr><th width="243">Feature</th><th width="138" data-type="checkbox">Store Credit</th><th data-type="checkbox">Offers</th><th width="115" data-type="checkbox">Gift Cards</th><th width="110.33333333333331" data-type="checkbox">Discounts</th><th width="170" data-type="checkbox">Shipping Credit</th></tr></thead><tbody><tr><td>Single expiry date</td><td>true</td><td>true</td><td>true</td><td>true</td><td>false</td></tr><tr><td>Multiple expiry dates</td><td>false</td><td>true</td><td>false</td><td>true</td><td>false</td></tr><tr><td>Enterprise Integrations</td><td>true</td><td>true</td><td>true</td><td>true</td><td>true</td></tr><tr><td>B2B Requests &#x26; Approvals</td><td>true</td><td>true</td><td>false</td><td>false</td><td>true</td></tr><tr><td>B2B Draft Orders</td><td>true</td><td>false</td><td>true</td><td>false</td><td>false</td></tr><tr><td>Checkout Extensions</td><td>true</td><td>true</td><td>true</td><td>false</td><td>false</td></tr><tr><td>Shopify Flows</td><td>true</td><td>true</td><td>true</td><td>true</td><td>true</td></tr><tr><td>Admin Extensions</td><td>true</td><td>false</td><td>false</td><td>false</td><td>false</td></tr><tr><td>Multiple for same email</td><td>false</td><td>true</td><td>true</td><td>true</td><td>false</td></tr><tr><td>Bulk import available</td><td>true</td><td>true</td><td>true</td><td>true</td><td>false</td></tr><tr><td>Bulk export available</td><td>true</td><td>false</td><td>false</td><td>true</td><td>false</td></tr><tr><td>Combine with other offers</td><td>true</td><td>true</td><td>true</td><td>true</td><td>true</td></tr><tr><td>Requires customer login</td><td>true</td><td>true</td><td>false</td><td>false</td><td>true</td></tr><tr><td>Refunds and exchanges</td><td>true</td><td>true</td><td>true</td><td>true</td><td>false</td></tr><tr><td>Digital wallet functionality</td><td>true</td><td>true</td><td>false</td><td>false</td><td>true</td></tr><tr><td>Shopwaive widget</td><td>true</td><td>false</td><td>false</td><td>false</td><td>true</td></tr><tr><td>Tapcart Integration</td><td>true</td><td>true</td><td>true</td><td>true</td><td>false</td></tr><tr><td>Klaviyo Integration</td><td>true</td><td>true</td><td>false</td><td>false</td><td>false</td></tr><tr><td>Zapier Integration</td><td>true</td><td>true</td><td>false</td><td>false</td><td>false</td></tr><tr><td>Save Email Templates</td><td>true</td><td>false</td><td>true</td><td>true</td><td>false</td></tr><tr><td>Shopwaive Order API</td><td>true</td><td>false</td><td>false</td><td>false</td><td>false</td></tr><tr><td>Shopwaive Customer API</td><td>true</td><td>true</td><td>true</td><td>false</td><td>false</td></tr><tr><td>Shopwaive Action API</td><td>true</td><td>true</td><td>true</td><td>false</td><td>false</td></tr><tr><td>Shopify POS</td><td>true</td><td>true</td><td>true</td><td>true</td><td>true</td></tr><tr><td>Topups</td><td>true</td><td>true</td><td>false</td><td>false</td><td>true</td></tr><tr><td>Subscriptions and Flows</td><td>true</td><td>true</td><td>true</td><td>true</td><td>true</td></tr><tr><td>Reporting and analytics</td><td>true</td><td>true</td><td>true</td><td>true</td><td>true</td></tr><tr><td>Currency options</td><td>true</td><td>true</td><td>true</td><td>false</td><td>false</td></tr><tr><td>Multilingual  </td><td>true</td><td>true</td><td>true</td><td>true</td><td>true</td></tr><tr><td>Canvas design editor</td><td>true</td><td>false</td><td>false</td><td>false</td><td>true</td></tr><tr><td>Redeem at Checkout</td><td>true</td><td>true</td><td>true</td><td>true</td><td>true</td></tr><tr><td>Fraud protection </td><td>true</td><td>true</td><td>true</td><td>true</td><td>true</td></tr><tr><td>24/7 Customer Support</td><td>true</td><td>true</td><td>true</td><td>true</td><td>true</td></tr></tbody></table>

{% hint style="success" %}
**Tip:** You have the option to create hundreds of rewards and discounts in seconds with or without assigning sender, recipient, and customer email. With Shopwaive we make it easy to get exactly what you need, and nothing you don't. See [Rewards and Discounts](/shopify/discounts) for more details
{% endhint %}

Multiple store credits cannot be issued to the same email account or customer. Shopwaive's convention for customer store credit requires a single-source of truth for 1:1 digital wallet accounting and traceability. This means when using the store credit feature each customer email is assigned a single available balance per store and if defined, a single expiration date.

Multiple [Offers](/shopify/offers), [Gift Cards](/shopify/gift-cards), and [Discounts](/shopify/discounts) can, however, be issued to the same email account or customer. In addition to issuing multiple Offers, Gift Cards, and Discounts, you can define each with its own value, type, and expiration date. By default, assigning Gift Cards and Discounts to a specific customer or segment is optional and can be redeemed based on any criteria you define. See [Gift Cards](/shopify/gift-cards) and [Rewards and Discounts](/shopify/discounts) for more details.&#x20;

{% hint style="info" %}
Enterprise features require the [Shopwaive Checkout](https://apps.shopify.com/shopwaive) subscription plan. Contact us at <support@shopwaive.com> to learn more
{% endhint %}

Have questions on any specific features? [<mark style="color:blue;">**Contact us**</mark>](mailto:support@shopwaive.com)


# Shopify Flow

With Shopify Flow and Shopwaive create automations when customers place orders, inventory is out of stock, or thousands of other actionable events

## Getting started

Shopify Flow enables merchants to create powerful workflows triggered by events. For example, when an order is placed, a transaction can be automatically recorded in a connected Google Sheet, or a customer can receive deposits in credit. The possibilities are endless.

Shopwaive actions and triggers in Shopify Flow require a paid subscription. [Learn more](https://apps.shopify.com/shopwaive)

{% hint style="info" %}
The Shopwaive Development team is continuously adding new features like Shopify Flow actions and triggers to streamline D2C and B2B workflows on Shopify. If you have a custom process or request you need please contact <support@shopwaive.com>, we're here to help
{% endhint %}

<table data-view="cards"><thead><tr><th></th><th></th><th></th><th data-hidden></th><th data-hidden data-card-cover data-type="image">Cover image</th><th data-hidden data-card-target data-type="content-ref"></th></tr></thead><tbody><tr><td><p><mark style="color:blue;"><strong>Shopify store credit</strong></mark></p><p><strong>Shopify Flow Action</strong></p></td><td>New! Credit or debit customer's with native store credit</td><td></td><td></td><td><a href="/files/muidwYq8vni97HCR95CA">/files/muidwYq8vni97HCR95CA</a></td><td><a href="https://changelog.shopwaive.com/posts/quickstart-7">https://changelog.shopwaive.com/posts/quickstart-7</a></td></tr><tr><td><p><mark style="color:blue;"><strong>Send email</strong></mark></p><p><strong>Shopify Flow Action</strong></p></td><td>Send your customer an email with their balance</td><td></td><td></td><td><a href="/files/muidwYq8vni97HCR95CA">/files/muidwYq8vni97HCR95CA</a></td><td><a href="https://docs.shopwaive.com/shopify/shopify-flow#send-an-email-when-credit-is-deposited">https://docs.shopwaive.com/shopify/shopify-flow#send-an-email-when-credit-is-deposited</a></td></tr><tr><td><p><mark style="color:blue;"><strong>Increment balance</strong></mark></p><p><strong>Shopify Flow Action</strong></p></td><td>Create a deposit or debit for a customer or segment</td><td></td><td></td><td><a href="/files/muidwYq8vni97HCR95CA">/files/muidwYq8vni97HCR95CA</a></td><td><a href="https://docs.shopwaive.com/shopify/shopify-flow#actions">https://docs.shopwaive.com/shopify/shopify-flow#actions</a></td></tr><tr><td><p><mark style="color:blue;"><strong>Create discount</strong></mark></p><p><strong>Shopify Flow Action</strong></p></td><td>Create a discount code and send in an email</td><td></td><td></td><td><a href="/files/muidwYq8vni97HCR95CA">/files/muidwYq8vni97HCR95CA</a></td><td><a href="https://docs.shopwaive.com/shopify/shopify-flow#create-a-discount-code-and-optionally-send-email">https://docs.shopwaive.com/shopify/shopify-flow#create-a-discount-code-and-optionally-send-email</a></td></tr><tr><td><p><mark style="color:blue;"><strong>Create gift code</strong></mark></p><p><strong>Shopify Flow Action</strong></p></td><td>Create a gift code and send in an email</td><td></td><td></td><td><a href="/files/muidwYq8vni97HCR95CA">/files/muidwYq8vni97HCR95CA</a></td><td><a href="https://docs.shopwaive.com/shopify/shopify-flow#create-a-gift-code-and-optionally-send-email">https://docs.shopwaive.com/shopify/shopify-flow#create-a-gift-code-and-optionally-send-email</a></td></tr><tr><td><p><mark style="color:blue;"><strong>Set balance</strong></mark></p><p><strong>Shopify Flow Action</strong></p></td><td>Set your customers balance to predefined value</td><td></td><td></td><td><a href="/files/muidwYq8vni97HCR95CA">/files/muidwYq8vni97HCR95CA</a></td><td><a href="https://docs.shopwaive.com/shopify/shopify-flow#actions">https://docs.shopwaive.com/shopify/shopify-flow#actions</a></td></tr><tr><td><p><mark style="color:blue;"><strong>Refund balance</strong></mark></p><p><strong>Shopify Flow Action</strong></p></td><td>Provide an order id to refund redeemed amount</td><td></td><td></td><td><a href="/files/muidwYq8vni97HCR95CA">/files/muidwYq8vni97HCR95CA</a></td><td></td></tr><tr><td><p><mark style="color:blue;"><strong>Void deposits</strong></mark></p><p><strong>Shopify Flow Action</strong></p></td><td>Provide an order or line item id to reverse earned points</td><td></td><td></td><td><a href="/files/muidwYq8vni97HCR95CA">/files/muidwYq8vni97HCR95CA</a></td><td></td></tr><tr><td><p><mark style="color:blue;"><strong>Earn Commission</strong></mark></p><p><strong>Shopify Flow Action</strong></p></td><td>Affiliates earn commission on orders and signups</td><td></td><td></td><td><a href="/files/muidwYq8vni97HCR95CA">/files/muidwYq8vni97HCR95CA</a></td><td><a href="/pages/dEQDxtkTM7FLp2CClNYO">/pages/dEQDxtkTM7FLp2CClNYO</a></td></tr><tr><td><p><mark style="color:blue;"><strong>Create segment</strong></mark></p><p><strong>Shopify Flow Action</strong></p></td><td>Create a customer segment  when you provide a query</td><td></td><td></td><td><a href="/files/muidwYq8vni97HCR95CA">/files/muidwYq8vni97HCR95CA</a></td><td></td></tr><tr><td><p><mark style="color:blue;"><strong>Send HTTP request</strong></mark></p><p><strong>Shopify Flow Action</strong></p></td><td>Send HTTP requests, receive response payloads</td><td></td><td></td><td><a href="/files/muidwYq8vni97HCR95CA">/files/muidwYq8vni97HCR95CA</a></td><td><a href="https://docs.shopwaive.com/shopify/shopify-flow#send-http-requests">https://docs.shopwaive.com/shopify/shopify-flow#send-http-requests</a></td></tr><tr><td><p><mark style="color:blue;"><strong>Balance change</strong></mark></p><p><strong>Shopify Flow Trigger</strong></p></td><td>Triggers when a customer's balance changes</td><td></td><td></td><td><a href="/files/muidwYq8vni97HCR95CA">/files/muidwYq8vni97HCR95CA</a></td><td><a href="https://docs.shopwaive.com/shopify/shopify-flow#balance-change">https://docs.shopwaive.com/shopify/shopify-flow#balance-change</a></td></tr><tr><td><p><mark style="color:blue;"><strong>Balance change from order</strong></mark></p><p><strong>Shopify Flow Trigger</strong></p></td><td>Triggers when a customer redeems on an order</td><td></td><td></td><td><a href="/files/muidwYq8vni97HCR95CA">/files/muidwYq8vni97HCR95CA</a></td><td><a href="https://docs.shopwaive.com/shopify/shopify-flow#balance-changes-from-order">https://docs.shopwaive.com/shopify/shopify-flow#balance-changes-from-order</a></td></tr><tr><td><p><mark style="color:blue;"><strong>HTTP POST</strong></mark></p><p><strong>Shopify Flow Trigger</strong></p></td><td>Triggers when a POST is made to /api/trigger</td><td></td><td></td><td><a href="/files/muidwYq8vni97HCR95CA">/files/muidwYq8vni97HCR95CA</a></td><td><a href="https://docs.shopwaive.com/shopify/shopify-flow#http-post">https://docs.shopwaive.com/shopify/shopify-flow#http-post</a></td></tr></tbody></table>

{% hint style="info" %}
New! Use the <mark style="color:blue;">**Create segment**</mark> action to automatically create a customer segment from any Shopify Flow trigger. Just provide a name and query for the segment
{% endhint %}

## Actions

In this section we provide several example use-cases with templates that demonstrate Shopwaive Actions you can add to your Shopify Flow. Actions perform a task when your flow is triggered. Shopwaive offers several Actions you can choose from and we're adding more each day. Choose from the <mark style="color:blue;">**Increment**</mark> action to create deposits and debits on a customer's account, the <mark style="color:blue;">**Assign**</mark> action to set the balance of a customer's account to a specific value, the [<mark style="color:blue;">**Create discount**</mark>](#create-a-discount-code-and-optionally-send-email) action to create a discount code and optionally send the code in an email to an individual customer or an entire customer segment, the [<mark style="color:blue;">**Create gift code**</mark>](#create-a-gift-code-and-optionally-send-email) action to create a gift code and optionally send the code in an email to a customer, the [<mark style="color:blue;">**Email**</mark>](#send-an-email-when-credit-is-deposited) action to send an email with balance to your customer, or the <mark style="color:blue;">**Create segment**</mark> action to create a customer segment when you choose any Shopify Flow trigger, just provide a segment name and query.

{% hint style="info" %}
New! Use the [<mark style="color:blue;">**Void deposits**</mark>](#debits-for-order-cancellation-or-refund) action to void earned deposits after an order is cancelled or refunded. Use the [<mark style="color:blue;">**Refund balance**</mark>](#debits-for-order-cancellation-or-refund) action to refund any redeemed balance amount to the customer's digital wallet after an order is cancelled or refunded .
{% endhint %}

{% hint style="info" %}
New! Use the [<mark style="color:blue;">**Earn Commission**</mark>](/shopify/referrals-and-affiliates) action to automatically deposit commission into affiliate accounts for each order referral. Just connect it to the <mark style="color:blue;">**Order created**</mark> trigger.
{% endhint %}

{% hint style="success" %}
Need to trigger your flow when data changes in Shopwaive? See [Triggers](#triggers)
{% endhint %}

### <img src="/files/zEvdP2k5f5G2wCLFspX3" alt="" data-size="line"> Send Marketing Email&#x20;

Use Shopwaive and Shopify Flow to create a unique discount and send to your customer as part of a post-purchase flow using Shopwaive's <mark style="color:blue;">**Create discount**</mark> action and Shopify's <mark style="color:blue;">**Send marketing email**</mark> action. Post-purchase discounts are one of the best ways to keep your customer's coming back. Now with Shopwaive's Shopify Flow actions, you can leverage this powerful retention tool with just a few clicks.

{% hint style="success" %}
Did you know? Although the below example describes sending email with Shopify's <mark style="color:blue;">**Send marketing email**</mark> action; You can also design your own email templates using Shopwaive's native email services avaialble in Shopwaive's <mark style="color:blue;">**Create discount**</mark>, <mark style="color:blue;">**Create Gift code**</mark>, and <mark style="color:blue;">**Send email**</mark> actions in Shopify Flow. With Shopwaive's email services, you can use any Shopify Flow liquid variables to send powerful email automations. Contact our team to learn more at <sales@shopwaive.com>
{% endhint %}

<figure><img src="/files/TiNGs9RIJ3Ys6ZK7r3Up" alt=""><figcaption><p>An example post-purchase marketing email flow with Shopwaive and Shopify email</p></figcaption></figure>

Within Shopwaive's <mark style="color:blue;">**Create discount**</mark> action, you can define a unique discount code using all the parameters available from the Discount admin.

<figure><img src="/files/8DkYWjXeT5q5ZFL8kdMl" alt=""><figcaption><p>Create a unique code and expiration date (i.e. expires in 14 days) using liquid, choose a percentage or fixed amount</p></figcaption></figure>

For any downstream actions in Shopify Flow, the <mark style="color:blue;">**Create discount**</mark> action returns the discount code created and you can reference this code in any 3rd-party Shopify Flow action using this liquid snippet:

```liquid
{{createDiscount.code}}
```

For example, after we create the discount, we can save the discount as a metafield to the customer&#x20;

<figure><img src="/files/SQlmFcMmoT6wSG1Sy2X7" alt=""><figcaption><p>Create discount always returns the code created with <mark style="color:blue;"><code>{{createDiscount.code}}</code></mark>, use it in any downstream action</p></figcaption></figure>

In Shopify's <mark style="color:blue;">**Send marketing email**</mark> action, to display a dynamic discount you can choose from the [availble liquid objects found here](https://help.shopify.com/en/manual/promoting-marketing/create-marketing/shopify-email/create-email/custom-liquid).&#x20;

In the example below, a Custom Liquid block is used to display the code. The HTML/Liquid used is:

{% code overflow="wrap" %}

```html
<span style="font-size:20px;font-weight:bold;">THANKYOU-{{customer.last_order.name | remove: "#" }}</span>
```

{% endcode %}

<figure><img src="/files/DH0nmgA1ynvO1AJbySzV" alt=""><figcaption><p>Create a unique discount code and send it with the <mark style="color:blue;"><strong>Send email marketing</strong></mark> action as part of a powerful post-purchase automation</p></figcaption></figure>

### Send HTTP requests

Send HTTP requests and receive response payloads all within the Flow environment.&#x20;

<figure><img src="/files/XOKwGabMROT9EF0QoVlV" alt=""><figcaption><p>Send HTTP Requests within Shopify Flow, receive a JSON stringified response</p></figcaption></figure>

With Shopwaive's <mark style="color:blue;">**Send HTTP request**</mark> action, you can make external requests to your endpoints or other 3rd parties, receive a response payload, and define a schema that extracts variables from the response that you can use elsewhere in downstream actions inside Flow.

To get started quickly, import an example <mark style="color:blue;">**Send HTTP request**</mark> Flow [here](https://cdn.shopify.com/s/files/1/0651/7650/2517/files/Send_HTTP_Request.flow?v=1764359742).

Step 1: Choose any trigger that starts the Flow. In our example, we choose <mark style="color:blue;">**Order created**</mark>

Step 2: Add the <mark style="color:blue;">**Send HTTP request**</mark> action in your Flow, add your payload and header to the request

<figure><img src="/files/wWzH1LtuyQkJoghckYws" alt=""><figcaption></figcaption></figure>

Step 3: Connect the <mark style="color:blue;">**Send HTTP request**</mark> action to the <mark style="color:blue;">**Run code**</mark> action

Step 4: Use the [example Flow provided above](https://cdn.shopify.com/s/files/1/0651/7650/2517/files/Send_HTTP_Request.flow?v=1764359742) as a reference to fill out the <mark style="color:blue;">**Run code**</mark> action to properly extract data from the payload received. Responses from the <mark style="color:blue;">**Send HTTP request**</mark> action are returned as stringified JSON, so you'll need to use JSON.parse() within the <mark style="color:blue;">**Run code**</mark> action inside the **Write code** block to parse your data into variable schema format. In the example below, we are defining an object schema with arbirtrarily defined fields **`id`**, **`example`**, and **`email`**, but you can define your own. Ensure you use the Define outputs block to correctly define the schema field types.&#x20;

<figure><img src="/files/So0rmnqdDzz5wsvIQWAf" alt=""><figcaption></figcaption></figure>

Step 5: You can now reference your schema as variables such as {{runCode.email}} in downstream Flow actions and conditional blocks

<figure><img src="/files/IAq7i0N7cVeC6derSvpd" alt=""><figcaption></figcaption></figure>

If you have any questions, or need support, just reach out to our dev team at <support@shopwaive.com>, we're happy to assist.

### Setup recurring Deposits and Debits

{% hint style="success" %}
There are many different workflows and options available. One example provided below explains how to make deposits or debits on a recurring schedule, i.e. on the 1st day of each month $50 is deposited to all (or only specific) customers in a defined segment
{% endhint %}

Connecting Shopwaive to Shopify Flows assumes you have already installed the app on your store and purchased a subscription plan. Learn more about our [pricing plans](https://www.shopwaive.com/pricing) and [features](/shopify/features).

Follow these steps to create a scheduled and recurring deposit or debit:

**Step 1:** Add the **Scheduled time** trigger, which will activate the flow to run at a scheduled time, and with recurring or repeat options you define

<figure><img src="/files/SFSVE4HBm3DK1LuPXzGm" alt=""><figcaption><p>For this example, the flow will trigger on the 1st day of each month, beginning on Feb. 1 at 8:00 am EST</p></figcaption></figure>

**Step 2:** Click the **Then** plus icon on the **Schedule time** trigger, select **Action** and then choose the Shopwaive app from the apps listed in the Installed apps section

<figure><img src="/files/kL7RUfXQ0GqB77Cf3OqX" alt=""><figcaption><p>Add an Action to run when the Schedule time triggers the flow</p></figcaption></figure>

**Step 3:** Choose the **Increment balance** action from the Shopwaive actions list

<figure><img src="/files/C2NvrpyRXrv1Nx85kMqo" alt=""><figcaption><p>Add the Increment balance action</p></figcaption></figure>

**Step 4:** Fill in the options available, you can choose an entire customer segment by providing the customer segment query or you can choose a single customer by providing the email. Note that you need to choose between <mark style="color:blue;">customer\_email</mark> OR <mark style="color:blue;">segment\_query</mark>, but not both. Whichever you choose, leave the other input blank. The former selects a single customer while the latter selects a group of customers in a segment (if any exists)

{% hint style="info" %}
New! For triggered events such as when an order is created, you can now use the native Shopify Flow <mark style="color:blue;">**Look up customer in segment**</mark> action shown to filter customer deposits based on customer segments
{% endhint %}

<figure><img src="/files/ltgLfHNZfCbTibpqrn2y" alt=""><figcaption><p>Look up customer in segment after an order is created to determine if credit should be deposited</p></figcaption></figure>

{% hint style="info" %}
Variable syntax is supported in Shopify Flows, which means you can use data from an action upstream in the flow like an email address from a draft order that was created **{{draftOrder.email}}** or the shop's contact email address **{{shop.contactEmail}}**, as a few examples.&#x20;
{% endhint %}

{% hint style="success" %}
Alternatively, leave the customer\_email input blank and instead define customer segment query like the one shown in the example below that selects only customers who have been tagged
{% endhint %}

<figure><img src="/files/GkSdgzV9RSWsa9Y4pWIy" alt=""><figcaption><p>Recurring deposits made easy with Shopwaive</p></figcaption></figure>

For the <mark style="color:blue;">amount</mark> you can choose a static value like 50 in the example above OR you can use a multiplier.&#x20;

For example, you can create a Cash Back Rewards flow that deposits 20% cash back on each purchase, or for only specific SKUs, variants, or those defined in a specific collection.

An example of this is shown below, when an <mark style="color:blue;">Order created</mark> is set as the trigger, you can choose the **order**.**totalPriceSet.presentmentMoney.amount** when the **order.fullyPaid** is <mark style="color:blue;">**TRUE**</mark> as a dynamic variable for the <mark style="color:blue;">amount</mark>. Then, you can multiply this by any value, for 20% cash back we choose **0.2**.&#x20;

{% hint style="success" %}
Note that if you choose to require the **order.fullyPaid** field to be <mark style="color:blue;">**TRUE**</mark>, that some Orders that require authorization, for example some forms of payment will prevent the Order to be paid at the time the Order is created, because it first goes through an Authorized state. In this case, Orders that have an authorization delay before being updated to paid will not process through the Flow since its only fired when an Order is first created. Therefore you may wish to relax this requirement and proceed with the deposit and instead create a debit if an authorized order with earned credit is later cancelled.&#x20;
{% endhint %}

{% hint style="info" %}
For more information on Shopwaive's Loyalty programs including tips and guidance, see [Cash Back and Loyalty](/shopify/cash-back-and-loyalty)
{% endhint %}

<figure><img src="/files/1ElFl2HfPo7MmLx7cZM0" alt=""><figcaption><p>Setup a Cash Back Loyalty and Rewards program with just a few clicks</p></figcaption></figure>

**Step 5:** Select **Apply changes** and then **Turn on workflow** when you are ready to make the flow live

{% hint style="info" %}
In the example above, you setup recurring **deposits**. You can achieve recurring ***debits*** using the same flow (just duplicate it), and then for the <mark style="color:blue;">amount</mark>, choose a negative value. See example scenarios below
{% endhint %}

> ***Example 1***
>
> If a customer has a $0 balance but are included in a debit flow based on the segment query defined, a debit flow would not have any effect as customer balances cannot be negative

> ***Example 2***
>
> Similarly, if a customer has a $20 beginning balance and subject to a -$50 debit flow, then the customer's final balance after the flow is complete would be $0

{% hint style="info" %}
Another example provided below explains how to connect a Google Sheet that automatically records the order transaction data when a customer redeems store credit
{% endhint %}

### Connect Google Sheets

One of our most popular Shopify Flows allows Shopify merchants to easily connect a Google Sheet to record all your customer transaction history. Follow these steps to get setup in just a few short minutes.

<figure><img src="/files/9HCQlcMHMyQ4x28lGLLr" alt=""><figcaption><p>Connect a Google Sheet to record Shopwaive order redemptions</p></figcaption></figure>

Shopwaive offers multiple ways to redeem store credit. For example, customers can use the Storefront widget after adding items to their cart to apply store credit and be routed to checkout. Alternatively, Shopify Plus merchants can choose to use the Checkout widget that is shown only during the checkout flow. A 3rd option includes enabling [Checkout extensions](/shopify/checkout-extensions) to allow customers to redeem credit by logging in and entering their email address in the discount code field at checkout.

The workflow we create will account for all of the aforementioned redemption options.

Follow these steps to create the Google Sheet workflow:

**Step 1:** Add the **Order paid** trigger, which will activate the flow to run each time this occurs

<figure><img src="/files/6BE8n4TDTKmGOELdaLXx" alt=""><figcaption><p>Add the Order paid trigger to run this flow each time an order is paid</p></figcaption></figure>

**Step 2:** Next, add a conditional check to determine a customer checked out with the extension. In this case we check if a discount code was used equal to the customer's email

<figure><img src="/files/rKYbGvp8TJGzEVrAThHD" alt=""><figcaption><p>Discount code conditional check to capture orders placed using the Checkout extension</p></figcaption></figure>

**Step 3:** If the conditional check in **Step 2** is true. **Then** we **Add row to spreadsheet**. Connect your Google Sheet by entering your <mark style="color:blue;">Spreadsheet URL</mark>, <mark style="color:blue;">Tab name</mark>, and <mark style="color:blue;">Row</mark> <mark style="color:blue;">contents</mark>. Your <mark style="color:blue;">Spreadsheet URL</mark> will be a unique URL link found in the Google Sheets app after you create a sheet. Your <mark style="color:blue;">Tab name</mark> will also be unique, for new sheets this is typically defaulted to Sheet1 but you can name it anything that is convenient.

<figure><img src="/files/KUHH2QWFXpg7klwiEWDr" alt=""><figcaption><p>Add a blank spreadsheet using Sheets</p></figcaption></figure>

Create a Sheet by visiting [Google docs](https://sheets.google.com) and click the blank spreadsheet. For the Column headers, add these to your sheet.

| Email | Code | Order Total | Redeemed | Order ID | Date |
| ----- | ---- | ----------- | -------- | -------- | ---- |
|       |      |             |          |          |      |
|       |      |             |          |          |      |
|       |      |             |          |          |      |

For the <mark style="color:blue;">Row contents</mark>, simply copy/paste the Row contents liquid code provided below.

{% code overflow="wrap" %}

```liquid
{{order.customer.email}},{% for discountApplications_item in order.discountApplications %}
  {{discountApplications_item.DiscountCodeApplication.code}}
{% endfor %},{{order.totalPriceSet.presentmentMoney.amount}},{{order.totalDiscountsSet.presentmentMoney.amount}},{{order.id}}, {{order.name}}, {{order.createdAt}}
```

{% endcode %}

<figure><img src="/files/rR5cSxn5vjdiWan3NetT" alt=""><figcaption><p>Connect your Google Sheet</p></figcaption></figure>

**Step 4:** Back up to the Check if conditional block, and add to the <mark style="color:blue;">Otherwise</mark> route. If a discount code is not found equal to the order customer email, then we add another Check if conditional block. In this conditional check, we check if the Order tags includes Shopwaive

<figure><img src="/files/3rFS4HioyLON5Yal1tTc" alt=""><figcaption><p>Check if Order tags include Shopwaive</p></figcaption></figure>

Step 5: Add to the <mark style="color:blue;">Then</mark> route to add this case to the same Spreadsheet setup in **Step 3**

The <mark style="color:blue;">Spreadsheet URL</mark> and <mark style="color:blue;">Tab name</mark> will be the same URL and Tab name connected in **Step 3**.&#x20;

<figure><img src="/files/cIWTdd5f2GHyXZI64v8f" alt=""><figcaption><p>Add orders tagged with Shopwaive to the Google Sheet</p></figcaption></figure>

For the <mark style="color:blue;">Row contents</mark>, simply copy/paste the Row contents liquid code provided below

{% code overflow="wrap" %}

```liquid
{{order.customer.email}},"", {{order.totalPriceSet.shopMoney.amount}},{% for discountApplications_item in order.discountApplications %}
  {{discountApplications_item.value.MoneyV2.amount}}
{% endfor %},{{order.id}}, {{order.name}}, {{order.createdAt}}
```

{% endcode %}

You are done! Now just apply changes and turn on your flow. Place a test order and check to see the Google Sheet populate with the order data.&#x20;

{% hint style="success" %}
**Advanced users:** You can add to this example, including adding other pertinent order transaction data for instance to the Sheet, by editing the Row contents liquid code and adding additional Columns to capture the extra data. Contact our team if you need developer support at <support@shopwaive.com>. We are glad to help
{% endhint %}

### Automatically expire credit 60 days after deposit

With the <mark style="color:blue;">**expirationdate**</mark> field you can define a static date using the format YYYY-mm-dd, or use liquid to expire the credit 60 days from the date the deposit posts.

To expire credit 60 days from the date of deposit, use the following snippet,

```liquid
{%- assign date = 'now' | date: '%s' -%} 
{%- assign days_until_expired = 60 | times: 24 | times: 60 | times: 60 -%} 
{{ date | date: "%s" | plus: days_until_expired | date: "%Y-%m-%d" }}
```

<figure><img src="/files/2viYV0qNDgE8we8PsJI5" alt=""><figcaption><p>Expire credit 60 days from the date of deposit</p></figcaption></figure>

### Send an email when credit is deposited

Developers and brand managers can setup a flow to send an automatic email notification when credit is deposited with Shopwaive's <mark style="color:blue;">**Send email**</mark> Shopify Flow action. In the example below, customer's  are incentivized when purchasing a specific product or collection item by receiving a cashback credit, and then sent an email of their new balance.

{% hint style="info" %}
Before sending email you will need to enable <mark style="color:blue;">**Notifications**</mark> from <mark style="color:blue;">**Settings**</mark> and verify your branded sending domain following this [guide](https://docs.shopwaive.com/shopify/install/setup-branded-email)
{% endhint %}

[Download example template below](https://storage.googleapis.com/steel-spark-359918.appspot.com/Send%20email%20on%20deposit.flow) for the <mark style="color:blue;">**Send email**</mark> Shopify Flow action

Use the <mark style="color:blue;">**`{balance}`**</mark> merge tag anywhere in the Subject title, Body message, Headline, or Call-to-action to display the customer's balance. Note the single curly brackets and no spaces between the bracket and balance keyword used for the Shopwaive merge tag, not to be confused with liquid double curly brackets. The merge tag should be used previously as typed above.

Alternatively, you can trigger the <mark style="color:blue;">**Send email**</mark> action with a [HTTP POST](#http-post) trigger to send any custom data to display with liquid variable syntax, for example <mark style="color:blue;">**{{ available }}**</mark> or <mark style="color:blue;">**{{ transaction }}**</mark>.

{% hint style="info" %}
Anywhere in the Headline, Body message, or Call-to-action you can style text using HTML markup. For example, you can use plain text like **Redeem** for the Call to action or use an HTML span tag as shown below to make the Call-to-action button font display **bold,** the former plain text option will inherit the global CSS
{% endhint %}

```css
<span style='font-weight:bold;font-size:18px;'>Redeem</span>
```

<figure><img src="/files/vPhbHf23FlRyVeoXw8ce" alt=""><figcaption><p>You can use dynamic liquid variables, Shopwaive merge tags, and HTML markup to design your email</p></figcaption></figure>

<figure><img src="/files/47oydZcdAsepScUfSBz4" alt=""><figcaption><p>Example email automation for CRM credit and Customer resolution</p></figcaption></figure>

### Create a discount code from an existing metafield value

This tutorial will walk you through how to create a discount code at the time of purchase (i.e. we will use the <mark style="color:$primary;">**Order created**</mark> Flow trigger) that is equal to the customer's metafield value for a selected namespace and key. In this example, we defined the metafield as a <mark style="color:$primary;">**Customer**</mark> metafield, but any metafield definition domain (Products, Collections, Shop, etc.) may be used.

(1) First, we should check to ensure we have defined the customer metafield definition. Visit your **Shopify admin** > **Settings** > **Metafields and metaobjects** > **Customers** and click <mark style="color:$primary;">**Add definition**</mark>. In this example, the namespace is equal to <mark style="color:$primary;">**custom**</mark> and the key is <mark style="color:$primary;">**referral\_code**</mark> as shown below:

<figure><img src="/files/g7hKjAr54LOhCr3MHts7" alt=""><figcaption></figcaption></figure>

(2) Secondly, we need to confirm that the purchasing customer (the one who is logged in) is assigned to the order and has a defined value for this customer metafield (custom.referral\_code). If the customer is logged in, they will automatically be assigned to the order. This allows us to access their customer metafield values in Flow.

Here is the customer metafield saved and viewable on the customer detail page. In this example, the customer's referral code is equal to <mark style="color:$primary;">**SPRING2026**</mark>:

<figure><img src="/files/MYs5Jw7DaR1kMaflL4B6" alt=""><figcaption></figcaption></figure>

(3) And then finally, in Flow, we set the discount code field inside of Shopwaive's <mark style="color:$primary;">**Create discount**</mark> action equal to the liquid variable as shown:

<figure><img src="/files/c2qYdUmME2tOfSu4jBHi" alt=""><figcaption></figcaption></figure>

And after clicking <mark style="color:$primary;">**Add**</mark>, we then click the <mark style="color:$primary;">**value**</mark>:

<figure><img src="/files/yNysnYpR0mVOkXYUMqpg" alt=""><figcaption></figcaption></figure>

And then we see the Liquid code that autofills is equal to <mark style="color:$primary;">**{{order.customer.referralCode.value}}**</mark>

<figure><img src="/files/SVHWVXqvlP5G9O57m4aP" alt=""><figcaption></figcaption></figure>

### Create a discount code and optionally send email

Developers and brand managers can setup a flow to create a discount code and send an automatic email notification with the code and backlink to your site with Shopwaive's <mark style="color:blue;">**Create discount**</mark> Shopify Flow action. In the example below, a discount code is created and sent to the customer when a draft order is created in the Shopify admin. &#x20;

<figure><img src="/files/liBTlgYE1B5zGWzpJe5m" alt=""><figcaption><p>Create discount code and send it in a custom designed email template</p></figcaption></figure>

Several options exist for sending the discount code via email.&#x20;

**Option 1: (Recommended)** If using the <mark style="color:blue;">**Create discount**</mark> action, you can use the <mark style="color:$primary;">`{{createDiscount.code}}`</mark>  liquid variable that's created in a downstream <mark style="color:blue;">**Send email**</mark> action. You can check the customer locale to customize language in the <mark style="color:blue;">**Send email**</mark> action. This variable can be used anywhere in the Subject title, Body message, Headline, or Call-to-action to display the customer's gift card code. It can also be used anywhere in any action or conditional check, or 3rd party app instance downstream of the <mark style="color:blue;">**Create discount**</mark> action

<figure><img src="/files/5nFvVS8JiuYCQpoSKkM4" alt=""><figcaption><p>In this example, we use the <mark style="color:blue;"><strong>Send email</strong></mark> action after the <mark style="color:blue;"><strong>Create discount</strong></mark> action and reference it using Liquid in the Body message</p></figcaption></figure>

You can use HTML inline-styling to make the discount code appear with bold font as shown in the example above. Of course, there's much more you can do with HTML styling using this method.

**Option 2:** If using the <mark style="color:blue;">**Create discount**</mark> action to send email, you can use the <mark style="color:blue;">**`{discountcode}`**</mark> merge tag anywhere in the Subject title, Body message, Headline, or Call-to-action to display the customer's gift card code. Note the single curly brackets and no spaces between the bracket and balance keyword used for the Shopwaive merge tag, not to be confused with liquid double curly brackets.&#x20;

**Option 3:** (Legacy) If using the <mark style="color:blue;">**Create discount**</mark> action to send email. In the app, when you [authenticate your DNS records](/shopify/install/setup-branded-email) and enable Email campaigns you can send email notifications and reference templates that you design in the Shopwaive app to show the discount code to your customer with backlinks to your site that are a pixel-perfect match of your brand. To reference a template, enter the name of the template in the **Email template** field within the <mark style="color:blue;">**Create discount**</mark> action.

(Legacy) An example template that uses the discount code [merge tag](https://docs.shopwaive.com/shopify/email-and-campaigns#html-merge-tags) can be referenced in your <mark style="color:blue;">**Create discount**</mark> Shopify Flow action. You can even send bulk emails to customer segments with the discount created. You can start with the discount code template that can be added once you install the app and open the email editor. The template already includes the discount code merge tag. Then as you make edits to your design just ensure you keep the discount code [merge tag](https://docs.shopwaive.com/shopify/email-and-campaigns#html-merge-tags) in a location in your HTML template you wish to display the code.

{% hint style="info" %}
The <mark style="color:blue;">**Create discount**</mark> and <mark style="color:blue;">**Create gift code**</mark> actions are just a few of the many enterprise-ready solutions offered by Shopwaive in Shopify Flow. Contact us at <support@shopwaive.com> if you have any questions or need help getting setup, we're happy to help.
{% endhint %}

<figure><img src="/files/JEl6lpuncjYfVoIOiZOn" alt=""><figcaption><p>Example discount code template that you can design in the Shopwaive app and connect to Flow</p></figcaption></figure>

### Create a gift code and optionally send email

Developers and brand managers can setup a flow to create a gift card code and send an automatic email notification with the code and backlink to your site with Shopwaive's <mark style="color:blue;">**Create gift code**</mark> Shopify Flow action. In the example below, a gift card code is created and sent to the customer when a draft order is created in the Shopify admin. &#x20;

{% hint style="info" %}
Ensure you meet the requirements to use this feature. To use this enterprise feature, you must have an active Shopwaive Checkout subscription plan, a Shopify Plus subscription, and you must enable the [Shopwaive Gift Extension in the app](https://docs.shopwaive.com/shopify/store-credit/checkout-extensions/extend-store-credit-with-gift-codes). If you've never enabled Gift Cards from the Shopify Admin, you must do this first and create a test card from the admin before connecting Shopwaive. Proceeding without these requirements being met will result in no action taken.
{% endhint %}

<figure><img src="/files/RYVF6IllJ0Sx0suokWf3" alt=""><figcaption><p>Create gift card code and send it in a custom designed email template</p></figcaption></figure>

Several options exist for sending the gift code via email.&#x20;

**Option 1: (Recommended)** If using the <mark style="color:blue;">**Create gift code**</mark> action, you can use the <mark style="color:$primary;">`{{createGiftCode.code}}`</mark>  liquid variable that's created in a downstream <mark style="color:blue;">**Send email**</mark> action. You can check the customer locale to customize language in the <mark style="color:blue;">**Send email**</mark> action. This variable can be used anywhere in the Subject title, Body message, Headline, or Call-to-action to display the customer's gift card code. It can also be used anywhere in any action or conditional check, or 3rd party app instance downstream of the <mark style="color:blue;">**Create gift code**</mark> action

<figure><img src="/files/ViPNsOv7IrCYu1sNKpcI" alt=""><figcaption><p>Once the gift code is created, you can reference it with Liquid downstream in any block</p></figcaption></figure>

<figure><img src="/files/TqN0JPPVAgcPzA2FaIZu" alt=""><figcaption><p>In this example, we use the <mark style="color:blue;"><strong>Send email</strong></mark> action after the <mark style="color:blue;"><strong>Create gift code</strong></mark> action and reference it using Liquid in the Body message</p></figcaption></figure>

You can use HTML inline-styling to make the gift code appear with bold font as shown in the example above. Of course, there's much more you can do with HTML styling using this method.

**Option 2:** If using the <mark style="color:blue;">**Create gift code**</mark> action to send email, you can use the <mark style="color:blue;">**`{giftcardcode}`**</mark> merge tag anywhere in the Subject title, Body message, Headline, or Call-to-action to display the customer's gift card code. Note the single curly brackets and no spaces between the bracket and balance keyword used for the Shopwaive merge tag, not to be confused with liquid double curly brackets.&#x20;

**Option 3:** (Legacy) If using the <mark style="color:blue;">**Create gift code**</mark> action to send email. In the app, when you [authenticate your DNS records](/shopify/install/setup-branded-email) and enable Email campaigns you can send email notifications and reference templates that you design in the Shopwaive app to show the gift card code to your customer with backlinks to your site that are a pixel-perfect match of your brand. To reference a template, enter the name of the template in the **Email template** field within the <mark style="color:blue;">**Create gift code**</mark> action.

(Legacy) An example template that uses the gift code merge tags can be referenced in your <mark style="color:blue;">**Create gift code**</mark> Shopify Flow action. For the gift card template, you have the option to include the gift card balance and the redeemable code. You can start with the gift code template which already includes the necessary code and balance merge tags. You can start with this to design your own, then as you make edits to your design ensure you keep the gift code [merge tag](https://docs.shopwaive.com/shopify/email-and-campaigns#html-merge-tags) in a location in your HTML template you wish to display the gift code and the credit value [merge tag](https://docs.shopwaive.com/shopify/email-and-campaigns#html-merge-tags) in a location in your HTML template you wish to display the initial gift balance. If you wish to not show these dynamic variables, you can simply delete these \<span> tags from your HTML.

<figure><img src="/files/rz3pGTGGSi6W4VNEXpm0" alt=""><figcaption><p>Example gift code template that you can design in the Shopwaive app and connect to Flow</p></figcaption></figure>

### Automatic Adjustments for Order Cancellations and Refunds

{% hint style="info" %}
Want to automatically remove the earned credit or cash back if an Order is cancelled? Or refund credit spent on an order? No problem. Just follow these steps to implement an Order cancellation or Refund flow.&#x20;
{% endhint %}

You have two options for Order refunds and cancellations.&#x20;

#### Option 1

Explicitly, you can now use the <mark style="color:blue;">**Refund balance**</mark> and/or <mark style="color:blue;">**Void deposits**</mark> actions with Shopify Flow as shown below.

<figure><img src="/files/AhrHO2HOoHlgOk0DmCxI" alt=""><figcaption><p>Refund balance spent and Void deposits (i.e. points or cash earnings) created if you use a loyalty program on purchases</p></figcaption></figure>

The <mark style="color:blue;">**Refund balance**</mark> action is provided an order id and will explicitly refund the amount redeemed on an order.&#x20;

{% hint style="success" %}
If you use the <mark style="color:blue;">**Redeem**</mark> Checkout UI with the Gift card extension enabled, a gift code is automatically applied when the customer uses one-click redemption. The gift card redeemed at checkout is automatically disabled when an order is placed and cannot be refunded in the Shopify admin. Instead, enter an amount of 0.00 when processing redeemed gift card Refunds in the Shopify admin. Then, you can use the <mark style="color:blue;">**Refund balance**</mark> action to refund a customer's balance redeemed with a gift code instead of refunding the gift card directly.

If you do not enter 0.00 in the gift card ending with \*\*\*SHOP at the time an order is refunded in the Shopify Admin, you will receive an error and will need to refund a customer's balance manually.

If you do not use the <mark style="color:blue;">**Redeem**</mark> Checkout UI with the Gift card extension enabled, you can ignore this tip
{% endhint %}

<figure><img src="/files/vz3hNziIJjlFDZeTfMjx" alt=""><figcaption><p>When using <mark style="color:blue;"><strong>Redeem</strong></mark> Checkout UI with the Gift card extension enabled, enter 0.00 for ****SHOP refund amount</p></figcaption></figure>

For voiding deposits, Shopwaive will debit any amount earned on a previous Loyalty program for the Order id provided. This Shopwaive API method voids any earnings or deposits created by order or line item id provided. Use with Refund or Cancellation trigger. If multiple deposits were created on a single order, then all deposits will be voided if only the Order ID is provided. If you prefer to void only deposits created by a specific line item purchased on an order, leave the Order ID field blank and provide the Line Item ID instead

<figure><img src="/files/hIk2hamTL83SZbawYZAU" alt=""><figcaption><p>Void all order deposits by providing the Order ID, or provide the Line Item ID to void only earnings deposited from a specific Line Item</p></figcaption></figure>

<figure><img src="/files/SYenA1Xc0otn3qAYqr51" alt=""><figcaption><p>Similarly, you can use either or both the Void deposits and Refund balance action with the Order cancelled webhook</p></figcaption></figure>

#### Option 2

Implicitly, you can use the Increment balance action in a flow as shown below. The Increment balance action will create a debit, and the amount debited can be a static value or a liquid variable depending on the original order.&#x20;

If an order is cancelled, previously earned cash back may be something you wish to void. We will simply modify the earned credit or cash back flow so that it is triggered by Order cancellation instead of Order created webhook, and then change the increment value to an equivalent negated amount as the original order (original increment amount times -1). An example of the flow is shown below. Or, simply [import the flow template](https://cdn.shopify.com/s/files/1/0651/7650/2517/files/Order_Cancellation_Debit_-_20_Cashback_on_every_purchase.flow?v=1720458551) into the Shopify Flow app.

<figure><img src="/files/N5WmGxyuWx4h4vqpAmcA" alt=""><figcaption><p>Order cancellation that processes a debit in the amount of previous earned cash back</p></figcaption></figure>

## Triggers

In this section we provide example use-cases with templates that demonstrate Shopwaive Triggers you can add to your Shopify Flow. Triggers are powered by subscriptions to webhooks that fire when data changes in Shopwaive. The Shopwaive data-changed event sends a payload to your Shopify Flow that is used to start your flow, when for example, your customer's balance changes. Shopwaive currently offers three triggers, but we're adding more each day.

Choose from the <mark style="color:blue;">**HTTP POST**</mark> trigger to send a POST request to the Shopwaive <mark style="color:blue;">**/api/trigger**</mark> endpoint to power your Shopify Flow, or the <mark style="color:blue;">**Balance change**</mark> trigger to power your Shopify Flows when a customer's available balance changes and the <mark style="color:blue;">**Balance changes from order**</mark> trigger, that fires for the specific event that a customer's available balance changes due to an associated order resource (i.e. when a customer redeems, an order id is attached to the payload sent to your Shopify Flow).&#x20;

#### HTTP POST&#x20;

When you add the <mark style="color:blue;">**HTTP POST**</mark> trigger to a Shopify Flow, send any of the Trigger variables shown in the screenshot below in the request body to the POST /api/trigger endpoint. To view the schema of the request body, just add any action downstream of the <mark style="color:blue;">**HTTP POST**</mark> trigger, and the environment variables that are available are shown with their descriptions if you click the downstream action variable input.&#x20;

{% hint style="success" %}
Although you can make direct POST requests to the [Shopwaive API](https://api.shopwaive.com), if you desire to first send the data to Shopify Flow for conditional checks before making deposits or debits, for example from a CRM or your own backend servers, then you can use the <mark style="color:blue;">**HTTP POST**</mark> trigger to send this data to Flow for processing. You can send a range of Trigger variable types, like generic strings, numbers, or booleans, all of which can be used to determine conditional logic in your downstream Shopify Flow. To setup the POST request, refer to the [Shopwaive API](https://api.shopwaive.com) for including your X-Shopwaive-Access-Token in the Header, as you would do for all other POST requests
{% endhint %}

The <mark style="color:blue;">**id**</mark> field need not be included in the body of the request as it is automatically created by Shopwaive. All fields in the request body are optional, you can use only what you need.

<figure><img src="/files/ZL1VfOKOffdiSv1YBaF5" alt=""><figcaption><p>Include HTTP POST trigger payload variables in the body of the request to the /api/trigger endpoint to access them in the Shopify Flow environment</p></figcaption></figure>

#### Balance change

Add the <mark style="color:blue;">**Balance change**</mark> trigger to a Flow to power any workflow when your customer's balance changes. When you add this trigger to a Shopify Flow, we make it easy to subscribe to the Shopwaive Webhook services without the hassle of adding the infrastructure to your backend code

{% hint style="info" %}
Note the key difference in the <mark style="color:blue;">**Balance change**</mark> and <mark style="color:blue;">**Balance changes from order**</mark> trigger is that the latter will include the Order resource associated with the trigger event. Use the <mark style="color:blue;">**Balance change**</mark> trigger for all changes to a customer's balance that are unrelated to an Order resource (i.e. adjustments made by an Admin in the app or API, Offers created in the app, bulk import operations, etc.)
{% endhint %}

<figure><img src="/files/pzRqTplGDSztQyInMnkf" alt=""><figcaption><p>Check customer's balance when it changes to drive actions like deposits or an email notification</p></figcaption></figure>

#### Balance changes from order

Add the <mark style="color:blue;">**Balance changes from order**</mark> to subscribe to balance changes that result from an Order adjustment, like when a customer redeems their balance. Using this special subscription topic, you get the same <mark style="color:blue;">`previous`</mark>, <mark style="color:blue;">`transaction`</mark>, and <mark style="color:blue;">`available`</mark> fields as you do with the <mark style="color:blue;">**Balance changes**</mark> trigger, but also the <mark style="color:blue;">`order_id`</mark> resource that is associated with the event.

Download the [<mark style="color:blue;">**Balance changes from order**</mark>](https://cdn.shopify.com/s/files/1/0651/7650/2517/files/Balance_Updated_By_Order_Trigger.flow?v=1722870393) template or the [<mark style="color:blue;">**Balance change**</mark>](https://cdn.shopify.com/s/files/1/0651/7650/2517/files/Balance_Updated_Trigger.flow?v=1722870393) template, and contact <support@shopwaive.com> if you have any questions using Shopwaive Triggers in Shopify Flow

## Begin your Shopify work flow with a prebuilt template

With Shopwaive and Shopify Flows, you can create powerful automations that connect apps and work flows that power your business. Contact us to receive our support importing or creating your work flow with specific or detailed criteria, aspects of your loyalty program, funneling triggers to power deposits and debits, or redemption and earn requirements. This is one reason of many why brands are switching to Shopwaive; we provide custom white-glove service to create a Rewards and Loyalty program that you define and we bring to life. We've included a link to some successful flows we've prebuilt that you can use as a template and build on to.

[Click here to download](https://storage.googleapis.com/steel-spark-359918.appspot.com/Shopify%20Flows%20Shopwaive.zip) a selection of Shopwaive work flows to use as a starting template or to reuse popular liquid snippets

{% hint style="info" %}
You know your customers better than any other software or platform, thats why with Shopwaive we give the control back to you. You leverage our expertise to implement the program in just days, not weeks or months. Contact us anytime at <support@shopwaive.com> for help, we're here and happy to support
{% endhint %}


# Shopwaive AI

Meet Waive. Shopwaive's most advanced AI agent for eCommerce sales, growth, and retention on Shopify Plus

{% hint style="success" %}
**Tip:** Install the Shopwaive app from the Shopify App Store today to test all of Shopwaive's new AI capabilities for eCommerce. See our [Shopify App Store](https://apps.shopify.com/shopwaive) listing for more details
{% endhint %}

## Ask Shopwaive AI

Shopwaive's AI agent is trained to provide Enterprise Shopify Plus brands prompt-based solutions that drive sales, growth, and retention. Shopwaive's AI does this by providing help with store configuration settings, guidance on creating advanced work flow automations, set up of Shopify's B2B features, and much more.

Closed-form solutions are provided in numerous forms, for example, Shopwaive's AI agent can draft a business plan and provide unique strategies for a business to consider, web-based content like images, video, and code-based solutions.

Shopwaive's AI agents are integrated with leading LLMs like OpenAIs gpt-4o-mini, DALL·E 3, Sora for video, Anthropic's Claude, and more. Shopwaive's development team anticipates Shopwaive's AI-based product offerings to rapidly increase in 2025, including advances in Shopwaive's native LLM models. Each AI product feature provides a practical closed-form solution that dramatically improves a brands' day-to-day business processes on Shopify Plus.

<figure><img src="/files/58xs5tOVgGoag7ioF26o" alt=""><figcaption><p>Example of Shopwaive's AI agent for image generation</p></figcaption></figure>

## Product image generator

Shopwaive's AI Product image generator can produce visual elements that stimulate brainstorming sessions for development teams, sales and marketing, and leaders. The output of Shopwaive's Product image generator AI is to generate new ideas, foster innovation, and eliminate brain fog for businesses that look to improve business strategies on GTM.

> <mark style="color:$primary;">Shopwaive AI Prompt:</mark> Trending shoes from a magazine ad, beautiful neon colors and athletic

<figure><img src="/files/nKwj6I8mfRtCA29RJgV1" alt=""><figcaption></figcaption></figure>

## Product image editor

Shopwaive's AI Product image editor is now generally available, released to all Shopify Plus with Shopwaive's Checkout subscription. Try out new capabilities such as placing your product in various scenes for A/B campaign testing using Shopwaive's AI Product image editor.

> <mark style="color:$primary;">Shopwaive AI Prompt:</mark> *Add our Malibu signature sunglasses to the model*

<div><figure><img src="/files/MrO1sn0RVu263wLJ7HKr" alt=""><figcaption></figcaption></figure> <figure><img src="/files/ZCwjViPu6ohFPKSYlSsN" alt=""><figcaption></figcaption></figure></div>

Notice in the above images that although the AI successfully added sunglasses to the model, her dress embroidery design is noticeably different. This was generated with **gpt-image-1**, an early version of Open AI's image generation model.&#x20;

Now, as you can see below, we have upgraded Shopwaive systems to **gpt-image-1.5** and you can see the gap has been closed, and the dress remains identical while still adding the accessory.&#x20;

<div><figure><img src="/files/MrO1sn0RVu263wLJ7HKr" alt="" width="375"><figcaption></figcaption></figure> <figure><img src="/files/ic84HASMrloKZ6TfcNqy" alt="" width="375"><figcaption></figcaption></figure></div>

From OpenAI, here's what's improved with gpt-image-1.5:

**What’s improved**

* **Stronger image preservation and editing** than GPT Image 1, especially for faces, logos, and key visual elements across edits
* **The model follows instructions more reliably** than our initial version. This enables more precise edits as well as more intricate original compositions
* **The model is better at text rendering**, particularly at handling denser and smaller text
* **20% lower cost on image inputs and outputs in the API** compared to GPT Image 1, helping you generate more images on the same budget
* **You can further optimize workflows for cost** by using the quality parameter, which delivers strong performance for the price even when set to low

**Top use cases**

* **Ecommerce & retail:** Generate multiple product visuals from a single source image with consistent face preservation as items like clothing or accessories change
* **Marketing & brand:** Create posters, ads, slides, and other brand assets with more consistent logo, brand, and object preservation

## Product Image-to-video creator

Shopwaive's newest AI product offering takes a text prompt and image as input and can produce stunning 1080p HD video in various formats between 5 - 10 seconds in length, perfect for social reels and bringing your static product catalog to life. Forgot to shoot b-roll video for new products you're launching? No problem, use Shopwaive's AI-powered Image-to-video creator to make videos for your Shopify Plus Product detail page or Featured collections in less than 20 seconds.

Want to see a few examples? Take a look a what our product development team was able to demonstrate with a still photo of a model and handbag. With the product still image and a text prompt that describes the video we created something really incredible, a 5-second reel of the product being modeled in 1080P HD video in 720x1280 format, pefect for a product detail page.

> <mark style="color:$primary;">Shopwaive AI Prompt:</mark> *Create a video of the model walking down a cat walk*

<div><figure><img src="/files/vxZpgrkt9By6mGVA8Ozu" alt=""><figcaption></figcaption></figure> <figure><img src="/files/x1MIemeHqo25jR3IkI3U" alt="" width="540"><figcaption></figcaption></figure></div>

Here's another example of a recent LinkedIn post our team created with a static Starbucks ad.

[Shopify](https://www.linkedin.com/company/shopify/) Plus brands can now use Shopwaive's powerful AI tools to create AI-generated video ads, product catalog image edits, and UGC (or AIGC). Using our Image-to-video tool, we demonstrate converting a static [Starbucks](https://www.linkedin.com/company/starbucks/) ad into a realistic 5-second reel in less than 20 seconds of LLM computing time.

> <mark style="color:$primary;">Shopwaive Prompt:</mark> *Create a video reel with slow pan rotation and add steam, any other effects that would make this look as realistic as possible*

<figure><img src="/files/y5IVudnlnsgNZko6KTJD" alt=""><figcaption></figcaption></figure>

<div><figure><img src="/files/V0l9PeUTdQmiDQkn1MOm" alt=""><figcaption></figcaption></figure> <figure><img src="/files/t9JXxC4jTsNTi3oToTkV" alt=""><figcaption></figcaption></figure></div>

Contact us at <support@shopwaive.com> with any questions or to schedule a demo. You can check out the full 5-second reel (converted to GIF) [here](https://lnkd.in/e2AHa7Qw)&#x20;

{% hint style="info" %}
Enterprise features require the [Shopwaive Checkout](https://apps.shopify.com/shopwaive) subscription plan. Contact us at <support@shopwaive.com> to learn more
{% endhint %}

Have questions on any specific features? [<mark style="color:blue;">**Contact us**</mark>](mailto:support@shopwaive.com)


# Accounts

Get started with Shopwaive by importing existing customer accounts, issue refunds with store credit, and much more

Store credit is compatible with all Shopify Themes and can be used with both Shopify and Shopify Plus subscription plans.&#x20;

New! [Shopify's Store Credit Primitive and API](https://www.shopify.com/blog/store-credit) is now supported and synced with Shopwaive. Bulk import Store Credit with Shopwaive and target Shopify's native store credit balance.&#x20;

{% hint style="success" %}
Shopify's native store credit is an independently developed solution that can be used along with Shopwaive balances to unlock powerful combinations and flexibility with order payments, loyalty, refunds, and offers. With Shopwaive, we sync your customer's Shopify store credit balance and display it in their Customer profile page in Shopwaive. Then you can make edits in the Shopify Admin or via Shopwaive's bulk import editor.
{% endhint %}

<figure><img src="/files/8XmiojYZ8KjOdL7NaWnY" alt=""><figcaption><p>Shopwaive balances and Shopify's new Store Credit Primitive and API shown in customer profiles</p></figcaption></figure>

## How to Give Store Credit — Step-by-step:

{% hint style="info" %}
This guide assumes you already installed Shopwaive on your Shopify store, staging, or development store as outlined in the [prior steps](/shopify/install). Confirm you can access the Shopwaive app in the Shopify admin before proceeding. See [Installation](/shopify/install) for more details
{% endhint %}

<details>

<summary>Step 1: How do I give store credit?</summary>

* Within the Shopwaive app admin, import existing customer accounts using the [Bulk import editor](/shopify/accounts/import-accounts) or search for your customer by email using the <mark style="color:blue;">**Customers**</mark> dashboard. Click the customer in the list or click the ellipsis to <mark style="color:blue;">View account</mark>
* Make edits to your customer available balance, notes, expiry date or send an email notification. Or, [create an Offer](/shopify/offers), make an [API request](https://api.shopwaive.com/), or [connect a Shopify Flow](/shopify/shopify-flow) to create deposits or debits. Once you make edits to a customer account, if an account does not already exists a Shopwaive credit account is automatically created
* Optionally, connect a [Klaviyo flow](/shopify/email-and-campaigns/klaviyo-email-and-sms) to automatically send customers an email or SMS message once you give them credit or make updates to their account. When used with the [bulk import editor](/shopify/accounts/import-accounts), this feature can unlock powerful work flows. You can update customer account data in seconds, which automatically triggers an email sent to your customers with backlinks to your store encouraging them to redeem their credit

</details>

{% hint style="info" %}
Launching a Headless commerce site with [Shopify Plus](https://www.shopify.com/plus) or want to integrate Shopwaive with your existing framework? Shopify Plus merchants and developers can programmatically create deposits, debits, and order links with the [Shopwaive API](https://api.shopwaive.com/). See [Headless commerce](/shopify/install/headless-commerce)
{% endhint %}

{% hint style="success" %}
Related topic: Setup [Shopify Flows](/shopify/shopify-flow) where you can create deposits or debits to customer accounts on a recurring schedule (i.e. 1st day of the month). You can even create your own [Cash Back Loyalty program](/shopify/cash-back-and-loyalty). The options are unlimited and can be as complex as you prefer. For example setup a Shopify Flow when an Admin user or customer from a Segment takes action  (i.e. *Admin creates a Draft order* or *Customer from a tagged-defined segment purchases a product from a collection with a minimum order value*)
{% endhint %}

<details>

<summary>Step 2: How do customers redeem store credit?</summary>

**Shopify Plus**

Shopify Plus merchants can choose to use the [Shopwaive Checkout extension](/shopify/checkout-extensions), where a convenient <mark style="color:blue;">**Redeem**</mark> button placed at checkout enables customers to redeem with one-click

**Shopify POS**

An employee or cashier uses the Shopwaive Smart Grid tiles to view and apply a customer's available balance, offers, or gift card to the Shopify POS cart at the time of purchase. See [Shopify POS](/shopify/shopify-pos)

**Basic and Advanced Shopify Plans**

* Customers will log into their account they created on your website. If the customer has a Shopwaive credit account (after completing all previous steps, see [Installation](/shopify/install) for details), the Shopwaive widget appears at the bottom of the page
* Before or after logging in, customers add items to their cart
* Your customers have the option to redeem their full available balance or apply partial credit towards a purchase. By clicking the popup, customers can apply any amount to their checkout
* If customers choose to combine credit with a discount code, you can enable the <mark style="color:blue;">**Combinations**</mark> setting by opening the Shopwaive app and clicking the Settings menu button. Once in the Settings panel, enable <mark style="color:blue;">**Combinations**</mark>. Now, two text fields appear in the Shopwaive popup, the top field the customer enters the amount they wish to redeem, and the bottom field they enter the case-sensitive discount code. Then they click <mark style="color:blue;">**Apply to checkout**</mark> to generate a Checkout link
* Customers can click the <mark style="color:blue;">**Checkout**</mark> button to be routed to checkout with selections applied

</details>

Have questions on any specific features? [<mark style="color:blue;">**Contact us**</mark>](mailto:support@shopwaive.com)


# Import accounts

Giving customers credit should be easy. Thats why with Shopwaive we made it that way

{% hint style="info" %}
Start creating, importing, or migrating customer accounts from another platform. Need to create or update existing accounts? See [Create or Update accounts](https://docs.shopwaive.com/shopify/accounts/import-accounts#create-or-update-accounts-with-bulk-import)
{% endhint %}

## Delete accounts with Bulk import

{% hint style="warning" %}
Deleting accounts is an irreversible action, ensure you create a backup before proceeding
{% endhint %}

Delete inactive, dormant, or terminated accounts with our Bulk import Delete Accounts mode. Follow the steps below to delete accounts via a bulk import operation.

Importing accounts in this mode will mark them for immediate deletion, including all related customer data including transaction history. This action is irreversible, and cannot be changed. If you are unsure, please export your customer data prior to proceeding or contact us at <support@shopwaive.com>.&#x20;

This action only deletes Shopwaive data associated with customers and does not delete any Shopify data. Deleting accounts may be desired if known accounts are inactive, dormant, or you wish to exclude accounts from being serviced by Shopwaive.&#x20;

{% hint style="info" %}
Deleting accounts can help reduce your monthly expenditure by reducing your total accounts subject to usage fees that Shopwaive services. You'll use the same CSV template used for importing customers. When you delete customers the same import template is required but only data in the Email column is used to mark customers for deletion, all other column data is ignored and can be left blank
{% endhint %}

Open the app, visit the <mark style="color:$primary;">**Customers**</mark> menu, and click <mark style="color:blue;">**Import**</mark> at the top right

<figure><img src="/files/4AYMeeigB7yYGLMX7jgY" alt=""><figcaption></figcaption></figure>

Once you click <mark style="color:blue;">**Import**</mark>, at the bottom right of the top card click the link labeled <mark style="color:$primary;">**I want to delete accounts**</mark>, this will activate **Delete mode.**

<figure><img src="/files/IHGCbcU8c1judHz9v4Kd" alt=""><figcaption></figcaption></figure>

To delete accounts, You'll use the same CSV template used for importing customers. In the template, populate the Email column with emails of the accounts that you want to delete. Only the Email column will be used to delete accounts with matching emails on file. All other column data is ignored and can be left blank, however, the header columns of the downloaded import template are still required to complete the bulk delete operation.&#x20;

<figure><img src="/files/sA24u0k8mJBhAGtONRQ7" alt=""><figcaption></figcaption></figure>

After adding the account emails, drag and drop your import CSV file into the drop zone or click <mark style="color:$primary;">**Add file**</mark> to upload from a local drive.&#x20;

<figure><img src="/files/u173zV7MqdWwhJzvdUHJ" alt=""><figcaption></figcaption></figure>

After you are ready to proceed to delete the targeted accounts, click the <mark style="color:$primary;">**Delete accounts**</mark> button at the top right of the page. A popup will appear to ensure you want to proceed. After proceeding, your accounts and associated transaction data will be deleted immediately.

<figure><img src="/files/vqj1T60mFMa31fQAZjmw" alt=""><figcaption></figcaption></figure>

Upon successful deletion, a toast message will appear at the bottom of the page, "*Accounts deleted"*

<figure><img src="/files/vwS7rH9n1Zxby8Y8BjkW" alt=""><figcaption></figcaption></figure>

After accounts are deleted, you are no longer charged usage (servicing) fees for these accounts and Shopwaive no longer retains the data stored previously.

{% hint style="info" %}
Have any questions on deleting accounts? Reach out to our team at <support@shopwaive.com>, we're here and happy to help
{% endhint %}

## Delete accounts from Settings

From the <mark style="color:$primary;">**Settings**</mark> menu, you can visit the <mark style="color:$primary;">**General**</mark> tab and <mark style="color:$primary;">**Delete Accounts**</mark>. This operation allows you to delete all your accounts on file, or only the ones that do not have a balance. This option is reserved as an irreversible nuclear option and should be avoided unless you have completed an export to backup your data or are working in a development environment where data is not necessary to retain.

## Create or update accounts with Bulk import

{% hint style="success" %}
If you have developer support, you can also create and import accounts using the [Shopwaive API](https://api.shopwaive.com/). Have questions? Reach out to our team at <support@shopwaive.com>, we're glad to help
{% endhint %}

First, navigate to the <mark style="color:$primary;">**Customers**</mark> menu, then click <mark style="color:blue;">**Import**</mark>

<figure><img src="/files/kzi9voIts6pVokoJu1w1" alt=""><figcaption><p>Click Import from the top right</p></figcaption></figure>

## Get the template

Click <mark style="color:blue;">**Download the CSV import file**</mark> to download the template CSV file to your local drive

<figure><img src="/files/zbEnYsh4APCR38tdSP7H" alt=""><figcaption><p>Choose to either assign or increment balances, then select Download the CSV import file</p></figcaption></figure>

{% hint style="info" %}
New! Target Shopify's new [Store Credit Primitive and API](https://www.shopify.com/blog/store-credit) during bulk import to update 1,000s of your customers balance in just seconds. You can use Shopify's native store credit feature in combination with Shopwaive balances and Checkout extensions
{% endhint %}

## Assign balances using the Balance column&#x20;

<figure><img src="/files/PUA4yWlzu4lHwkG2pyCp" alt=""><figcaption><p>Assign template file with customer data being prepared to import into Shopwaive</p></figcaption></figure>

{% hint style="success" %}
Note, you cannot use both the Balance and Increment columns in the same template
{% endhint %}

## Increment balances using the Increment column

<figure><img src="/files/8Qg9cmYHUUPE0L09vn2e" alt=""><figcaption><p>Increment template file with customer data being prepared to import into Shopwaive</p></figcaption></figure>

Copy and paste your customer's email address, existing credit balance or incremental deposit or debit, and any note you'd like to attach to the customer import transaction. The Email and either the Balance or Increment are required, while any transaction note is optional. You also have the option to include Shipping credits, this column accepts integer values, each shipping credit is equal to free shipping on a single order. Enter "1" to give free shipping on a single order, or "0" to defer giving newly imported customers shipping credits.

{% hint style="success" %}
The Balance or Increment column can be any numeric value greater than or equal to 0. It does not require a currency symbol, but you can include it if it is convenient. Your balance currency will always be defined by the currency setting defined in <mark style="color:blue;">**Settings**</mark><mark style="color:blue;">.</mark>
{% endhint %}

{% hint style="info" %}
The total number of customers that can be imported and at any given time is limited depending on your Shopwaive subscription plan. Our team can temporarily lift these restrictions upon request and based on need, please email us at <support@shopwaive.com>
{% endhint %}

## Upload your customers

Ensure you save or export the template with your customer data as CSV (.csv file extension). Then simply click <mark style="color:blue;">**Upload**</mark> or <mark style="color:blue;">**Drag and drop**</mark> to import your data into Shopwaive. When the file upload is successful, your page will appear similar to the example provided below.&#x20;

<figure><img src="/files/1mZReS1miazvzFYEDLYZ" alt=""><figcaption><p>Accounts are successfully uploaded and ready for import</p></figcaption></figure>

If you have trouble importing your customer data, try the troubleshooting steps listed here, otherwise you can skip this section and continue to <mark style="color:blue;">**Confirm and Import your customers**</mark>

## Troubleshooting imported customers

To ensure you are successful with importing your existing customer data, follow the guidance and requirements outlined below.

1. Ensure you use the CSV template file by clicking <mark style="color:blue;">**Download the CSV import file**</mark>
2. Only include data for the columns in the template, and do not change the column titles
3. Check to be sure your customers email addresses are valid and are in the correct format
4. Expiry dates and Shipping are optional, leave blank if you do not need to define an expiration or shipping credit. You can always change this later
5. Only include numerical amounts greater than or equal to zero in the <mark style="color:blue;">**Balance**</mark> column. The <mark style="color:blue;">**Increment**</mark> column accepts values less than zero to perform a debit. In contrast, values greater than zero will perform a credit. Currency symbols are optional, but consider removing them if you receive errors. Define your store credit currency in the app <mark style="color:blue;">**Settings**</mark>
6. If you exceed the limit for max number of customers imported, contact our support team at <support@shopwaive.com>, depending on your subscription plan we may lift these restrictions.

## Confirm and Import your customers

After you confirm the data is ready, click <mark style="color:blue;">**Import**</mark> to proceed to import your customers into Shopwaive. If you have customers that did not previously have a Shopify account, a Shopify account is created for them.&#x20;

{% hint style="success" %}
Discover the powerful benefits of using Shopwaive. Give credit to new leads or potential customers that have opted-in for email notifications. You can then send emails within Shopwaive and send automated Account activation requests with an offer to encourage first-time customers to visit your site and spend their welcome credit. Pretty neat, right?
{% endhint %}

## Successful import

If the import is successful, you'll receive a success message and the import transactions take effect immediately (with the exception to large datasets described below).&#x20;

Most imports take effect within seconds. For large datasets with new customers without a previous Shopify account, allow an additional 7 seconds per new account. For each new customer you can estimate the time to complete using this formula:&#x20;

**No. of&#x20;*****new*****&#x20;customers** x **7 seconds** = ETA to complete

> For example, you have 1,000 new customers without a previous Shopify account. The estimated time to import is calculated below:
>
> 1,000 accounts x 7 seconds = 7000 seconds / (60 seconds / 1 minute) = Approximately 2 hours to import and sync 1,000 new Shopify customers

Alternatively, if all your imported accounts already have a Shopify account and you only need to update their Shopwaive data, you can estimate the time to complete an import to update Shopwaive data by assuming 5 ms per transaction.

For example, you have 1,000 transactions to update. The estimated time to complete the Shopwaive data updates with bulk import is:

> 1,000 transactions x 5 milliseconds = 5,000 milliseconds / (1,000 milliseconds / 1 second) \* (60 seconds / 1 minute) = Approximately 5 seconds to import and sync 1,000 transactions


# Export accounts

Exporting data for your third-party reporting and analytics teams is as easy as one click

## Export customer balances

Export all your customer account balances with just one click. Follow the steps below to get a real-time snapshot of your customer account balances.

Open the app and click the item labeled <mark style="color:blue;">**Export**</mark> on the left side menu

<figure><img src="/files/kbovrFpL4h7UzYC3z3GH" alt=""><figcaption><p>Click Export from the left menu</p></figcaption></figure>

Once you click <mark style="color:blue;">**Export**</mark>, a download will begin of a CSV of all your customer account data

## Export customer transactions

If you'd like to receive a full ledger of all your customer transactions, including issuance and redemption of credit, follow the steps below.

Open the app, and click the <mark style="color:blue;">**Recent activity**</mark> tab. Select which customer data to export, if you wish to export all data, simply check the box at the top of the list. Then click <mark style="color:blue;">**Export selected**</mark> or <mark style="color:blue;">**Export all**</mark>

<figure><img src="/files/uK1EqktBkSDEIv9jnpXw" alt=""><figcaption><p>Select transactions and then click Export selected or Export all recent</p></figcaption></figure>

Once you click <mark style="color:blue;">**Export selected**</mark> or <mark style="color:blue;">**Export all recent**</mark> you will receive a CSV of all your customer transaction data and can be used for reporting and analytics by your finance and marketing teams, B2B vendor or your third-party partners.


# HTML, CSS and Snippets

Include Shopwaive's HTML snippets in your theme to conveniently display transactional history and customer balances

## Selector tags

After customer's log into their account, you can display their account balance and transaction history with the following markup.

```html
//An authenticated customer's balance
<span id="shopwaive_acctbalance"></span>

//An authenticated customer's balance string
<div id="shopwaive_acctstatus"></div>

//An authenticated customer's table of transactions (i.e ledger)
<div id="shopwaive_accttable"></div>
```

## Global styles

You can style your customer's transaction table on their account page by including these styles to your Theme.&#x20;

<figure><img src="/files/FrYQvr7CzgtMzcqgR5gk" alt=""><figcaption><p>Navigate to your Theme settings and select Custom CSS to copy/paste the styles</p></figcaption></figure>

```css
#shopwaive_acct_table_history > thead > tr:first-child > th:last-child {
  border-radius: 3px;
  border-top-right-radius: 3px;
  border-top: none;
}
#shopwaive_acct_table_history > thead > tr:first-child > th:first-child {
  border-radius: 3px;
  border-top-left-radius: 3px;
  border-top: none;
}
#shopwaive_accttable table {
  border-collapse: separate;
}
#shopwaive_accttable thead {
  background: #c6573f;
  color: white;
}
#shopwaive_accttable td {
  padding: 10px;
  border: 0.5px solid #e5e5e5;
}
#shopwaive_accttable {
  text-align: left;
}
#shopwaive_accttable th {
  font-weight: normal;
  padding-left: 10px;
}
body:has(* > #shopwaive_accttable table) #credit_title_h1 {
  display: block;
}
#shopwaive_acctstatus {
  margin-top: 10px;
  margin-bottom: 10px;
}
```

In the CSS ABOVE, the table header includes a brand color you can change:

<pre class="language-css"><code class="lang-css">#shopwaive_accttable thead {
<strong>    background: YOUR_BRAND_BACKGROUND_COLOR_HERE
</strong><strong>    color: YOUR_BRAND_FONT_COLOR_HERE
</strong>}
</code></pre>

{% hint style="info" %}
If you do not use the [Minified script](#minified-script-for-html-and-snippets) provided below, use of the selector tags will require the App embed to be turned on from your Shopify Admin Theme settings. For the most recommended implementation, turn off the Popup app embed and render the [Minified script](#minified-script-for-html-and-snippets)&#x20;
{% endhint %}

Brands can use these selectors and styles in combination with server requests to the [Shopwaive API ](https://api.shopwaive.com/)to provide the most optimal integration experience with your site. Have questions on any specific features? [<mark style="color:blue;">**Contact us**</mark>](mailto:support@shopwaive.com)

## Minified script for HTML and snippets

When using the Checkout extension for Shopify Plus you may wish to reduce loading global scripts on your storefront, in which case you should disable the Popup app embed and instead render the minified script using the liquid snippet below which renders the HTML and snippets described above. For brands on Shopify Plus, the following liquid code can be added to a new snippet called <mark style="color:blue;">**shopwaive\_script.liquid**</mark> for example. Then include the snippet in your <mark style="color:blue;">**theme.liquid**</mark> using the <mark style="color:blue;">**render**</mark> tag like so

In your file <mark style="color:blue;">**theme.liquid**</mark>, add this:

```liquid
{%- render 'shopwaive_script' -%}
```

Create a snippet named <mark style="color:blue;">**shopwaive\_script.liquid**</mark> and add this:

{% code overflow="wrap" %}

```liquid
{% if customer %}
  {% assign shopwaive_customer_id = customer.id %}
  {% assign shopwaive_customer_email = customer.email %}
  {% assign store_domain = shop.permanent_domain %}
  {% assign store_primary_domain = 'https://' | append: shop.domain %}
  <script id="sw_crypto_" async type="text/javascript" src="https://cdnjs.cloudflare.com/ajax/libs/crypto-js/4.0.0/crypto-js.min.js"></script>
  <script>
      window.Shopwaive = {};
      window.Shopwaive.customer_id = '{{ shopwaive_customer_id }}';
      window.Shopwaive.customer_name = '{{ customer.first_name }} {{ customer.last_name }}';
      window.Shopwaive.customer_email = '{{ shopwaive_customer_email }}';
      window.Shopwaive.shop = '{{ store_domain }}';
      window.Shopwaive.domain = '{{ store_primary_domain }}';
      var elementExists = document.getElementById("shopwaivecom");
      if (!elementExists) {
          var script = document.createElement('script');
          script.id = 'shopwaivecom'
          script.type = 'text/javascript';
          script.async = true;
          script.src = 'https://app.shopwaive.com/admin/2024-05/account_script/shopwaive.js';
          document.head.append(script);
      }
  </script>
{% endif %}
```

{% endcode %}


# App embed

Not on Shopify Plus? Enable the app embed on your Shopify theme for various features and functionality on your storefront before Checkout

{% hint style="info" %}
The <mark style="color:blue;">**Popup**</mark> app embed is designed for Shopify Basic, Shopify, and Advanced subscription plans that do have have access to customizing the Checkout page. For Shopify Plus, disable the Popup app embed, ignore the information provide in the App embed pages and instead use Shopwaive's advanced [Checkout extensions](/shopify/checkout-extensions)
{% endhint %}

## Popup

{% hint style="success" %}
You have the option to hide the popup visibility within the Design settings of the app. You can also select to show the popup only if the customer has an available balance
{% endhint %}

If you are using Shopwaive on Shopify, you are not on Shopify Plus, and you do not have access to our Checkout extensions, then this step is for you, otherwise you can skip the App embed pages. After installing the app enable the <mark style="color:blue;">**Popup**</mark> by navigating to the **Shopify Admin** > **Sales Channels** > **Online Store** > **Customize**. Then click the <mark style="color:blue;">App embeds</mark> icon on the left menu pane. Find the Popup listed and toggle on.

If your theme does not support Shopify's Theme app extensions or app embeds, [contact](mailto:support@shopwaive.com) our team and we can provide integration support to get you setup in minutes.

<figure><img src="/files/6diucSBf4craSsHHNP24" alt=""><figcaption><p>Not on Shopify Plus? Enable the Popup on your Shopify theme </p></figcaption></figure>

Have questions on any specific features? [<mark style="color:blue;">**Contact us**</mark>](mailto:support@shopwaive.com)


# Combinations

Allow customers to combine store credit with store promotions, automatic discounts, discount codes, and gift cards

{% hint style="info" %}
**Tip:** When you offer bespoke checkout experiences, customers rave about their ease of purchase and have an improved likelihood to be a frequent buyer. Use Shopwaive to design checkout flows, including stacking store credit with promotions to personalize the buying journey for each customer
{% endhint %}

## Settings

To combine store credit with discount codes, rewards, or gifts redeemed by code follow the steps outlined below.

Open the app and click the initial avatar at the top right of the page where a drop down menu appears. Click the item labeled <mark style="color:blue;">**Settings**</mark>

<figure><img src="/files/xDKxj4CqyVcJYekYCysm" alt=""><figcaption><p>Click Settings from the left side menu</p></figcaption></figure>

Once you click <mark style="color:blue;">**Settings**</mark>, scroll down and toggle on the <mark style="color:blue;">**Combine with discounts**</mark> setting.

## Customer logs into their account

Once your customer logs into their account, the Shopwaive popup will now include a Discount code field, in addition to the credit redemption field.&#x20;

After logging in, customers follow these steps to combine credit with discount codes

## Step-by-step:

1. Add items to your cart
2. Click the Shopwaive button at the bottom left of the page and enter the amount of credit you wish to redeem into the top field
3. Beneath the credit field, enter the discount code you wish to combine
4. Click <mark style="color:blue;">**Apply to checkout**</mark> to combine store credit with the discount code. If the discount code is not valid for your email address, items in your cart, or any other prerequisite defined by the discount code definition, you will receive a *Not valid* error.
5. If successful, you'll proceed to checkout with store credit combined with the discount code by clicking the <mark style="color:blue;">**Go to checkout**</mark> button.

<figure><img src="/files/ixFU7PNh9kpkAjiK6oCq" alt=""><figcaption><p>Combine discount codes with store credit</p></figcaption></figure>


# Tapcart mobile app builder

Integrate Shopwaive with Tapcart's mobile app builder to create a powerful mobile-first checkout UX

{% hint style="info" %}
When you offer personalized checkout experiences with Shopwaive and [Tapcart](https://www.tapcart.com), your customers have an improved likelihood of returning for a second and third purchase
{% endhint %}

## Introduction

Shopwaive is the leading e-commerce credit accounting platform global brands choose to offer the best digital wallet experience for their customers. Shopwaive offers reliable and secure transactional data services independent of your store platform, pricing structure, promotions, or discounts. This means you can bolt-on Shopwaive with your existing framework with ease, and without risk of conflicting with your existing marketing strategies.

For Shopify store merchants using [Tapcart's mobile app builder](https://www.tapcart.com/), you can now sync your customer's store credit balances with a unique discount code.&#x20;

{% hint style="info" %}
The Tapcart integration is currently only available to [Shopify](https://www.shopify.com) and [Shopify Plus](https://www.shopify.com/plus) store merchants and brands.  If your store is available on a different e-commerce platform, email our team at [support@shopwaive.com](mailto:undefined)
{% endhint %}

For visitors using your store's Tapcart app available on the iOS Apple App Store or Android's Google Play, Shopwaive provides a new powerful solution. Customers using your app may receive push notifications on their mobile device with promotional offers, they can follow these links to your store to purchase items. With Shopwaive's Tapcart integration, they can combine these offers and redeem store credit you issue them by entering their email address in the discount code field.

{% hint style="success" %}
Your desktop site visitors will continue to redeem their credit using the Shopwaive popup as they normally would
{% endhint %}

## Setup Tapcart Integration — Step-by-step:

Open the app and click the initial avatar at the top right of the page where a drop down menu appears. Click the item labeled <mark style="color:blue;">**Settings**</mark>

Once you click <mark style="color:blue;">**Settings**</mark>, scroll down and toggle on the <mark style="color:blue;">**Checkout with Discount**</mark> setting.

<figure><img src="/files/3IID6AzfWOkF27D4dkPr" alt=""><figcaption></figcaption></figure>

## Customer opens app&#x20;

Your customers may visit your mobile app after receiving a push notification or email offer.

## Redeem credit within your mobile app

After customers open your mobile app and log into their account they'll be able to redeem their credit by pressing the button labeled <mark style="color:blue;">**Redeem**</mark> at Checkout (Shopify Plus) or simply entering their email address in the discount code field.&#x20;

{% hint style="info" %}
Although by default guests can use apply their email discount prior to checkout, for security, we recommend [requiring customers to log in](https://help.shopify.com/en/manual/customers/customer-accounts/new-customer-accounts#:~:text=If%20you%20want%20to%20require,the%20Customer%20contact%20method%20section.) to complete their purchase within the Shopify admin
{% endhint %}


# iframe

Load Shopwaive as an iframe to isolate Shopwaive's JS and stylesheets on your custom site

## Settings

Navigate to the Settings panel and toggle on <mark style="color:blue;">**Embed as iframe**</mark> setting to load the Shopwaive application as an iframe. Brands may wish to embed Shopwaive as an iframe to overcome conflicts experienced with the App embed, including styles, jQuery, or other Javascript runtime aspects.&#x20;

<figure><img src="/files/ZsJFNPuBoksftz3z8EP7" alt=""><figcaption><p>Enable Shopwaive as an iframe from the Settings panel</p></figcaption></figure>

Have questions on any specific features? [<mark style="color:blue;">**Contact us**</mark>](mailto:support@shopwaive.com)


# Shipping Credit

Allow customers to combine store credit with FREE shipping credits

{% hint style="info" %}
**Tip:** Shipping credits are conveniently issued and tracked separately from store credit. If customers experience a delayed or poor delivery experience, brands may choose to waive future shipping costs on an order by offsetting shipping fees with shipping credits
{% endhint %}

{% hint style="success" %}
If you are a Shopify Plus brand and use Shopwaive Gift Cards, shipping credits are not necessary since a gift card will apply toward all line item costs
{% endhint %}

To combine store credit with shipping credit follow the steps outlined below. Open the app and click the item in the left side menu labeled <mark style="color:blue;">**Settings**</mark>

<figure><img src="/files/yLH5i8MafH8ofeFTLgEY" alt=""><figcaption><p>Click Settings from the drop down menu</p></figcaption></figure>

Once you click <mark style="color:blue;">**Settings**</mark>, scroll down and toggle on the <mark style="color:blue;">**Shipping credits**</mark> setting.

## Customer logs into their account

Once your customer logs into their account, the Shopwaive popup will now include a Shipping credit field, in addition to the credit redemption field.&#x20;

After logging in, customers follow these steps to combine credit with discount codes

## Redeem Shipping Credit — Step-by-step:

1. Add items to your cart
2. Click the Shopwaive button at the bottom left of the page and enter the amount of credit you wish to redeem into the top field
3. Above the credit field, check the box to include a FREE shipping credit
4. Click <mark style="color:blue;">**Apply to checkout**</mark> to combine store credit with FREE shipping.&#x20;
5. Proceed to checkout with store credit combined with the shipping credit by clicking the <mark style="color:blue;">**Go to checkout**</mark> button.


# Checkout extensions

Make it easy for your customers to redeem their credit with a Shopify Checkout extension. Redeem credit with a single click on Shopify Plus

## Getting started

Choose Shopwaive's <mark style="color:blue;">**Redeem**</mark> checkout extension for [Store credit](/shopify/accounts) and [Offer](/shopify/offers) redemption at checkout. Add the <mark style="color:blue;">**Upsells**</mark> checkout extension to show specific collections of products you define through metafield definitions and then optionally add a cash back incentive when they add it at Checkout.

<figure><img src="/files/CliC5exnUArQUEJ62nGy" alt=""><figcaption></figcaption></figure>

{% hint style="success" %}
Checkout Extensibility features that use Shopwaive's one-click redemption requires a [**Shopify Plus**](https://docs.shopwaive.com/shopify/www.shopify.com/plus) subscription
{% endhint %}

**Step 1:** Add the App block to your Theme. Visit your <mark style="color:blue;">**Themes**</mark>, and then click <mark style="color:blue;">**Customize**</mark>

<figure><img src="https://mail.google.com/mail/u/0?ui=2&#x26;ik=abbaba65e5&#x26;attid=0.1&#x26;permmsgid=msg-a:r-6091121040962058570&#x26;th=19083089a8f7d9ce&#x26;view=fimg&#x26;fur=ip&#x26;sz=s0-l75-ft&#x26;attbid=ANGjdJ8lRn-er_dfms36RnyqiqlkoH2-DhKWeawf0mtZWjernCQU0G-Q1vz4Cmg3a_91WnHlTOaWbeJnpgTAUbaBJdDKy6-gKcV9ZCfR8WsSP_9P5OxgAZcYS5FaT-0&#x26;disp=emb&#x26;realattid=ii_ly8pq5n20" alt=""><figcaption></figcaption></figure>

**Step 2:** Click the <mark style="color:blue;">**Home page**</mark> drop down. Then click <mark style="color:blue;">**Checkout and new customer accounts**</mark>

<figure><img src="https://mail.google.com/mail/u/0?ui=2&#x26;ik=abbaba65e5&#x26;attid=0.2&#x26;permmsgid=msg-a:r-6091121040962058570&#x26;th=19083089a8f7d9ce&#x26;view=fimg&#x26;fur=ip&#x26;sz=s0-l75-ft&#x26;attbid=ANGjdJ_M4EVA_r3C1PMlpycVRMmdU_FuRjczj5MWItK0C7ZKwsfPhd9hkUAk0sSmwb3Fd735xPcx8RolmNfnKqGRh66hs3xR0imFqbJa3isN_gpzlaBGWlFpfMKjxEA&#x26;disp=emb&#x26;realattid=ii_ly8pr0d81" alt=""><figcaption></figcaption></figure>

**Step 3:** Click <mark style="color:blue;">**+ Add app block**</mark> under the <mark style="color:blue;">**Order Summary**</mark> section, or anywhere you choose

<figure><img src="https://mail.google.com/mail/u/0?ui=2&#x26;ik=abbaba65e5&#x26;attid=0.3&#x26;permmsgid=msg-a:r-6091121040962058570&#x26;th=19083089a8f7d9ce&#x26;view=fimg&#x26;fur=ip&#x26;sz=s0-l75-ft&#x26;attbid=ANGjdJ9dsdxe7IGvHv0pFK8T3w60muRVWsh5_E1DSB0Nhgw1l_atLWPzsgv4HyaGJmJK3Y4V7KV3Jc-qpXZEJ6oN52OFivj37mUqhUVTpglOt-i_i9P1xnmlt_JmdKM&#x26;disp=emb&#x26;realattid=ii_ly8psioe2" alt=""><figcaption></figcaption></figure>

**Step 4:** Click the <mark style="color:blue;">**Redeem**</mark> extension by Shopwaive

<figure><img src="https://mail.google.com/mail/u/0?ui=2&#x26;ik=abbaba65e5&#x26;attid=0.4&#x26;permmsgid=msg-a:r-6091121040962058570&#x26;th=19083089a8f7d9ce&#x26;view=fimg&#x26;fur=ip&#x26;sz=s0-l75-ft&#x26;attbid=ANGjdJ86N1EejjUvMQ_yl3Yud2pIx6I8blx5K7L7F_AxH7TJZi92xe5RcSqDH2hpDDJpfJZpgmmI8p0fCFgRUUVYUFntv21YNnbGzSIrXBsrhIbJ9NywwXceFj8GJoE&#x26;disp=emb&#x26;realattid=ii_ly8ptjbo3" alt=""><figcaption></figcaption></figure>

**Step 5:** Click <mark style="color:blue;">**Save**</mark>. And you're done!

<figure><img src="https://mail.google.com/mail/u/0?ui=2&#x26;ik=abbaba65e5&#x26;attid=0.5&#x26;permmsgid=msg-a:r-6091121040962058570&#x26;th=19083089a8f7d9ce&#x26;view=fimg&#x26;fur=ip&#x26;sz=s0-l75-ft&#x26;attbid=ANGjdJ8CS1rLMhBRMNEqzZDLFAuOT_y9BmeCrBYTMnVgIA6Wlmd1-uwmBujULIBBk7BZwI2Ys2klpahQEe4OVPBMye8ON5_d-9xBHczwgFrzW5P2wiofJqW_wtxz2So&#x26;disp=emb&#x26;realattid=ii_ly8puu5x4" alt=""><figcaption></figcaption></figure>

Now, you can change the look, text, and options to match your brand from the <mark style="color:blue;">**Design**</mark> tab within the Shopwaive app. You also have the option to hide the redemption input field, hide your brand logo, change the <mark style="color:blue;">**Redeem**</mark> button text and much more.

<figure><img src="/files/dhmDAjHbkoRugIMnWLO0" alt=""><figcaption></figcaption></figure>

As mentioned above, you can place the <mark style="color:blue;">**Redeem**</mark> extension anywhere you like when you design your Checkout with Shopify Plus.&#x20;

<figure><img src="/files/R2sBN9TFxinGSyvtDNSi" alt=""><figcaption><p>Issue partial refunds, select line item refunds with store credit</p></figcaption></figure>

{% hint style="info" %}
The default extension applies an Order discount in the amount the customer desires to redeem. The discount only applies toward the subtotal of merchandise items. Need to extend store credit to apply toward the full cart cost, including taxes, shipping, and fees? You can skip the remainder of this article and jump to [Extend Store credit with Gift codes](/shopify/checkout-extensions/extend-with-gift-codes)
{% endhint %}

Redeemed balances can be combined with other discounts or promotional codes if you enable this feature in the Shopify Discounts panel when creating the discount. Make these selections in the Combinations card, where you can choose to combine with other Products, Shipping, or Order discounts.

<figure><img src="/files/nTvNaUu8oozz0EhUVV5z" alt=""><figcaption><p>Combine store credit with other discounts by enabling combinations when creating your discount code</p></figcaption></figure>

Shopify Plus stores need to upgrade to Checkout Extensibility before the Combinations card shows options to combine with Product, Order, and Shipping discounts.

{% hint style="info" %}
Enterprise features require the Shopwaive Checkout subscription plan. Contact us at <support@shopwaive.com> to learn more
{% endhint %}

Have questions on any specific features? [<mark style="color:blue;">**Contact us**</mark>](mailto:support@shopwaive.com)


# Extend with Gift codes

After reviewing this guide you will be able to bulk import store credit, gift cards, and offers and extend theme as a gift code at checkout

{% hint style="info" %}
**Tip:** Need help extending store credit to apply toward the full cart cost (i.e. taxes, shipping, and fees)? Use this guide to get started and if you need additional help or have questions contact us at <support@shopwaive.com>&#x20;
{% endhint %}

## Introduction

For Shopify Plus merchants who wish to issue store credit as a true alternative form of payment or for crowdfunding or pre-orders, you can [bulk import store credit](/shopify/accounts/import-accounts) in the amount the customer pledged, and then enable them to apply it toward the full cart costs including taxes, shipping, and fees. This will allow the order to be created in Shopify without any additional amount being transacted at Checkout. To use this feature, you will need to install the Shopwaive Gift Cards extension by creating a custom app on your store. Reach out to <support@shopwaive.com> for any support needed, but this typically takes only 1 - 2 minutes to complete. Shopify Plus is required.

{% hint style="success" %}
Be sure to enable Gift cards on your store from the Shopify Admin before proceeding. If you've already enabled Gift cards but you've never created a gift card before, create a test gift card from <mark style="color:blue;">**Products**</mark> <mark style="color:blue;">**> Gift cards**</mark> in the Shopify admin before completing the steps below
{% endhint %}

To redeem as a gift code with the Shopify Plus <mark style="color:blue;">**Redeem**</mark> Checkout Extension, turn on the <mark style="color:blue;">**Gift Cards Extension**</mark> from the app by visiting **Settings > Gift Cards.**

<figure><img src="/files/bAnwY6DavkolI4FA1c4v" alt=""><figcaption><p>Enable the GIft Cards Extension</p></figcaption></figure>

## Install the Shopwaive Gift Card extension&#x20;

{% hint style="warning" %}
New! The following method to install a custom app to grant <mark style="color:blue;">**read\_gift\_cards**</mark> and <mark style="color:blue;">**write\_gift\_cards**</mark> permissions is now no longer required and deprecated and you can skip the remainder of this documentation. All new installations automatically include gift card scopes.&#x20;

If you installed the app prior to August 20th, 2024, you can add the gift card scopes by uninstalling and then reinstalling the app, or by following the steps below, otherwise, the steps outlined are no longer required.
{% endhint %}

#### Step 1: Navigate to <mark style="color:blue;">**Shopify Admin**</mark> > <mark style="color:blue;">**Settings**</mark> > <mark style="color:blue;">**Apps and sales channels**</mark> > <mark style="color:blue;">**Develop apps**</mark>

<figure><img src="/files/4vxhTPZ9H9L3MwbdTY2N" alt=""><figcaption><p>Navigate to Develop apps from the Shopify admin</p></figcaption></figure>

**Step 2**: Click <mark style="color:blue;">**Create an app**</mark>

<figure><img src="/files/P6SLvo7G4qLOmD67PepB" alt=""><figcaption><p>Click Create an app</p></figcaption></figure>

**Step 3**: Name the app. You can use *Shopwaive: Gift Cards Extension* if you prefer

<figure><img src="/files/qAPbFtQkDNWwjsZPOcPK" alt=""><figcaption><p>Name your custom app</p></figcaption></figure>

**Step 4**: Click <mark style="color:blue;">**Configure Admin API scopes**</mark>

<figure><img src="/files/QCMclHQXdP8RkH5wNdjv" alt=""><figcaption><p>Click Configure Admin API scopes</p></figcaption></figure>

**Step 5**: Search for scopes by typing "gift" in the search field. Then check the box next to <mark style="color:blue;">**write\_gift\_cards**</mark> and <mark style="color:blue;">**read\_gift\_cards**</mark>. Then click <mark style="color:blue;">**Save**</mark>

<figure><img src="/files/QZYJXvf1EwTkhesqohBq" alt=""><figcaption><p>Add Admin API access scopes</p></figcaption></figure>

**Step 6**: Click the <mark style="color:blue;">**API credentials**</mark> tab at the top, then <mark style="color:blue;">**Install app**</mark>

<figure><img src="/files/RM0dzJWvryDCXIVPGTku" alt=""><figcaption><p>Navigate to the API credentials tab and click Install app</p></figcaption></figure>

**Step 7**: Click <mark style="color:blue;">**Install**</mark> from the popup to confirm the installation

<figure><img src="/files/6Fc7NSfyci0Bi5Hvlzhp" alt=""><figcaption><p>Click Install to confirm the installation</p></figcaption></figure>

**Step 8**: Click <mark style="color:blue;">**Reveal token once**</mark> to be shown the access token, but be sure to copy and paste it somewhere secure, or just save it in the Shopwaive settings. You'll only be shown the token once

<figure><img src="/files/Pi2ST3qZfwFTHE0Dwlhe" alt=""><figcaption><p>Click Reveal token once and save it in the Shopwaive Gift Card access token settings</p></figcaption></figure>

**Step 9**: Save the **Admin API access token** in your Shopwaive settings. Then turn on the **Gift Cards Extension** toggle and you're done.

<figure><img src="/files/kD09itLvLPehaVPU7Equ" alt=""><figcaption></figcaption></figure>


# Automatic Discounts

Apply discount codes automatically for customers in an eligible segment

{% hint style="info" %}
Shopify Plus brands can now trigger discount codes to apply automatically at Checkout for eligible customer segments. This feature requires Checkout extensibility for Shopify Plus and is integrated in the <mark style="color:blue;">**Redeem**</mark> Checkout extension
{% endhint %}

Use this feature to bypass the need for customers to manually enter a discount code if customers are in the customer segment defined for the discount.

<figure><img src="/files/jyIJRr2TamCB6QCH7tcH" alt=""><figcaption><p>Enable discount codes to apply automatically for eligible customers</p></figcaption></figure>

**Step 1:** From the Shopify Discounts admin, **c**reate a discount code (i.e. SUMMER20) and select a customer segment (i.e. Customers tagged with **first\_order**).&#x20;

{% hint style="info" %}
To use this feature, the discount is required to be created as a discount code, not an automatic discount. Also, the discount code has to be associated with at least one customer segment (but it can be associated with more than one)
{% endhint %}

**Step 2:** Next, go into the Shopwaive app and select which discounts you want to automatically extend to eligible customers when they go to checkout. If your customer is eligible, our systems will automatically apply the code to the cart.&#x20;


# App blocks

Add app blocks to your Theme to show customers a transactions table or a facade redirect button

## Legacy customer accounts

Navigate to the **Shopify Admin** > **Sales Channels** > **Online Store** > **Customize**. In the Apps section, you have the option to add the <mark style="color:blue;">**Account**</mark> app block, which can display a customer's transaction history and current available balance

{% hint style="info" %}
The <mark style="color:blue;">**Account**</mark> app block is designed for [Legacy customer accounts](https://help.shopify.com/en/manual/customers/customer-accounts). For <mark style="color:blue;">**customer accounts**</mark> contact <support@shopwaive.com> to preview the new Account block available to merchants beginning December 2024
{% endhint %}

<figure><img src="/files/Zy3CmJr2pgGBykcqLYif" alt=""><figcaption><p>Add the Account app block to Classic customer accounts to show a transactions table and available balance</p></figcaption></figure>

So you want to show your customer that you offer rewards and credit? But to access they must sign in, introducing the <mark style="color:blue;">**Facade**</mark> app block that shows a theme-matching button at the bottom of your theme only when customers are not logged in. If clicked, the facade button redirects customers to the account log in page.

<figure><img src="/files/6zfStrma16X6M6H2edKf" alt=""><figcaption></figcaption></figure>

## Customer accounts

When you create [Offers](/shopify/offers), [Store credit](/shopify/accounts), [Loyalty Rewards and Cash Back](/shopify/cash-back-and-loyalty), [Points](/shopify/cash-back-and-loyalty), and [Gift cards](/shopify/gift-cards) in Shopwaive, you can display a customer's balance, offers, and more with the customer accounts app block.

<figure><img src="/files/ZD0FpAou9SAfMEOxrh19" alt=""><figcaption><p>Offers shown from the Shopwaive customer profile page</p></figcaption></figure>

### Profile

With Shopify's updated customer accounts, display your customers data on their Profile page in the most seamless and modern way yet. Display a customer's cash back, store credit balance, and eligible offers  on their Profile page that sync with the same data shown at Checkout.&#x20;

<figure><img src="/files/cfzaPge2dV1sh8Sinzi7" alt=""><figcaption><p>Shopwaive's new customer accounts block is coming soon</p></figcaption></figure>

{% hint style="info" %}
Excited for Shopify's new customer accounts? We are too! We'll be ready to help add the new Account block to your Customer's Profile page when customer accounts are generally available to all merchants on December 11, 2024. Contact us at <support@shopwaive.com> for questions
{% endhint %}

Have questions on any specific features? [<mark style="color:blue;">**Contact us**</mark>](mailto:support@shopwaive.com)


# Cash Outs

New! Shopify Plus brands can offer D2C customers, B2B customers, affiliates, or employees the ability to make cash out requests, where Admins can approve and send funds, reject, or refund requests

{% hint style="success" %}
With Shopwaive's new <mark style="color:blue;">**Cash Outs**</mark> solution, brands are loving the seamless one-click request solution that tears down the barriers of transacting money between brands and their customers, affiliates, and employees
{% endhint %}

Shopwaive partners with Stripe, an industry leader in financial technology to offer advanced and secure cash out transactions between customers and merchants. Many existing solutions require complex integrations, and endless hours of development. Now, with Shopwaive's <mark style="color:blue;">**Cash Outs**</mark> solution, account balances can be sent directly to a customer's preferred bank institution (i.e., direct deposits) or debit card on file in just a matter of minutes.

{% hint style="info" %}
Shopwaive's <mark style="color:blue;">**Cash Outs**</mark> solution was born out the lack of no-code solutions available for eCommerce brands to transact with their customers, affiliates, and employees in an easy, secure, and PCI-compliant way
{% endhint %}

## How to get started

Follow these simple steps to offer cash outs ( i.e., direct deposits) to your customers, affiliates, and employees.

**Requirements:**

1. At this time, only brands that use a default presentment currency of USD (United States Dollar) are eligible to use this feature. Also, customers must register their payout account (receive payouts) with the USD currency
2. Brands must be on a paid Shopify Plus subscription plan, on a paid Shopwaive Checkout plan, and use the Shopwaive Redeem checkout extension
3. Brands must fund a connected Stripe account to be used for payouts. The account must maintain a minimum balance of $100 USD. Additionally, the brand payout account must be funded and have a minimum balance of 110% of any cash out request value at the time the brand admin approves a request for it to be successfully processed
4. Requests can only be made if customers have a balance greater than or equal to $5 USD
5. By default, a max request limit of $50 USD is placed on all cash out requests. If your business needs a limit increase, contact our team at <support@shopwaive.com> as this can be increased for Enterprise customers following a review of your use case

{% hint style="info" %}
All minimum requirements for <mark style="color:blue;">**Cash Outs**</mark> are subject to change. Please contact <support@shopwaive.com> to receive a custom solution using the core <mark style="color:blue;">**Cash Outs**</mark> product
{% endhint %}

\
**Step 1:** From the Shopify admin, visit <mark style="color:blue;">**Settings**</mark>. Then click <mark style="color:blue;">**Integrations**</mark>

Enable the <mark style="color:blue;">**Stripe Connect**</mark> setting.

<figure><img src="/files/eJ5lfrxvKuWofhkGvYlb" alt=""><figcaption><p>Enable Stripe Connect and Connect your business</p></figcaption></figure>

**Step 2:**  Click the <mark style="color:blue;">**Connect your business**</mark> button to register your brand and payment method that you'll use to send funds to your customers, affiliates, or employees

<figure><img src="/files/nSahLI5ExGMSAHOm0aWr" alt=""><figcaption><p>Enable cash outs by toggling the setting that appears</p></figcaption></figure>

**Step 3:**  Next, enable cash outs (i.e., direct deposits) by toggling the new option that appears. Note this option will only appear after you've fully connected your brand in the previous step. If you still have steps remaining, continue to use the link provided to complete onboarding your business.

**Step 4:**  Next, add the <mark style="color:blue;">**Redeem**</mark> checkout extension to your Checkout page

<figure><img src="/files/g6CsHBBuULsjU7Vs7QR8" alt=""><figcaption><p>Add the <mark style="color:blue;"><strong>Redeem</strong></mark> checkout extension to your Checkout</p></figcaption></figure>

**Step 5:**  Next, customers can make requests at Checkout after they register a payout method

If a payout method is not on file, an option is provided to register a payout method at Checkout.&#x20;

{% hint style="info" %}
As previously mentioned, the customer requires a balance of $5 USD or more before they are shown the option to connect a bank or debit card to receive payouts
{% endhint %}

<figure><img src="/files/rB79Yd6TAByFE6mzwAMS" alt=""><figcaption><p>Customer's are provided an option to connect a bank or debit card to receive payouts</p></figcaption></figure>

If a payout method is on file and the customer has provided all the necessary information needed to proceed with requesting cash out, the customer's balance can be requested in cash with the option provided.

<figure><img src="/files/DQJGSUC17Ohqh6saUkJc" alt=""><figcaption><p>The option to cash out (i.e., direct deposit) will appear if the customer successfully registers their preferred payout method</p></figcaption></figure>

{% hint style="info" %}
If the option to request cash out does not appear for your customer, its likely due to the customer not fully completing the onboarding process, which includes KYC (Know your customer) verification and verifies their preferred bank or debit card is valid to receive payouts. For troubleshooting steps, see [How to get started](#how-to-get-started)
{% endhint %}

**Step 6:**  Admins can view requests from the Customer profile page. Status of the request can be viewed and admin actions can be taken like <mark style="color:blue;">**Approve and send funds**</mark>, <mark style="color:blue;">**Reject**</mark>, or <mark style="color:blue;">**Refund**</mark>. If the request has already been approved, then you can click <mark style="color:blue;">**View receipt**</mark> to download a copy of the transactional data.

**Definitions of Cash Out actions available**

<mark style="color:blue;">**Approve and send**</mark> - Approving the request updates the status of the request to **Complete**. Payment is made to Shopwaive, Inc. from your banking or debit card on file for the amount requested plus additional processing fees. Shopwaive will review payment on file and complete a fraud-prevention review before releasing funds to the customer. Typically, direct deposits are received instantly but can take up to 5 - 7 business days if additional review is required.

<mark style="color:blue;">**Reject**</mark> - Rejecting the request updates the status of the request to **Rejected** and makes no further changes to the customer's balance. The debited amount that occurred at the time the request was originally made is not returned automatically to the customer. If you prefer to automatically credit after rejecting, see <mark style="color:blue;">**Refund**</mark> instead.

<mark style="color:blue;">**Refund**</mark> - Refunding the request updates the status of the request to **Refunded** and credits the customer's balance the amount that was requested. No funds are released or sent by direct deposit. Use the refund action if the request was made in error, for example.

<mark style="color:blue;">**View receipt**</mark> - Use this option to view the receipt and transactional data created when you clicked **Approve and send** to process payment to Shopwaive, Inc. to cover the costs of the requested funds by your customer.

<figure><img src="/files/NweuzE3lK4ATzpkHTJ7h" alt=""><figcaption><p>Approve, reject, refund, or view receipts from the Customer profile page</p></figcaption></figure>

See below an example receipt of the payment made to Shopwaive to cover the cost of the customer cash out request. The receipt details an example payout of $22.48 plus a $2.62 service fee collected by Shopwaive and Stripe for processing the request.

<figure><img src="/files/QxJ78TpTfWVQUQpaXcdD" alt=""><figcaption><p>Receipt viewed from the cash out after payment has been captured by Shopwaive</p></figcaption></figure>

<figure><img src="/files/J2BFnlAwMEgh8ln4JwH3" alt=""><figcaption><p>Pending requests from customers are viewed from their Customer profile</p></figcaption></figure>


# Gift Cards

Shopify Plus merchants can create bulk gift cards for customers with just a few clicks

{% hint style="info" %}
**Tip:** Gift cards are convenient when migrating crowdfunding pre-orders or for low-stock backorders when the time of payment and order processing occur asynchronously. Gift cards are also an easy store credit alternative that deducts from all cart costs, including taxes and shipping fees
{% endhint %}

{% hint style="info" %}
If you want to learn how to redeem store credit as a gift code, see [Extend Store Credit with Gift Codes](/shopify/checkout-extensions/extend-with-gift-codes) using our Shopify Plus Checkout extension
{% endhint %}

## How to use

With Shopwaive, you can empower your customers, employees, and affiliates with gift cards. Create, redeem, and send gift cards with Shopify Plus Checkout extensions, Shopify POS Smart Grid Tiles, bulk creation within the app, and automated emails via Shopify Flow actions.

<table data-view="cards"><thead><tr><th></th><th></th><th data-hidden data-card-cover data-type="files"></th><th data-hidden data-card-target data-type="content-ref"></th></tr></thead><tbody><tr><td><p><mark style="color:blue;"><strong>Redeem credit as gift code</strong></mark></p><p><strong>Checkout Extensions</strong></p></td><td>Allow customers to redeem their credit as a gift code</td><td><a href="/files/muidwYq8vni97HCR95CA">/files/muidwYq8vni97HCR95CA</a></td><td><a href="https://docs.shopwaive.com/shopify/store-credit/checkout-extensions/extend-with-gift-codes">https://docs.shopwaive.com/shopify/store-credit/checkout-extensions/extend-with-gift-codes</a></td></tr><tr><td><p><mark style="color:blue;"><strong>Create gift code</strong></mark></p><p><strong>Shopify Flow Action</strong></p></td><td>Create a gift code and send in an email in Shopify Flow</td><td><a href="/files/muidwYq8vni97HCR95CA">/files/muidwYq8vni97HCR95CA</a></td><td><a href="https://docs.shopwaive.com/shopify/shopify-flow#create-a-gift-code-and-optionally-send-email">https://docs.shopwaive.com/shopify/shopify-flow#create-a-gift-code-and-optionally-send-email</a></td></tr><tr><td><p><mark style="color:blue;"><strong>Create bulk gift cards</strong></mark></p><p><strong>Shopwaive app</strong></p></td><td>Issue gift cards with CSV import in the app</td><td><a href="/files/muidwYq8vni97HCR95CA">/files/muidwYq8vni97HCR95CA</a></td><td><a href="https://docs.shopwaive.com/shopify/gift-cards#create-gift-cards-in-bulk">https://docs.shopwaive.com/shopify/gift-cards#create-gift-cards-in-bulk</a></td></tr><tr><td><p><mark style="color:blue;"><strong>Redeem Gift Cards</strong></mark></p><p><strong>Shopify POS UI Extension</strong></p></td><td>Redeem as a gift code, all from the Shopify POS Cart</td><td><a href="/files/muidwYq8vni97HCR95CA">/files/muidwYq8vni97HCR95CA</a></td><td><a href="https://docs.shopwaive.com/shopify/shopify-pos">https://docs.shopwaive.com/shopify/shopify-pos</a></td></tr><tr><td><p><mark style="color:blue;"><strong>Send Gift Cards</strong></mark></p><p><strong>Shopify POS UI Extension</strong></p></td><td>Create Gift cards and send them in an email</td><td><a href="/files/muidwYq8vni97HCR95CA">/files/muidwYq8vni97HCR95CA</a></td><td><a href="https://docs.shopwaive.com/shopify/shopify-pos">https://docs.shopwaive.com/shopify/shopify-pos</a></td></tr></tbody></table>

## Create Gift Cards in bulk

To create gift cards for your customers, follow the steps outlined below. Open the app and click the icon labeled <mark style="color:blue;">**Settings**</mark> when you hover over it using a desktop browser. Or simply navigate to the <mark style="color:blue;">**Settings**</mark> page on a mobile device

<figure><img src="/files/AOeDroFO1fZQbbT817JL" alt=""><figcaption><p>Click Settings from the side menu, navigate to the Gift Cards tab and toggle on Gift Cards</p></figcaption></figure>

Once you click <mark style="color:blue;">**Settings**</mark>, scroll down and toggle on the <mark style="color:blue;">**Gift cards**</mark> setting.&#x20;

{% hint style="info" %}
New! Gift cards are now available through Shopwaive on all Shopify subscription plans. To learn more about Shopwaive's Gift Card business solutions, please contact us at <mark style="color:blue;">**<support@shopwaive.com>**</mark>
{% endhint %}

## Create Gift Cards — Step-by-step:

{% hint style="success" %}
This guide describes how to create gift cards in bulk in the app. Need to create Gift Cards in Shopify POS? You can skip this guide and instead refer to the Shopify POS [Send Gift Cards](/shopify/shopify-pos) Smart Grid Tile
{% endhint %}

How do I issue gift cards? Whether you're migrating crowd-funded pledges to Shopify, or want the flexibility to cover all costs at checkout for your customers,  gift cards are a convenient and easy way to accomplish this and so much more. To begin, follow these steps:

1. Go to <mark style="color:blue;">**Settings**</mark> > <mark style="color:blue;">**Gift Cards**</mark> and click the <mark style="color:blue;">**Create Gift Cards**</mark> button
2. In the modal popup that appears, click the <mark style="color:blue;">**Get Template**</mark> button to download a CSV file to your local drive. Open the file and enter the following information

<figure><img src="/files/y1qvqPvFlEyZzTtOGEmM" alt=""><figcaption></figcaption></figure>

The <mark style="color:blue;">**email**</mark> field can include an existing customer or prospect customers' email, and will be assigned as recipient to the gift card, but this field is optional. Leave blank to create gift card codes that are not associated with email.

{% hint style="info" %}
If the email field is left blank, the gift card code is created without assigning to a specific customer or email address. Note, you will be unable to send email notifications for this gift card unless you add an email later in the Shopify admin. If an email is added in the Shopify admin at a later time, the default Shopify gift card notification template will be used automatically
{% endhint %}

The <mark style="color:blue;">**code**</mark> field can include a string between 8 - 20 characters in length, but is optional. Leave blank for an autogenerated code to be created.

The <mark style="color:blue;">**value**</mark> field is required and must be greater than 0. It is equivalent to the value of the gift card code associated with your store's currency. Leave out currency symbols, this field accepts numeric values greater than zero only.

The <mark style="color:blue;">**type**</mark> field must equal **gift\_card** to successfully complete the import process.

The <mark style="color:blue;">**OncePerCustomer**</mark> field is a boolean that accepts **TRUE** or **FALSE**.&#x20;

If you set <mark style="color:blue;">**OncePerCustomer**</mark> equal to **FALSE** the following will occur:

1. If an email is included for this row, the email address is attached to the internal notes section of the gift card for reference only. The note for this gift card can be viewed in the Shopify Admin, and if you choose, the email can be used to attach a customer at a later time to this gift card in the Shopify Admin, in which an email notification using Shopify's gift card template can be sent.
2. If an email is included for this row, the customer is not created or notified by email, only the gift card is created.
3. If an email is not included for this row, only the gift card is created, and the internal notes attached to this gift card is left blank
4. Set equal to **FALSE** to use Shopwaive's email campaign service. With this service you can create custom gift card templates and send email campaigns with the gift card code, balance, and a custom message with HTML editing capability. Conveniently, setting equal to **FALSE** only creates the gift card so you can send a custom email notifying customers at a later time that corresponds to your campaign timing. The templates include merge tags, so dynamic data such as balance and gift card code can be sent to thousands of your customers with just one-click.

If you set <mark style="color:blue;">**OncePerCustomer**</mark> equal to **TRUE** the following will occur:

1. If an email is included for this row, the email address is attached to the internal notes section of the gift card. The note for this gift card can be viewed in the Shopify Admin
2. If an email is included for this row, the customer is also created and notified by email using Shopify's default gift card template. If a customer with this email already exists, they are automatically notified by email using Shopify's default gift card template.
3. If an email is not included for this row, only the gift card is created, and the internal notes attached to this gift card is left blank

After you upload your gift cards, you'll receive a success message indicating the upload was successful and you can complete the import by clicking the <mark style="color:blue;">**Import**</mark> button. You can import hundreds or thousands of codes with just a few clicks.

<figure><img src="/files/wAG2pi91mwgNubG9KgFl" alt=""><figcaption><p>Bulk import gift cards for pre-orders, backorders, or promotions with Shopify Plus and Shopwaive</p></figcaption></figure>

After clicking <mark style="color:blue;">**Import**</mark> you will receive a success message if the import was successful. Please contact <support@shopwaive.com> if you you have questions or need help troubleshooting.

Processing times for gift card codes may vary based on the size of your import and if you choose to automatically create customers if emails are provided and they do not already exist.

*Less than 10 codes will take a minute or less.*

*Less than 100 codes can take up to 5 minutes.*

*Less than 1000 codes can take up to 30 minutes to process.*

{% hint style="info" %}
Gift card creation occurs at a rate of approximately 1 gift card code every 3 seconds
{% endhint %}

While these are just estimates, you can close the window while they finish processing in the background.&#x20;

## Email campaigns

With gift cards, you will have the added benefit of using Shopwaive's advanced TinyMCE Email editor, create saved HTML email templates, and include merge tags to send dynamic messages to your customers, including real-time gift card balances. Once a template is created, you can send balances to all customers with a gift card code with just a single click. With Shopwaive's campaign email tracking, you will have the option to resend to customers who previously received a notification, or only send gift cards that were newly created since the last time you sent out an email campaign, or who did not previously receive a successful notification due to failed attempts.

<figure><img src="/files/cMFr0HxWGfDHZVoEW9iN" alt=""><figcaption><p>Resend all gift cards, or select only the newly created or previously failed send attempts</p></figcaption></figure>

When emails are sent to customers that are recipients of the gift card, the internal notes section of the gift card is updated with the email timestamp, for event and communication tracking.

<figure><img src="/files/bRr9QJBhRlKmZLgqpFaV" alt=""><figcaption><p>Shopify Plus Gift card details as viewed within the Shopify admin</p></figcaption></figure>


# Offers

New! Shopify Plus brands can create promotional offers with unique eligibility rules and expirations with seamless redemption options at Checkout

{% hint style="success" %}
With Shopwaive's new [Offers](/shopify/offers) solution, brands love the seamless one-click redemption without requiring customers to enter a code. Plus, you can now allow customers to redeem multiple offers in the same checkout session
{% endhint %}

{% hint style="info" %}
If you are a Shopify Plus brand and use Shopwaive Gift Cards, you can optimize the customer UX with gift offer redemption
{% endhint %}

[Offers](/shopify/offers) are best suited when used in combination with our [Customer](https://api.shopwaive.com/reference/rest-api-documentation/customer-api) and [Actions APIs](https://api.shopwaive.com/reference/rest-api-documentation/action-api). Let us know if you need help getting setup, we're here to help. To get started with [Offers](/shopify/offers), open the app and click the item in the left side menu labeled [Settings](https://docs.shopwaive.com/product-tour/dashboard#settings). Once you click <mark style="color:blue;">**Settings**</mark>, scroll down and toggle on <mark style="color:blue;">**Offers**</mark>. Note, turning on <mark style="color:blue;">Offers</mark> will automatically disable the ability for customers to redeem store credit by entering any amount in the input field and clicking Redeem. Instead, customers redeem their credit by choosing from a list of different offers, each with their own expiration date and value.

<figure><img src="/files/MCS8DcnviC4s892htKXr" alt=""><figcaption><p>Enable offers and choose your desired configuration, including multiple offer redemption and offer label</p></figcaption></figure>

A few additional settings you can choose is to allow multiple or single offer redemption. Multiple offer redemption allows offers to be stacked and redeemed during the same checkout session.&#x20;

Also, you can choose to show your brand logo or other media if you defined one when you created the offer. If the offer media is disabled, no graphic is shown to the left of the description of each offer in the list. If you create the offer using the [Customer API PUT endpoint](https://api.shopwaive.com/reference/rest-api-documentation/customer-api#put-customer-endpoint), you have the option to define a unique media url for each offer. Otherwise, if the offer media is enabled but no media is defined for the individual offer, then the brand logo is used instead.

Next, scroll down and toggle on the <mark style="color:blue;">**Expiration**</mark> setting. Choose <mark style="color:blue;">**Multiple expiry dates**</mark>

<figure><img src="/files/QtMiJnazNOoHgOjw3sjp" alt=""><figcaption><p>Enable multiple expiry dates</p></figcaption></figure>

## Create offers

To create offers, you have three new options. Firstly, you can create offers directly from the Customer profile page in the app. Secondly, you can use the [Customer and Action API](https://api.shopwaive.com/reference/rest-api-documentation) which will also allow you to create, edit, and delete offers programatically. You can also create new offers with a [Bulk Increment Import](/shopify/accounts/import-accounts#increment-balances-using-the-increment-column), however, you cannot currently edit or delete offers within the app.

### From the Customer profile page

Simply search and click on a customer from your synced Customer list. When their profile page opens, find the Offers card near the bottom left and click the <mark style="color:blue;">**Create**</mark> button as shown

<figure><img src="/files/kKHCuOrXME5seCFs8kMw" alt=""><figcaption><p>Find the Offers card and click Create, to create a new offer for this customer or an entire customer segment</p></figcaption></figure>

Though you can create an offer exclusively for this customer in this manner, you can also choose to extend the offer to an entire customer segment that you define from your Shopify admin. On top of that, you can schedule the offer to be deposited and expire on precise start and end dates. A classic scenario is described below,

> Brand A wants to send all of their customers a $25 Black Friday Cyber Monday reward that gets scheduled to post to their customer's digital wallet on Thanksgiving at midnight (Black Friday). Then, it expires at midnight on Cyber Monday (Tuesday after Thanksgiving).&#x20;

To achieve this, it takes less than a minute. Simply create a customer segment for the customers that you want to receive the deposit. Then visit any customer profile page in the Shopwaive app, click Create in the Offers card, then for <mark style="color:blue;">**Offer recipient**</mark> choose **Customers within a segment** and then for Segment query, the customer segment you created in the previous step. Choose the value for the offer, a title, any media you want attached to the offer and much more. Then select deposit and expiration dates to schedule and create the eligibility period.

<figure><img src="/files/2MIp2x5jMxbLEryKQ2vr" alt=""><figcaption><p>Offers can be scheduled in advance, deposited to entire customer segments, and then set to expire</p></figcaption></figure>

Now that you've created an offer this customer or an entire customer segment, you can view the offers each customer will see at checkout on their customer profile in the Offers card. Here, you can quickly duplicate or delete the offer. This is helpful if a customer has an offer that you want to quickly extend to a larger audience (i.e. an entire customer segment). Just click <mark style="color:blue;">**Duplicate**</mark>, and make any changes you wish then click <mark style="color:blue;">**Save and close**</mark> to save the offer and close the Offer creation workflow. By default, if offers are not scheduled, they are deposited instantly. Use the <mark style="color:blue;">**Schedule a deposit**</mark> feature to delay the deposit date to some time in the future.

<figure><img src="/files/NJR7f42pK69Wcvzc2fnB" alt=""><figcaption><p>Delete or duplicate an offer quickly from the customer profile page</p></figcaption></figure>

{% hint style="info" %}
Have questions? Offers unlock powerful automations and business processes for brands. Contact our team if you have any questions or would like to learn more on how Offers is the exact solution your brand has been waiting for where you can the best combination of automation and flexibility
{% endhint %}

### Customer API&#x20;

Use the Customer `PUT` [endpoint](https://api.shopwaive.com/reference/rest-api-documentation/customer-api#put-customer-endpoint) to create a new offer, where you can define the <mark style="color:blue;">`expirationdate`</mark>,  <mark style="color:blue;">`amount`</mark> of the offer, and <mark style="color:blue;">`note`</mark>. The <mark style="color:blue;">`note`</mark> field is equivalent to the offer title and description and will be displayed to the customer at Checkout. With the <mark style="color:blue;">`media`</mark> field, you can also include an offer image or graphic by including a url link to the media that the offer is associated with. &#x20;

### Bulk Increment Import

When you create a [Bulk Increment Import](/shopify/accounts/import-accounts#increment-balances-using-the-increment-column), offers are automatically created. To show them at the Checkout page, you will add the <mark style="color:blue;">**Redeem**</mark> Checkout Extension for Shopify Plus and enable <mark style="color:blue;">**Multiple expiry dates**</mark> from [Settings](https://docs.shopwaive.com/product-tour/dashboard#settings).

{% hint style="info" %}
Bulk Assign Imports do not create offers, since this type of import assigns a customers total balance
{% endhint %}

## Multiple offer redemption

With Shopwaive's multiple offer redemption setting, which allows redeeming multiple offers at a time, you may observe increases to customer satisfaction and customer perceived value due to the added flexibility that combining offers presents. The demo below shows redemption using a discount, however, you can also use multiple offer redemption with our [Gift card extension](/shopify/checkout-extensions/extend-with-gift-codes).

<figure><img src="/files/cgD1T9Op8WyqNbmrzya3" alt=""><figcaption><p>Show multiple offers at Checkout with the Shopify Plus Redeem extension (example of multiple offer redemption)</p></figcaption></figure>

## Single offer redemption

With Shopwaive's single offer redemption, which only allows redeeming one offer at a time, you may observe increases to AOV, frequency, and total number of customer orders.

## Collapsed list of multiple offers

With Offers enabled, visit the <mark style="color:blue;">**Design**</mark> tab and select the <mark style="color:blue;">**Redeem App Block**</mark> design, then toggle the <mark style="color:blue;">**Collapsible**</mark> setting. Click <mark style="color:blue;">**Save all settings**</mark> after you've selected your preferred way to display offers.

{% hint style="info" %}
New! You can now choose to collapse all offers onto a single line, with the offer expiring soonest shown first. This is especially convenient for merchants that want to offer 3 or more offers at checkout
{% endhint %}

<figure><img src="/files/xbG6yIfjjqzY10XWgw99" alt=""><figcaption><p>Collapse multiple offers onto a single line</p></figcaption></figure>

## Edit and Delete offers

To edit and delete offers, follow the steps outlined in the [Action API](https://api.shopwaive.com/reference/rest-api-documentation/action-api) documentation.


# Upsells

New! Shopify Plus brands can increase AOV by incentivizing customers with earned cash back by displaying eligible products at Checkout and their cash back value

{% hint style="success" %}
With Shopwaive's new <mark style="color:blue;">**Upsells**</mark> solution, brands love the seamless one-click add solution that inherently increases AOV, and satisfies customers with an instant reward for adding more products to their checkout. Plus, you can allow customers to earn unique cash back amounts for each product added
{% endhint %}

[Download the Upsells Shopify Flow template here](https://cdn.shopify.com/s/files/1/0651/7650/2517/files/Shopwaive_Upsells_Cash_Back_Rewards_Program.flow?v=1722525300)

<mark style="color:blue;">**Upsells**</mark> are our newest addition to Shopify Plus Checkout solutions. To get started with <mark style="color:blue;">**Upsells**</mark>, add the Upsells app block to your Checkout. Then, open the Shopwaive app and click on the <mark style="color:blue;">**Design**</mark> tab. Once you click <mark style="color:blue;">**Design**</mark>, choose the <mark style="color:blue;">**Upsells App Block**</mark>. You can fully customize the text and labels here, and you can choose filters to only display products eligible for cash back. Click <mark style="color:blue;">**Save all settings**</mark>

{% hint style="info" %}
As opposed to a generic form of product offers, with Shopwaive Upsells you can fully customize the design and text, but one thing that makes it truly unique is you can incentivize your customers to add products to their checkout in exchange for earning credit. The setup is simple and fully integrated with Shopify's systems.
{% endhint %}

## Earn cash back with Upsells

If you just want to add the Upsells to your checkout without the earned credit feature, you just simply add it to your Checkout with no changes needed from the Design tab. If instead, you want to show only products that customers can earn cash back then you can do the following:

\
**Step 1: From the Shopify admin,** add a unique tag to the product(s) you want customers to earn credit, for example <mark style="color:blue;">**cashback**</mark>. Then from the Shopwaive app, click <mark style="color:blue;">**Design**</mark>, choose <mark style="color:blue;">**Upsells App block**</mark>, and then add <mark style="color:blue;">**tag:cashback**</mark> in the text input for Tag query. This will only show product upsells that have tag <mark style="color:blue;">**cashback.**</mark> Click <mark style="color:blue;">**Save all settings**</mark>

<figure><img src="/files/hJzLEoh0DSvenjzcSZl7" alt=""><figcaption><p>Design Upsells with tag queries, cash back metafield definitions, custom text, and much more</p></figcaption></figure>

\
**Step 2:**  Next, from your <mark style="color:blue;">**Shopify Admin**</mark> > <mark style="color:blue;">**Settings**</mark> > <mark style="color:blue;">**Custom Data**</mark> define a new metafield for <mark style="color:blue;">**Products**</mark>, and assign them a value. For example, add a metafield definition for products with namespace <mark style="color:blue;">**custom**</mark> and key <mark style="color:blue;">**cashback**</mark>. For the metafield definition value type, choose <mark style="color:blue;">**Single line text**</mark>. Then enter those values on the Shopwaive <mark style="color:blue;">**Design**</mark> tab, click <mark style="color:blue;">**Save all settings**</mark>. Then from the Shopify Admin, visit the products you tagged with cashback, and enter a earned cashback value for their cashback metafield, for example 20. This will show your customers how much they will earn ($20) if they purchase that product

<figure><img src="/files/DCKUm78rW9EKuO9yyuKD" alt=""><figcaption></figcaption></figure>

\
**Step 3:** Finally, you can install or ask us to install the Shopify Flow that will increment customers earned cash back credits according to the products and their <mark style="color:blue;">**cashback**</mark> metafield values for each order

{% hint style="info" %}
Metafield values for earned cash back are unitless. So the value earned is equivalent to the Store presentment currency settings, or you could choose to use multipliers to modify this amount or use a points systems
{% endhint %}

Here is an example of a product that has the <mark style="color:blue;">**cashback**</mark> metafield definition (see **Step 3** above) with value of 12.50, as you can see, the customer is incentivized to add the product to their checkout, in exchange for earning a $12.50 cash back reward.

<figure><img src="/files/sF6sddZWs5404u25UkVq" alt=""><figcaption><p>Show Upsells at Checkout with Product offers and their potential cash back values </p></figcaption></figure>


# B2B Checkout

New! Shopify Plus brands can now extend B2B wallets at Checkout to customer segment-based users like company employees, affiliates, and more

{% hint style="success" %}
With Shopwaive's new <mark style="color:blue;">**B2B Checkout**</mark> solution, brands love the ability to extend company wallets to employees and users of the company account. Grant access easily to a company B2B wallet with customer segmentation in the Shopify Admin
{% endhint %}

<mark style="color:blue;">**B2B Checkout**</mark> is a powerful feature for Enterprise businesses and is part of the Shopify Plus Checkout solution family. To get started with <mark style="color:blue;">**B2B Checkout**</mark> , add the <mark style="color:blue;">**B2B Checkout**</mark> app block to your Checkout.&#x20;

<figure><img src="/files/QSs5BYx7OMqU29dhKvCz" alt=""><figcaption><p>Add the <mark style="color:blue;"><strong>B2B Checkout</strong></mark> extension to your Checkout page</p></figcaption></figure>

{% hint style="info" %}
The <mark style="color:blue;">**Redeem**</mark> extension is available for access to the logged-in customer's personal digital wallet. If you plan to only issue deposits to the top-level B2B company account, its not necessary to add the <mark style="color:blue;">**Redeem**</mark> extension to Checkout, but the <mark style="color:blue;">**Redeem**</mark> and <mark style="color:blue;">**B2B Checkout**</mark> extensions can be used together if you desire for customers to have access to both.
{% endhint %}

<figure><img src="/files/wpIDgRKefJCtxZxxiXk0" alt=""><figcaption><p>Select if you wish to show the <mark style="color:blue;"><strong>B2B Checkout</strong></mark> extension with Shop Pay</p></figcaption></figure>

Then, open the Shopwaive app and navigate to <mark style="color:blue;">**Settings**</mark> > <mark style="color:blue;">**B2B**</mark>. Once you click <mark style="color:blue;">**B2B**</mark>, enable the <mark style="color:blue;">**B2B Checkout**</mark> setting.&#x20;

<figure><img src="/files/kFeHvSMabSPluiCYZg1t" alt=""><figcaption><p>Enable <mark style="color:blue;"><strong>B2B Checkout</strong></mark> from Shopwaive settings</p></figcaption></figure>

Next, in the Shopwaive app simply search for a company's account by searching for the email associated with the company. Open their profile, and make updates to the <mark style="color:blue;">**Account permissions**</mark> card by extending permissions to other customers that are in a customer segment that you define. When finished, click <mark style="color:blue;">**Save and close**</mark>.&#x20;

{% hint style="info" %}
To define a customer segment, simply visit your Shopify admin and create a segment based on any criteria you need, like customer tags, email domain, and more. Learn more how to [create a Customer segment](https://help.shopify.com/en/manual/customers/customer-segmentation/create-customer-segments).
{% endhint %}

<figure><img src="/files/rRffI5o4vxJnoRuiypxV" alt=""><figcaption><p>Extend B2B permissions by selecting a customer segment for the top-level B2B company account</p></figcaption></figure>

## Using B2B Checkout accounts

Now, customers that are logged in and meet the customer segment eligibility requirements of a B2B company account will be granted permissions to redeem and access deposits from the company wallet and other eligible offers.

{% hint style="info" %}
Note that if more than one B2B company account is assigned per domain and each B2B account has a unique customer segment and the logged-in customer is eligible for multiple B2B customer segments defined, then the logged-in customer will be granted access to only the first eligible B2B account
{% endhint %}

<figure><img src="/files/veVAWHSw7GJFQTrjFfvs" alt=""><figcaption><p><mark style="color:blue;"><strong>B2B Checkout</strong></mark> allows employees and users to access a company wallet based on customer segments</p></figcaption></figure>

Unlock this powerful feature today. If your team needs help setting up or have questions, contact Shopwaive's development team at <support@shopwaive.com>


# Judge.me

New! Brands can connect Judge.me to create credit deposits, discounts, gift cards, and more when customers leave reviews with your connected Judge.me account

{% hint style="success" %}
Shopwaive's integration with Judge.me is powered by the Shopify Flow app. Install Shopify Flow to unlock powerful automations, including [Judge.me](https://judge.me/) to Shopwaive
{% endhint %}

[<mark style="color:blue;">**Judge.me**</mark>](https://judge.me/) powers product reviews for your e-commerce store and helps you collect and display star ratings and reviews on Shopify. Now brands can connect the [Judge.me](https://judge.me/) trigger to all of Shopwaive's Shopify Flow actions, like create discounts and gift codes and send them in an email, or create credit deposits to reward your customer for leaving a review after a recent purchase

<figure><img src="/files/FbbKwb404lCZJznGXBc4" alt=""><figcaption><p>Judge.me and Shopwaive integration on Shopify Flow</p></figcaption></figure>

[Download this Judge.me Shopify Flow template ](https://cdn.shopify.com/s/files/1/0651/7650/2517/files/Judge.me____Shopwaive.flow?v=1731382134)

## Connect [Judge.me](https://judge.me/)

Simply install Shopify Flow. Then create a new flow with the [Judge.me](https://judge.me/) trigger named <mark style="color:blue;">**New review received**</mark>. Next, connect the [Judge.me ](https://judge.me/)trigger to the Shopwaive <mark style="color:blue;">**Increment balance**</mark>  or <mark style="color:blue;">**Create discount**</mark> action, or any of the 7 available Shopwaive actions designed exclusively for Shopify Flow.

Unlock this powerful feature today. If your team needs help setting up or have questions, contact Shopwaive's development team at <support@shopwaive.com>


# Zapier

Optimizing your CRM has never been easier with the Shopwaive API and Zapier

{% hint style="info" %}
Don't have a Zapier account? If you prefer, you can choose to use Shopify Flow to create your automations. See [Shopify Flow](/shopify/shopify-flow)
{% endhint %}

## Deposits and debits

Trigger an event like customer credit top ups that deposit credits based on customer actions, such as when customers purchase a Product or SKU, or pay an invoice. For example, after customers purchase X quantities of product XYZ, then a credit deposit of Y is automatically made to the customers account.&#x20;

{% hint style="info" %}
For example, after customers purchase A quantities of product B, then a credit deposit of C is automatically made to the customers account.&#x20;
{% endhint %}

{% hint style="success" %}
Another example, a customer pays an invoice in the amount of Y and their credit account is automatically topped up by X\*Y, Y, or Z amount, where X is any multiplier you define, Y is the amount of the invoice paid, and Z is any amount you choose.
{% endhint %}

### Multipliers

You can also include multipliers, such that the amount of credit deposited is a multiple of the Order or Line Item subtotal that triggered the top up.&#x20;

> For example, your customer purchased five units of SKU #90183749 for a subtotal of $45.10 USD. This SKU was defined in a Shopwaive Trigger with a multiplier of 10 to top up a customers credit balance.

In the example above, the customer's available credit balance is increased by $451.00 USD. If you'd like a 1:1 exchange for purchases and deposits, then use a multiplier of 1.

## Setup a trigger

There are several ways to setup Shopwaive Triggers for your store. You can use any of the three [Shopify Flow Triggers](/shopify/shopify-flow#triggers), the [Shopwaive API](https://api.shopwaive.com/) (development required), or setup a [Zapier](https://zapier.com/) zap no-code required. On Zapier, we have the <mark style="color:blue;">**Balance Updated**</mark> trigger available to power your work flows, along with several action events like Get available balance, Set available balance, and Increment available balance.

### With Shopify Flow

This option is no-code and takes advantage of the Shopwaive Triggers and Actions available on Shopify Flow. Make an [HTTP POST](/shopify/shopify-flow#http-post) to the [Shopwaive API](https://api.shopwaive.com/) to trigger a Flow, or listen to [balance change events](/shopify/shopify-flow#balance-change) to power a flow.

### With API or NPM package

This option requires your development team to make requests to the API or using the [@shopwaive/credit](https://www.npmjs.com/package/@shopwaive/credit) NPM package while listening or subscribing to your platform's webhook events. To learn more [contact](mailto:undefined) our team.

### With Zapier&#x20;

This option is also no-code, however, you do need a [Zapier](https://zapier.com/) account with Premium access to Shopify events. To setup a zap that triggers a top up, follow this [guide](https://cdn.shopify.com/s/files/1/0605/5765/6280/files/Zapier_for_Product_Purchase_Topup_with_Shopwaive.pdf?v=1686517077).

{% embed url="<https://zapier.com/shared/5408e7f755187921ff3f5760eb928b51f808b37a>" %}

{% embed url="<https://zapier.com/shared/129fca8fe6a333baacbef490747399d211e350a4>" %}

{% embed url="<https://zapier.com/shared/668c38fd658b512312ef1811448894f4902b0b64>" %}

{% embed url="<https://zapier.com/shared/b2fe77fc9720a0eaee0d7aec95050fd6f6f1c6a4>" %}

{% embed url="<https://zapier.com/shared/f0e83c2f52687703fd25b78157e20dee1444b2fd>" %}


# B2B Requests & Approvals

Brands can now leverage Shopwaive's B2B requests and approvals (RFA) business solution for handling vendor and 3rd-party deposits, credits, and debits

{% hint style="info" %}
Requests and approvals (RFA) business suite is an extension available only upon request to our B2B partners. Contact our [sales team](mailto:undefined) to learn more
{% endhint %}

{% hint style="info" %}
The following information assumes you are familiar with importing customer data into Shopwaive. For help understanding how to import customer data, refer to [Import accounts](/shopify/accounts/import-accounts)&#x20;
{% endhint %}

## Getting started

Before you begin, if you do business with both B2B and D2C customers, you'll need to contact Shopify to enable Discounts and Gift Cards on your Blended store. [Learn more](https://help.shopify.com/en/manual/b2b/blended-and-dedicates-stores)

<figure><img src="/files/ORm8IhEIPk8Za3qGPE5t" alt=""><figcaption><p>When getting started for B2B, you need to enable Gift Cards and Discounts on Blended stores by reaching out to Shopify</p></figcaption></figure>

## B2B 3rd-party Businesses and Vendors

First, you can provide a link to your B2B vendor portal url via email or list it on your website for easy and quick access by your business partners. Contact our team to receive your dedicated B2B vendor portal URL. They'll visit your portal and provide their contact information, download the template, and drag and drop their account adjustments into your queue.&#x20;

After you signup and subscribe to Shopwaive Checkout, your vendor portal can be reached by vendors at:

<https://app.shopwaive.com/?headless=true\\&shop=**yourshopifyurl.myshopify.com**\\&rfa=1>

> For example, vendors of Surf San Diego LLC can submit RFAs at:
>
> <https://app.shopwaive.com/?headless=true\\&shop=**surf-san-diego.myshopify.com**\\&rfa=1>

<figure><img src="/files/0AGFJqE5eawFQvS4MHIC" alt=""><figcaption><p>An example B2B Vendor portal as viewed by one of your vendors or customers </p></figcaption></figure>

RFA requestors will choose an RFA submission type. Submissions can either **Assign** new balances (overrides existing or current available balance) or they can **Increment** existing balances. Typically recurring requests (i.e. 1st day of each month) or promotional related submissions will use the **Increment** type such that the submission will add new credit to a customers existing balance.

<figure><img src="/files/1uOuVwU5cVGEcguChLbg" alt=""><figcaption><p>Vendor selected to increment balances and is ready to submit for review</p></figcaption></figure>

Upon completing the submission, they'll receive a notice their submission is currently under review and you'll receive one that it has been added to your queue automatically set to **Pending** status.

<figure><img src="/files/GjDV8OLPuxv61tZrgaBc" alt=""><figcaption><p>RFA successfully submitted for review</p></figcaption></figure>

## Notifications show RFAs in queue

To review your queue, just open Shopwaive and if you have RFAs waiting to be reviewed you will see them in your list of notifications at the top of the page.

<figure><img src="/files/eKkdpePeOVluoMi8fgdZ" alt=""><figcaption><p>Pending RFAs will be listed in your notifications to review  </p></figcaption></figure>

## Review RFA submissions

To review the in queue RFAs, simply click **Review** or anywhere on the listed item row from the Notifications popup. The review panel will populate.

<figure><img src="/files/MO6G4Iu6YSNimUwl556y" alt=""><figcaption><p>RFA review panel as viewed by an admin or team member</p></figcaption></figure>

## Approve, reject, or approve with changes

You have the option to **approve**, **reject**, or **approve with changes** the RFA submission. If you make edits to the submission, including deleting rows, adding notes, or editing credits you need to export the new data set using the **Export** button. You can then drag the exported file back into the drag and drop panel to reload the modified RFA.&#x20;

<figure><img src="/files/bYgRG9ceyKxE74Cnhjpk" alt=""><figcaption><p>If you choose to make changes, drag and drop the new file into the review panel</p></figcaption></figure>

When you are satisfied, you can accept and import the transactions which take effect immediately. Most imports take effect within seconds. For large datasets with new customers without a previous account, allow an additional 2 seconds per new account. For each new customer you can estimate the time to complete using this formula:&#x20;

**No. of&#x20;*****new*****&#x20;customers** x **2 seconds** = ETA to complete

> 1000 x 2 seconds = 2000 seconds / (60 seconds / 1 minute) = Est. 33 mins to import 1000 new customers

## Create an email that sends the RFA status change

When the RFA status changes, you may optionally choose to send an email from your branded sending domain. If approved, they'll receive a basic email message indicating their RFA is approved. You'll have the option to edit a custom message before sending the approval notice if you'd like to make changes to the messaging (see below).

Likewise, you can also continue conversation with your vendor if further action is required, i.e. if RFA is rejected initially, you may request a new RFA to be submitted with requested changes. If you opt to not notify your vendor by email, simply click the Close button at the top left of the page to discard the email draft.

<figure><img src="/files/2TFK1E9fa2Pm4eWxJyg4" alt=""><figcaption><p>RFA approval email</p></figcaption></figure>

## Vendor access tokens

You can limit your 3rd party vendors access to your portal and organize their requests with access tokens, notes, and tags.&#x20;

{% hint style="success" %}
Contact our team to learn more at <sales@shopwaive.com>
{% endhint %}

<figure><img src="/files/I14aR5tqNNDQfNEK0KIJ" alt=""><figcaption><p>3rd-party login with access tokens, notes, and tags</p></figcaption></figure>


# Referrals and Affiliates

New! Brands can now launch their own referral program. How does it work? Customers and affiliates share their unique referral link to earn rewards when new customers sign up

{% hint style="success" %}
Shopwaive's Referral program empowers your loyal customer base and affiliates to share your brand with new potential customers through vlogs, social, messaging, and email channels
{% endhint %}

{% hint style="info" %}
While the default settings will be best suited for most, you have the option to customize your Referral program settings however you like, for example define the Affiliate Commission earn rate and affiliate discount value
{% endhint %}

Shopwaive's powerful referral and affiliate program allows you to easily setup affiliate payments with the Shopwaive <mark style="color:blue;">**Earn Commission**</mark> action available in Shopify Flow. Just simply connect the <mark style="color:blue;">**Earn Commission**</mark> action to the <mark style="color:blue;">**Order created**</mark> trigger, and you're set! Just add the Order ID using liquid syntax that's passed down from the <mark style="color:blue;">**Order created**</mark> trigger.

<figure><img src="/files/aId3P59wm8bBYxjQZCUu" alt=""><figcaption><p>Add the <mark style="color:blue;"><strong>Earn Commission</strong></mark> action downstream of the <mark style="color:blue;"><strong>Order created</strong></mark> trigger in Shopify Flow</p></figcaption></figure>

## Referral orders

When new potential customers visit your site and make a purchase with an affiliates' unique discount code or referral link; the affiliate receives commission at a fixed percentage of the sale value after discounts. If an order is cancelled or refunded, you can use Shopwaive's reversal actions like <mark style="color:blue;">**Void deposits**</mark> and <mark style="color:blue;">**Refund balance**</mark> to reverse the earned and/or redeemed credit.

With Shopwaive's New customer accounts app extension, each affiliate gets a dedicated Affiliate and Commission dashboard that provides all of their metrics, referral link, and unique discount code.

<figure><img src="/files/cfzaPge2dV1sh8Sinzi7" alt=""><figcaption><p>Shopwaive's Affiliate and Referral Program dashboard for New customer accounts</p></figcaption></figure>

Making changes to your desired commission structure is easy and simple. Just visit the Referral panel in the Shopwaive app, and select the Affiliate earn rate and discount value.

<figure><img src="/files/M7JpyPh7o1THM155pqyq" alt=""><figcaption><p>Define your Commission Structure like earn rate and referral discount value in the Shopwaive app</p></figcaption></figure>

{% hint style="info" %}
A particularly powerful aspect of Shopwaive's Affiliate and Referral program is that it connects with all other Shopwaive touchpoints, like [Checkout extensions](/shopify/checkout-extensions), [Shopify POS](/shopify/shopify-pos), [Upsells](/shopify/upsells), [Cash Outs](/shopify/cash-outs) and more. This means affiliates can mix-and-match on redemption, i.e. redeem a portion of their commission on merchandise (if they prefer) and for the remainder opt to receive a direct deposit into their connected bank account or debit card
{% endhint %}

## Referral signups

Each of your customers and affiliates are assigned a unique referral link; if new customers sign up using their link you can select to reward one or both parties from the Referral program settings shown below.  You can even choose to expire the reward after a given amount of time or select to never expire.

<figure><img src="/files/5r1OkTKUYvUPR4vkNTLJ" alt=""><figcaption><p>Enable the referral program to begin</p></figcaption></figure>

Next, enter a description of the reward, or you can leave this blank. You can use the <mark style="color:blue;">`{{credit}}`</mark> merge tag to place the amount of the reward anywhere in the description text. &#x20;

<figure><img src="/files/4GF3VJFrmn8luDog8eiU" alt=""><figcaption><p>Enter a description, url path, and CSS query selector. Then click Save</p></figcaption></figure>

Next, enter your landing page url path where your new potential customers will sign up on your website. For example, the path <mark style="color:blue;">**/account/register**</mark> is a common landing page for new account sign ups, but your sign up page path could be different. If you have multiple sign up pages, simply enter a single forward slash <mark style="color:blue;">**/**</mark> for the path.

Next, choose your CSS query selector. This is the selector of the form, html, or button submitted when your customers create their account on your site. If you're unsure, just reach out to us, we can help.

Finally, just click Save. Now your Referral program is live and customers and affiliates can start earning rewards on each referral.

{% hint style="info" %}
After turning on the Referral program, developers can use the [GET Customer API endpoint](https://api.shopwaive.com/reference/rest-api-documentation/customer-api#get-customer-endpoint) to fetch the unique referral links of customers and affiliates and display them on their account page or in email notifications, for example
{% endhint %}


# Cash Back and Loyalty

Shopify Plus merchants can create a bespoke Cash Back and Loyalty program with Shopwaive in just a few minutes (and only a few clicks)

{% hint style="success" %}
There are many different workflows and options available, in the example below we walk through setting up a Cash Back Loyalty program. For more automations you can achieve and other helpful tips see [Shopify Flows](/shopify/shopify-flow) or [download examples](https://storage.googleapis.com/steel-spark-359918.appspot.com/Shopify%20Flows%20Shopwaive.zip) of our Shopify Flows
{% endhint %}

{% hint style="info" %}
For a more advanced Loyalty program that incorporates more complexity with tiered, paid, or earned membership, [download these Shopify Flow templates to get started](https://cdn.shopify.com/s/files/1/0651/7650/2517/files/Loyalty_ba7afebc-e0f4-41c2-b58c-9e4921814522.zip?v=1728661763). The Loyalty program templates use Shopify Flow that automates updates to metafield definitions, customer segments, and tags to create monthly recurring deposits, earned cash back deposits, Welcome deposits, Birthday deposits, and Loyalty program anniversary deposits. Please contact <support@shopwaive.com>, we're glad to setup a custom advanced loyalty program that meets your precise business requirements
{% endhint %}

## Getting started

Cash Back and Loyalty programs are made easy with Shopwaive's integration with Shopify Flows. Trigger deposits when Orders are placed, on a recurring cycle, and much more. Shopify Flows allows merchants to unlock powerful workflows that are triggered by events, such as when an order is placed customers receive a cash back, discount incentive, or reward

## Create a Cash Back program

Connecting Shopwaive to Shopify Flows assumes you have already installed the app on your store and purchased a subscription plan. Learn more about our [pricing plans](https://www.shopwaive.com/pricing) and [features](/shopify/features).

{% hint style="info" %}
For this example, we will create a Cash Back Rewards flow that deposits 20% cash back on each purchase, or for only specific SKUs, variants, or those defined in a specific collection. You can even set a minimum purchase requirement
{% endhint %}

Follow these steps to create a Cash Back Loyalty program:

**Step 1:** Add the **Order created** trigger, which will activate the flow to run when an order is created

<figure><img src="/files/1ElFl2HfPo7MmLx7cZM0" alt=""><figcaption><p>For this example, the flow will trigger when an order is created</p></figcaption></figure>

**Step 2:** Click the **Then** plus icon on the **Order created** trigger, select **Condition**, select **If all conditions are met** from the dropdown, and then choose **Add criteria**

<figure><img src="/files/qYMVJCalDECCAZxGNZ8d" alt=""><figcaption><p>Choose Then <strong>Condition</strong> for the <strong>Order created</strong></p></figcaption></figure>

**Step 3:** Choose **Order**, and then **fullyPaid**

<figure><img src="/files/GXwf8LPplxZI73XHJzz3" alt=""><figcaption><p>Choose <strong>Order</strong> and <strong>fullyPaid</strong></p></figcaption></figure>

**Step 4:** Select **Equal to** and **True**

<figure><img src="/files/NwZkkvrh9O7NgkmGo5g4" alt=""><figcaption><p>Select <strong>Equal to</strong> and <strong>True</strong> for the order.fullyPaid attribute</p></figcaption></figure>

**Step 5:** Select **Then** and choose **Action** then select the **Shopwaive** app

<figure><img src="/files/TZv8mfdNZe4ouQXZ3hmb" alt=""><figcaption><p>If the condition is True, select a Shopwaive action to run</p></figcaption></figure>

**Step 6:** Choose the **Increment balance** action from the Shopwaive actions list. Next you'll select **Add a variable** to the <mark style="color:blue;">amount</mark> input field.&#x20;

An example of this is shown below, when an <mark style="color:blue;">Order created</mark> is set as the trigger, you can optionally choose the **order**.**totalPriceSet.presentmentMoney.amount** as a dynamic variable for the <mark style="color:blue;">amount</mark>. Then, you can choose a multiplier to multiply this by any value, for 20% cash back on every purchase we choose **0.2**. You can add any note when this transaction occurs, your customers can view this in their transaction history after logging into their account.

{% hint style="info" %}
If you choose to add the **order.fullyPaid** is <mark style="color:blue;">**TRUE**</mark> condition, keep in mind some orders may first go through an Authorized state before being promoted to fully paid status. To capture these delayed paid orders, be sure to not include the order.fullyPaid condition in your work flow
{% endhint %}

<figure><img src="/files/1ElFl2HfPo7MmLx7cZM0" alt=""><figcaption><p>Add the Increment balance action</p></figcaption></figure>

**Step 7:** Next, choose your audience for the 20% Cash Back program. You can choose an entire customer segment by providing the customer <mark style="color:blue;">segment\_query</mark> or you can choose a single customer by providing the email. Note that you need to choose between <mark style="color:blue;">customer\_email</mark> OR <mark style="color:blue;">segment\_query</mark>, but not both. Whichever you choose, leave the other input blank. The former selects a single customer while the latter selects a group of customers in a segment (if any exists). In this example, we chose to limit the 20% Cash Back program to only customers that are tagged with **FALL2023**.&#x20;

{% hint style="success" %}
If you choose to use the segment\_query, ensure you follow the same query syntax you use to define Customer segments in the Shopify Admin, for example **customer\_tags CONTAINS 'FALL2023'**. Note that in this query definition the tag is enclosed with single quotes
{% endhint %}

{% hint style="info" %}
Variable syntax is supported in Shopify Flows, which means you can use data from an action upstream in the flow like an email address from a draft order that was created **{{draftOrder.email}}** or the shop's contact email address **{{shop.contactEmail}}**, as a few examples
{% endhint %}

You are done! Now select **Apply changes** and **Turn on your flow**. Place a test order and check to see your Cash Back rewards are deposited.

## Debits for Order cancellation <a href="#debits-for-order-cancellation" id="debits-for-order-cancellation"></a>

{% hint style="info" %}
Want to automatically remove the earned credit or cash back if an Order is cancelled? No problem. You now have two options. Use the new [<mark style="color:blue;">**Void deposits**</mark>](/shopify/shopify-flow) and [<mark style="color:blue;">**Refund balance**</mark>](/shopify/shopify-flow) actions on Shopify Flow, or follow the steps below to implement a basic Order cancellation flow.
{% endhint %}

If an order is cancelled, previously earned cash back may be something you wish to void. We will simply modify the earned credit or cash back flow so that it is triggered by Order cancellation instead of Order created webhook, and then change the increment value to an equivalent negated amount as the original order (original increment amount times -1). An example of the flow is shown below. Or, simply [import the flow template](https://cdn.shopify.com/s/files/1/0651/7650/2517/files/Order_Cancellation_Debit_-_20_Cashback_on_every_purchase.flow?v=1720458551) into the Shopify Flow app.

<figure><img src="https://docs.shopwaive.com/~gitbook/image?url=https%3A%2F%2F1743155819-files.gitbook.io%2F%7E%2Ffiles%2Fv0%2Fb%2Fgitbook-x-prod.appspot.com%2Fo%2Fspaces%252F6HSAZj4RDucpQwVtzMYt%252Fuploads%252FTg2ZI56NPi5oe2iNTIwi%252FOrderCancelled.png%3Falt%3Dmedia%26token%3D1aba6b51-9e0f-40e9-9b4c-e0d49ff2d3f4&#x26;width=768&#x26;dpr=4&#x26;quality=100&#x26;sign=96ecc71b&#x26;sv=1" alt=""><figcaption><p>Order cancellation that processes a debit in the amount of previous earned cash back</p></figcaption></figure>

**For Overachievers:** This next step is only for the overachievers that need to earn that "extra credit" 🎉

Further constrain your Cash Back program to only make 20% cash back deposits on every purchase **IF** the minimum purchase amount is met. Simply click the **Condition** block created in **Step 2** above, and were just going to add another criteria **order.subtotalPriceSet.presentmentMoney.amount** is **Greater than 100**. Now, only orders with subtotals that are greater than $100 will trigger the Cash Back deposit. Depending on your Cash Back program preference, you can choose totals using **totalPriceSet** instead of **subtotalPriceSet**

<figure><img src="/files/7VxN5pZ0cjeccUyihemH" alt=""><figcaption><p>Minimum order for 20% Cash Back program</p></figcaption></figure>


# Shopify POS

Shopwaive syncs with Shopify POS enabling your employees to apply customer credit or invoice charges to in-store purchases with a single button press

{% hint style="success" %}
With Shopwaive, you have many Smart Grid Tiles to choose from on Shopify POS. From <mark style="color:blue;">Send Gift Cards</mark>, <mark style="color:blue;">Redeem Gift</mark> <mark style="color:blue;">Cards</mark>, <mark style="color:blue;">Debit</mark>, <mark style="color:blue;">Offers</mark>, <mark style="color:blue;">Refund</mark>, <mark style="color:blue;">Admin</mark>, <mark style="color:blue;">Invoice</mark>, and the <mark style="color:blue;">Shopwaive</mark> Loyalty app Smart Grid Tile. If you have questions regarding any of our Smart Grid Tile solutions, just send us a quick message at <support@shopwaive.com> or in the in-app chat, we're here to help
{% endhint %}

## Smart Grid Tiles

Choose from any number of Shopwaive Smart Grid Tiles on Shopify POS that precisely solve your complex business work flows. Need to send a gift card in an email or redeem a credit as a gift card, all from the Shopify POS cart? We got you covered. Need a robust NET 30 Buy Now Pay Later solution on POS, look no further than Shopwaive's Invoice tile. We're glad you're here and ready to support.

First, begin by adding the <mark style="color:blue;">**Account**</mark> Smart Grid Tile to your POS cart. This tile is the primary universal tile that displays a customer's balance, and allows for redemption for in-store checkout on the POS cart.

<table data-view="cards" data-full-width="false"><thead><tr><th></th><th></th><th data-hidden></th><th data-hidden data-card-cover data-type="files"></th><th data-hidden data-type="rating" data-max="5"></th><th data-hidden data-card-target data-type="content-ref"></th></tr></thead><tbody><tr><td><p><mark style="color:blue;"><strong>Account</strong></mark></p><p><strong>Shopify POS UI Extension</strong></p></td><td>Redeem store credit and earn with Shopwaive loyalty </td><td></td><td><a href="/files/muidwYq8vni97HCR95CA">/files/muidwYq8vni97HCR95CA</a></td><td>5</td><td><a href="https://docs.shopwaive.com/shopify/shopify-pos-credit#loyalty-program-for-shopify-pos">https://docs.shopwaive.com/shopify/shopify-pos-credit#loyalty-program-for-shopify-pos</a></td></tr><tr><td><p><mark style="color:blue;"><strong>Refund</strong></mark></p><p><strong>Shopify POS UI Extension</strong></p></td><td>Refund or create a credit deposit for any custom amount</td><td></td><td><a href="/files/muidwYq8vni97HCR95CA">/files/muidwYq8vni97HCR95CA</a></td><td>5</td><td><a href="https://docs.shopwaive.com/shopify/shopify-pos-credit#refund-with-shopify-pos-smart-grid">https://docs.shopwaive.com/shopify/shopify-pos-credit#refund-with-shopify-pos-smart-grid</a></td></tr><tr><td><p><mark style="color:blue;"><strong>Admin</strong></mark></p><p><strong>Shopify POS UI Extension</strong></p></td><td>Use with Shopwaive Invoicing. Override a NET 30 limit </td><td></td><td><a href="/files/muidwYq8vni97HCR95CA">/files/muidwYq8vni97HCR95CA</a></td><td>5</td><td><a href="https://docs.shopwaive.com/shopify/shopify-pos-invoicing#define-an-admin-pin-and-set-invoice-limits">https://docs.shopwaive.com/shopify/shopify-pos-invoicing#define-an-admin-pin-and-set-invoice-limits</a></td></tr><tr><td><p><mark style="color:blue;"><strong>Invoice</strong></mark></p><p><strong>Shopify POS UI Extension</strong></p></td><td>Create NET 30 Buy Now Pay Later charge accounts</td><td></td><td><a href="/files/muidwYq8vni97HCR95CA">/files/muidwYq8vni97HCR95CA</a></td><td>5</td><td><a href="https://docs.shopwaive.com/shopify/shopify-pos-invoicing">https://docs.shopwaive.com/shopify/shopify-pos-invoicing</a></td></tr><tr><td><p><mark style="color:blue;"><strong>Redeem Gift Cards</strong></mark></p><p><strong>Shopify POS UI Extension</strong></p></td><td>Redeem as a gift code, all from the Shopify POS Cart</td><td></td><td><a href="/files/muidwYq8vni97HCR95CA">/files/muidwYq8vni97HCR95CA</a></td><td>5</td><td><a href="https://docs.shopwaive.com/shopify/shopify-pos-credit#gift-cards-in-shopify-pos">https://docs.shopwaive.com/shopify/shopify-pos-credit#gift-cards-in-shopify-pos</a></td></tr><tr><td><p><mark style="color:blue;"><strong>Send Gift Cards</strong></mark></p><p><strong>Shopify POS UI Extension</strong></p></td><td>Create Gift cards and send them in an email</td><td></td><td><a href="/files/muidwYq8vni97HCR95CA">/files/muidwYq8vni97HCR95CA</a></td><td>5</td><td></td></tr></tbody></table>

{% hint style="info" %}
Need a custom solution? Reach out to us at <mark style="color:blue;">**<support@shopwaive.com>**</mark> and we'll build it
{% endhint %}

{% hint style="info" %}
**Tip:** You can add Shopwaive Smart Grid tiles on the Shopify POS cart page to process invoice charges, store credit, refunds, returns, and exchanges. This guide discusses how to give store credit to customers with Shopify POS, if instead you wish to allow customers to charge to an invoice, see [Shopify POS Invoicing](/shopify/shopify-pos/invoicing)
{% endhint %}

<figure><img src="/files/VQzwED32f8MlzgfV4q0b" alt=""><figcaption><p>Checkout with Shopwaive in-store with Shopify POS Smart Grid tiles</p></figcaption></figure>

## Settings

To use Shopwaive with Shopify POS follow the steps outlined below. First, enable the Shopify POS setting toggle. To do this, follow these steps

Open the app and click the left menu item labeled <mark style="color:blue;">**Settings**</mark>

<figure><img src="/files/9yVocGD3cAPSQEDSin7y" alt="Shopify POS Invoice and Accounts Receivable"><figcaption><p>Go to settings by clicking the gear icon in the left side menu panel</p></figcaption></figure>

Once you click <mark style="color:blue;">**Settings**</mark>, scroll down and toggle on the <mark style="color:blue;">**Shopify POS**</mark> setting. If you also wish to use Shopwaive's Invoice and Accounts Receivable services for Shopify POS, go ahead and enable this settings as well. Shopwaive's Invoice and Accounts Receivable services for Shopify POS are built exclusively for brick and mortar shops and works in the reverse way of Shopwaive Store Credit. See [Invoicing and Accounts Receivable](/shopify/shopify-pos/invoicing) for a more detailed description of the differences.

{% hint style="success" %}
When you enable Shopwaive's Shopify POS Invoicing services, Shopwaive's Store Credit services will be automatically disabled. For merchants with both in-store and online sales channels or those that wish only to provide a store credit, points, or loyalty program for their customers, its recommended to disable Shopify POS Invoicing
{% endhint %}

## Checkout with Shopify POS — Step-by-step:

1. Install the Shopwaive: Credit, AI, & Upsell app from the [Shopify App Store](https://apps.shopify.com/shopwaive)
2. Add the Shopwaive <mark style="color:blue;">**Account**</mark> Smart Grid tile to your cart page as shown below
3. Scan items or search and add items to the cart
4. Search for your customer by email and add them to the cart. If your customer does not yet exist, click the <mark style="color:blue;">**Add customer**</mark> tile and include their email address, then click <mark style="color:blue;">**Save**</mark>
5. If the customer has an available balance, then it will appear as "Balance $435.55" for example, in the <mark style="color:blue;">**Account**</mark> tile on the cart page
6. In the example below, if you click "Balance $435.55", the available balance will be applied to the order. Only the amount required will be deducted from the customers available balance
7. You can press the <mark style="color:blue;">**Clear cart**</mark> or <mark style="color:blue;">**Remove discount**</mark> tile at anytime to remove the applied balance from the purchase. The balance is only deducted from the customers account after the order financial status changes to **Paid**
8. Similarly, add the <mark style="color:blue;">**Refund**</mark> and <mark style="color:blue;">**Debit**</mark> tiles to perform deposits and debits on the customer's balance all from the POS cart.

{% embed url="<https://storage.googleapis.com/steel-spark-359918.appspot.com/POSDEMO.mp4>" %}
Add the <mark style="color:blue;">**Account**</mark>, <mark style="color:blue;">**Refund**</mark>, and <mark style="color:blue;">**Debit**</mark> tiles to perform convenient actions all from the POS cart
{% endembed %}

## Actions with Shopify POS

Though you can manually issue [store credit](#give-store-credit-manually) or use [Bulk import](/shopify/accounts/import-accounts) for any miscellaneous reason, you can also issue a balance or deposit inside the Shopify POS app based on scanned item value while processing a combination of return, exchange, and new purchase. You can perform many actions within Shopify POS with a single press of a button using various Smart Grid tiles design by Shopwaive, such as the <mark style="color:blue;">**Account**</mark>, <mark style="color:blue;">**Refund**</mark>, and <mark style="color:blue;">**Debit tiles**</mark>

To begin, add the <mark style="color:blue;">**Account**</mark>, <mark style="color:blue;">**Refund**</mark>, and <mark style="color:blue;">**Debit**</mark> Shopwaive tiles to your Shopify POS Smart Grid.&#x20;

<div data-full-width="false"><figure><img src="/files/6iLQUO1v0n37QS4w1Z5V" alt=""><figcaption><p>Add the <mark style="color:blue;"><strong>Account, Refund,</strong></mark> and <mark style="color:blue;"><strong>Debit</strong></mark> Smart Grid tiles to the Shopify POS cart</p></figcaption></figure></div>

## Redeem with Shopify POS Smart Grid

After adding the <mark style="color:blue;">**Account**</mark> tile, customers can redeem their available account balance if you press the <mark style="color:blue;">**Account**</mark> tile. This will apply the customer's available balance up to the amount required to cover the total due. If the available balance does not cover the full cost, the total due will be reduced by their available balance and the customer will be required to provide another form of payment to pay the remainder.

## Refund with Shopify POS Smart Grid

Customers can be refunded for items they return to your store by pressing the <mark style="color:blue;">**Refund**</mark> tile. You simply add the items to the Shopify POS cart by searching for them in your product catalog or by scanning them into Shopify POS using the product barcode. Then add the customer to the cart, if they do not exist, add them as a new customer and include their email address. The Refund tile will always equal the grand total of the customer's items in the Shopify POS cart. This makes it super easy to refund based on scanned value of an item, without the need for a receipt, order history, etc.  For a miscellaneous refund amount, you can complete a custom sale.

{% hint style="info" %}
If completing a refund and new purchase simultaneously, after completing the <mark style="color:blue;">**Refund**</mark>, you simply can remove the refunded items and the customer from the cart, and then add the new purchase items to the cart. Removing the items associated with the refund from the cart does not remove or effect their balance, we simply temporarily scanned them into the cart to capture an accurate value to credit the customer. After completing the <mark style="color:blue;">**Refund**</mark>, removing the customer and then adding them back to the Shopify POS cart will refresh their available balance that will appear in the <mark style="color:blue;">**Account**</mark> tile
{% endhint %}

For issuing credit refunds based on a specific order, you can do this at anytime by visiting the Order Details page of the order you wish to refund within the Shopify admin. Click the <mark style="color:blue;">**More Actions**</mark> button at the top right of the Order page, and select <mark style="color:blue;">**Give credit**</mark>

## Debit with Shopify POS Smart Grid

You can debit a balance from a customers account by performing the same actions as with a refund, and instead, press the <mark style="color:blue;">**Debit**</mark> tile. Add items to the Shopify POS cart. Then add the customer to the cart, if they do not exist, add them as a new customer and include their email address. If the customer is not new, but does not have an email address on file, you will need to add it before proceeding. The amount that will be removed from a customer's available balance is equivalent to the grand total in the Shopify POS cart. For a miscellaneous amount, you can complete a custom sale. A customer's available balance can never be less than 0.

{% hint style="info" %}
After processing a refund or debit to an account, remove the customer from the cart and then add them back to get the latest available balance to reflect on the <mark style="color:blue;">**Account**</mark> tile before proceeding to process the order
{% endhint %}

<figure><img src="/files/sHovfBHHEtLRJUid6rx3" alt=""><figcaption><p>Debit a customer's balance with the <mark style="color:blue;"><strong>Debit</strong></mark> tile, redeem with the <mark style="color:blue;"><strong>Account</strong></mark> tile</p></figcaption></figure>

In the example above, the grand total of the customer's cart is equal to $12.76. The <mark style="color:blue;">**Refund**</mark> and <mark style="color:blue;">**Debit**</mark> tiles equal +$12.76, and -$12.76, respectively, indicating the customer's balance can be increased or decreased by the value of the items in the current cart session. If more items are added or removed from the cart, the value of these tiles will change to match, and will always remain in-sync with the current cart value.

Before these tiles will be available to take action, you first need to add a customer to the cart. New or existing customer's must have an email address. If they currently do not have an email address on file, you can add one by asking your customer to provide this information and entering the email address on their customer profile within the Shopify Admin or using the Customers tab within Shopify POS.

The <mark style="color:blue;">**Account**</mark> tile is equal to $435.55, this is the customer's existing balance available for redemption, and is independent of the current Shopify POS cart value. After processing a refund or debit of credit, remove the customer from the cart and then add them back to get the latest available balance to reflect on the <mark style="color:blue;">**Account**</mark> tile before proceeding to process the order.

## Loyalty Program for Shopify POS

Shopwaive's Loyalty program for Shopify and Shopify POS allow you to create custom automations, eligibility rules and conditions, expirations, and much more. Double points, custom redemption ratios and currencies, exclusions on products and collections, Membership perks and tier-based rewards are all easy to achieve with Shopwaive and POS.

<figure><img src="/files/bX0MQHdztcxTwyiyccaq" alt=""><figcaption><p>Create a Points loyalty and rewards program and choose tiers and redemption multipliers</p></figcaption></figure>

In the example above, the Shopwaive app settings are setup as a Loyalty and Rewards Theme, where points are earned at rate you define and redeemed in increments that you also define. In this case, the redemption increment is set to 100 points, this means rewards can only be redeemed in increments of 100 points.&#x20;

<figure><img src="/files/8kniZOgt197rNb47VQNs" alt=""><figcaption><p>Redemption increment setting is defined on the Design tab</p></figcaption></figure>

For the Loyalty and Rewards Theme defined on the Settings page, you can also select a multiplier for redemption and multiplier for display. The difference is the former is the ratio of points required to redeem a single unit of presentment currency at the time the reward is redeemed. For example, a multiplier of redemption of 20, would be 20 points is required to redeem $1 USD, if the stores presentment currency is USD. The latter is only for displaying purposes and represents the ratio of earned points to the customers actual available balance. A multiplier of display of 20 would mean a customer balance of 100 points would be displayed as 2,000 points at the time of checkout. You can combine multipliers for both options to create a uniquely defined rewards program.

<figure><img src="/files/AvvjDClsZbD6Kqmc7qSb" alt=""><figcaption><p>Multipliers and Theme types are defined on the Settings page</p></figcaption></figure>

If you are using the Loyalty and Rewards program, you may wish to also choose a custom suffix, such as <mark style="color:blue;">**points**</mark>.

<figure><img src="/files/UzxmIwdr55QG7GPIQrUt" alt=""><figcaption><p>Choose custom prefix and suffix for display</p></figcaption></figure>

Here's a few examples of the Smart Grid Loyalty Program with Shopwaive. Feel free to reach out to our team to learn how to add the Loyalty app Smart Grid Tile, update your settings to get started. You can launch your own custom loyalty program and design it exactly to your specifications in just a matter of minutes. Then, its all automated without any upkeep or changes needed.

First, import the Loyalty Program Shopify Flow. Here's an [example template](https://cdn.shopify.com/s/files/1/0651/7650/2517/files/Cashback_Rewards_Program_by_Shopwaive.flow?v=1718571960) that you can import on your store from within the Shopify Flow app.&#x20;

You can modify this automation template anyway you wish or reach out to our team and we can help customize the template to meet your precise eligibility requirements. The Shopify Flow does one job, when an Order is created, it checks if items that were purchased are eligible for Earned points, if so it tags the Order so can easily keep track which orders were credited with points, and it deposits points to the customers' Shopwaive account balance.

<figure><img src="/files/8RmFXhu1Tbkcm4Gr0u21" alt=""><figcaption><p>Loyalty Rewards Program example for earning points or cash back with Shopify POS</p></figcaption></figure>

The template checks if the Order was completed with Shopify POS, if you only want the the Program to be eligible for Shopify POS and exclude Online sales, then this condition is available to only deposit points for Shopify POS orders. Also, it checks if the customer has created an account with your store. They're required to have an email on file for Shopwaive to deposit points or cash back. The example template also checks if products purchased contain the word SERVICES in the title. This is just an example, but you can check Collection IDs, Product IDs, titles, and much more to exclude/include product type purchases for points. Finally, the flow uses Shopwaive's Increment balance action to increment the customers balance for eligible products that were purchased.

<figure><img src="/files/2osCpiAdVSioOix0GOx7" alt=""><figcaption><p>Shopwaive's Increment balance action is used to credit a customer with points or cash back within Shopify Flow</p></figcaption></figure>

Notice an additional criteria is checked before a deposit is made. In the <mark style="color:blue;">**Amount**</mark> input field, the customer's tags are checked to determine if they contain <mark style="color:blue;">**VIP**</mark>, if so, then they earn double points, else they earn 1:1.&#x20;

Next, you install Shopwaive from the Shopify App Store and add the <mark style="color:blue;">**Account**</mark> Smart Grid tile to your Shopify POS Home page. Then, add your customer and add items to the cart. If your customer has already earned points, then they are displayed as shown, along with the number of available redemption options (promotions).

<figure><img src="/files/8VNeYNuzCAICxMmy47m7" alt=""><figcaption><p>Loyalty app for Shopify POS displaying customer points and promotions available</p></figcaption></figure>

Within the Shopwaive app, you may choose the following settings:

* Go to your <mark style="color:blue;">**Settings**</mark> page, and choose <mark style="color:blue;">**Loyalty and Rewards**</mark> for Theme <mark style="color:blue;">**Type**</mark>. Then choose <mark style="color:blue;">**1**</mark> for <mark style="color:blue;">**Multiplier for display**</mark> and <mark style="color:blue;">**20**</mark> for <mark style="color:blue;">**Multiplier on redemptions**</mark>.  This is just an example, you can choose any value for these, the default is 1 for both Multiplier types.

{% hint style="info" %}
*Definition*: Multiplier for display. Multiplies a customers current balance by this display setting value, for example, a balance of $100 and Multiplier for display of 2, will display as $200 to the customer.&#x20;

*Definition*: Multiplier for redemptions. By contrast, takes the customers current balance and discretizes it by the Multiplier on redemptions value. For example, a $100 balance with Multiplier on redemptions of 20, is equivalent to a $5 reduction applied to the cart.
{% endhint %}

<figure><img src="/files/hsgqYxRKMh9tJJzi8Rtu" alt=""><figcaption><p>Loyalty app Settings for Shopify POS redemption ration and display</p></figcaption></figure>

* Go to your Design tab, and choose <mark style="color:blue;">**Checkout extension for Shopify Plus**</mark> for the <mark style="color:blue;">**Storefront design**</mark> setting. Scroll down and choose 500 points for <mark style="color:blue;">**Redemption increments**</mark> setting. Ensure to <mark style="color:blue;">**Save all settings**</mark> at the top

<figure><img src="/files/Ff0rHRQFJtYimCKnSEFN" alt=""><figcaption><p>Choose 500 points for the Redemption increments</p></figcaption></figure>

<mark style="color:blue;">**Redemption increments**</mark> are a new feature available for Shopify POS brands that allow you to place limits on increments of redemption. For example, you can design your Loyalty Program as a 1:1 spend/earn ratio, each dollar spent earns 1 point ($1 spent = 1 point earned). Then, if you choose the settings in the example above, 1,278 points will display to the customer on the Smart Grid Tile as precisely 1,278 points, since our Multiplier for display was set to 1 (Balance x Multiplier display = Balance displayed at Checkout, 1,278 x 1 = 1,278 points). Then, when you click on the Smart Grid Tile, the 2 available promotions are shown to your customer to choose. Since the Redemption increments was set to 500 points, the total 1,278 points are not eligible to be redeemed fully, since the customers points must only be redeemed in increments of 500. Therefore, the two promotions are 500 points and 1000 points.

<figure><img src="/files/WVR9yV7UKQbF6wlVbAUU" alt=""><figcaption><p>Redemption increment of 500 points displays multiple offers in increments of 500 points</p></figcaption></figure>

If the 500 points offer is chosen, then a $25 reduction is applied to the cart. This is because a Multiplier on redemptions of 20 was saved in our settings. This means the 500 points / 20 = $25.&#x20;

<figure><img src="/files/n4ZgJBUcfboIuebul9iW" alt=""><figcaption><p>500 points are redeemed resulting in a $25 reduction to the cart</p></figcaption></figure>

Similarly, if 1000 points were redeemed instead, then a $50 reduction would be applied to the cart (1000 points x 1 Multiplier for display / 20 Multiplier on redemptions = $50 reduction).

{% hint style="info" %}
This is a quick introduction to Shopwaive's Loyalty Program with Shopify POS. If you don't see something you need, reach out to our team via the in-app chat, website chat, or directly via email at <support@shopwaive.com> and if we haven't built it already; we're glad to help get you started and support updates and review new feature requests&#x20;
{% endhint %}

## Gift Cards in Shopify POS

Conveniently redeem customer store credit as an alternative form of payment using Gift Cards and Shopwaive's Smart Grid <mark style="color:blue;">Redeem Gift Card</mark> Tile.&#x20;

On the Smart Grid Cart, press **Add tile** > **App** > **Shopwaive: Credit and Payments** > **Redeem Gift Card**

Next, just add your customer and items to the cart. Press <mark style="color:blue;">**View Gift Card**</mark> on the Shopwaive tile to be shown your customers unique redemption code for checkout. Copy and paste this code into the Gift card code field at checkout.&#x20;

{% hint style="success" %}
Simply press the View Gift Card tile on the Smart Grid cart. Then, copy and paste the redemption code (equal to the customers available balance) into the Gift card code field when selecting a form of payment
{% endhint %}

With Shopwaive's Shopify POS Gift Card extension, your customers credit applies toward the full cart costs, inclusive of line item merchandise, taxes, shipping, and fees. Combinations with other forms of payment is made easy with Shopwaive's POS extension, and makes bookkeeping and reporting seamless and organized. Keep track of customer redemption through Shopwaive's unique identifier, that's simple and intuitive to search, filter, export, and segment within the Shopify Admin.

<figure><img src="/files/AJEGQj47hQmhAAREtxAN" alt=""><figcaption><p>Shopwaive Gift Card Extension for Shopify POS - @ lightning speed</p></figcaption></figure>


# Invoicing

Shopwaive syncs with Shopify POS enabling your employees to apply invoice charges and payments to in-store purchases with a single button press

{% hint style="info" %}
**Tip:** You can add Shopwaive Smart Grid tiles on the Shopify POS cart page to process invoice charges, payments, view net 30 terms and much more. This guide is to allow customers to charge to an invoice with Shopify POS, if you wish to issue store credit instead, see [Shopify POS Credit](/shopify/shopify-pos)
{% endhint %}

<figure><img src="/files/COnbHqqsxEmEsvNDLPIb" alt=""><figcaption><p>Invoice in-store payments with Shopify POS Smart Grid tiles</p></figcaption></figure>

## Getting started

Follow this guide to set up Shopwaive's [Invoice and Accounts Receivable](/shopify/shopify-pos/invoicing) services with Shopify POS. First, enable the Shopify POS setting toggle. To do this, open the app and click the left menu gear icon labeled <mark style="color:blue;">**Settings**</mark>

<figure><img src="/files/s8MyECCadMc2vDVGyqXQ" alt="Shopify POS Invoice and Accounts Receivable"><figcaption><p>Go to settings by clicking the gear icon in the left side menu panel</p></figcaption></figure>

Once you click <mark style="color:blue;">**Settings**</mark>, scroll down and toggle on the <mark style="color:blue;">**Shopify POS**</mark> setting. Next, enable the <mark style="color:blue;">**Shopify POS Invoicing**</mark> setting just below the Shopify POS setting. Shopwaive's [Invoice and Accounts Receivable](#shopwaive-invoicing-and-accounts-receivable) services for Shopify POS are built exclusively for brick and mortar shops and operate in a reverse way of Shopwaive [Store Credit](/shopify/accounts). See below for a more detailed description of the differences.

{% hint style="info" %}
If you enable Shopwaive's Shopify POS Invoicing services, Shopwaive's Store Credit services will be automatically disabled
{% endhint %}

## Overview

With Shopwaive POS Invoicing, customers are in debt to the merchant through an invoice account with net 30, 60, 90 terms. An invoice is opened for the customer and charged by way of a trade credit, in which trust is granted by the merchant to the customer such that the customer can receive goods now with the agreement for the customer to pay-in-full within 30 days.&#x20;

Net 30 invoice terms can also be coupled with a discount. This discount is intended to encourage customers to pay more quickly. For example, an invoice with terms ‘3/10 net 30’, implies that customers can receive a 3% discount if they pay within 10 days. Of course, this also applies to other discounts, so a 2% discount on payments made within 10 days would read as ‘2/10 net 30’.

By contrast, with Shopwaive [Store Credit](/shopify/accounts) the merchant's debt is to the customer in the form of credit that a customer can apply toward a future purchase. Shopwaive's [Store Credit](/shopify/accounts) services for Shopify POS can be used both online and in-store, whereas Shopwaive's [Invoice and Accounts Receivable](/shopify/shopify-pos/invoicing) services are built exclusively for merchants that transact in-store purchases only.

## Set up Invoicing and Accounts Receivable

{% hint style="info" %}
Shopwaive Invoicing is built for brick and mortar businesses that require net 30 charge accounts for their customers and all sales are conducted with Shopify POS. For Shopwaive Store Credit services for online and in-store sales see instead [Store Credit](/shopify/accounts)
{% endhint %}

1. Install the <mark style="color:blue;">**Shopwaive: Credit, AI, & Upsell**</mark> app from the [Shopify App Store](https://apps.shopify.com/shopwaive). Signup for the <mark style="color:blue;">**Shopwaive Checkout**</mark> subscription plan to use Shopwaive Invoicing and Accounts Receivable services for Shopify POS
2. Add the Shopwaive <mark style="color:blue;">**Account**</mark> tile to your Shopify POS cart page
3. Add the <mark style="color:blue;">**Invoice**</mark> tile to your Shopify POS cart page
4. Add the Shopify Flow automations below. The Invoicing Shopify Flows are designed for Shopify POS Invoicing services only, and are not applicable to Shopwaive Store Credit or online sales.
5. Import the [Shopify Flow for Charging Invoices](https://storage.googleapis.com/steel-spark-359918.appspot.com/Add%20to%20Invoice%20on%20Shopify%20POS%20charge%20purchases.flow) to process Invoice charges. See [Charge an invoice](#charge-to-an-invoice)
6. Import the [Shopify Flow for Paying Invoices](https://storage.googleapis.com/steel-spark-359918.appspot.com/Pay%20Invoice%20on%20Shopify%20POS%20purchases.flow) to process Invoice payments. See [Pay an invoice](#pay-an-invoice)
7. (Optional) Import the [Shopwaive Invoicing Shopify Flow for Refunds](#refund-an-invoice) to process Invoice refunds. See [Refund an invoice](#refund-an-invoice).  To process refunds with Shopwaive Store Credit instead, see [Refund store credit](/shopify/refunds).
8. (Optional) Install the <mark style="color:blue;">**Order Print**</mark> app from the [Shopify App Store](https://apps.shopify.com/order-printer) published by Shopify. The Order Print tile can be conveniently added your Shopify POS Cart page to allow printing invoice receipts

<figure><img src="/files/J3eKB3szpugWdwsGQboC" alt=""><figcaption><p>Add your customer to the Shopify POS cart</p></figcaption></figure>

<figure><img src="/files/snzW0nJhImOgXMEohbb4" alt=""><figcaption><p>Add the Invoice and Account Smart Grid tiles to your Cart page</p></figcaption></figure>

## Charge to an invoice

1. Scan items or search and add items to the Shopify POS cart
2. Search for your customer by email and add them to the cart. If your customer does not yet exist, click the <mark style="color:blue;">**Add customer**</mark> tile and include their email address (required), then click <mark style="color:blue;">**Save**</mark>
3. To view the customer's active open invoice, click the <mark style="color:blue;">**View invoice**</mark> tile. If an invoice or account history exists, a ledger of the customer's invoice transactions are shown, in addition to the balance due, invoice origination date, and net 30 payment terms due date.&#x20;
4. If the customer wishes to charge items to an invoice, their open invoice is not overdue, and your employees approve of charging to a new or existing invoice, they can do so by simply clicking the <mark style="color:blue;">**Charge to invoice**</mark> tile
5. Once the items are charged to the invoice, the checkout session is complete by simply clicking <mark style="color:blue;">**Checkout**</mark> which automatically marks the order as paid with no immediate balance due

{% hint style="info" %}
After an order is placed, you can click the <mark style="color:blue;">**View invoice**</mark> tile to note the new balance due has been updated with the amount charged on the last placed order. In addition, the account ledger is updated with the details of the invoiced order. An option exists to generate a QR code that can be shown to the customer to view the order details on their own mobile device or print an invoice receipt with the Order Print tile
{% endhint %}

{% hint style="success" %}
Note, you can press the <mark style="color:blue;">**Clear cart**</mark> or <mark style="color:blue;">**Remove discount**</mark> tile at anytime to remove the invoice charge from the Cart. The charge is only added to the customers invoice balance due after the order is placed and the financial status changes to **Paid**
{% endhint %}

View the customer's existing invoice by pressing the <mark style="color:blue;">**View invoice**</mark> tile. Press <mark style="color:blue;">**Show details**</mark> to view the NET30 terms, including the invoice origination date, due date, and status. If no previous transaction history exist, their summary details will indicate there is no open invoice or balance due.

<figure><img src="/files/itELXHGKAKS8gRsRX5cp" alt=""><figcaption><p>Press the View invoice tile to view the customers existing invoice balance due (if it exists) prior to charging an invoice</p></figcaption></figure>

Proceed with charging the invoice and completing the order by pressing <mark style="color:blue;">**Checkout**</mark>

<figure><img src="/files/MSA6t0SImKhCmhiOsh3g" alt=""><figcaption><p>Press Charge to invoice to charge the purchase</p></figcaption></figure>

A confirmation page will appear, affirming the order was created without any payment received. The invoice is now open and accessible through Shopwaive via the Smart Grid Tiles or the Shopwaive app

<figure><img src="/files/ZSYUVowxhnBQvlODd9c0" alt=""><figcaption><p>Press Checkout to complete the invoice charge and create a NET30 account</p></figcaption></figure>

As shown below, once an invoice is charged, you can add the customer to an empty cart and press the <mark style="color:blue;">**View invoice**</mark> tile at anytime to view their open invoice, balance due, transaction history, and NET30 terms.

<figure><img src="/files/zLDfIOC7P4LjcRbFLGqT" alt=""><figcaption><p>Add customer to the cart to view their open invoice at anytime</p></figcaption></figure>

View the post-purchase invoice by pressing the <mark style="color:blue;">**View invoice**</mark> tile. Press <mark style="color:blue;">**Show details**</mark> to view the NET30 terms, including the invoice origination date, due date, and status.

<figure><img src="/files/FzQdlLcqoYUzXJzZ6KEV" alt=""><figcaption><p>Invoicing and accounts receivable</p></figcaption></figure>

## View order details

You can press any transaction in a customer's account ledger to view the details of an order. You can generate a QR code the customer can scan with their mobile device or camera that will link them to the order status page with details of the transaction.&#x20;

### Generate an Order Status QR Code

Simply press the <mark style="color:blue;">**Order Status QR Code**</mark> link at the top right on the Order details page to generate a QR Code that can be scanned for convenient viewing of the order details by your customer on their mobile device. For a paper copy of the invoice or order details, we recommend using Shopify's [Order Print](https://apps.shopify.com/order-printer) Smart Grid Tile to print hard copy receipts. You can also print an account record within the Shopwaive app by exporting all transactions to CSV.

<figure><img src="/files/8RW8IXj0NHz8fIP9YgXp" alt=""><figcaption><p>View the details of an order. Generate a QR code for the customer to reference the details on their mobile device</p></figcaption></figure>

## Pay an invoice

Customers can pay down part of their invoice balance or pay in full. If a balance exists, the balance due is shown on the Invoice Smart Grid Tile from the Shopify POS cart page.&#x20;

<figure><img src="/files/aLz8bW4nbhiQFXUiDndV" alt=""><figcaption><p>The subtotal invoice balance due is now $171.55, as shown on the Invoice tile</p></figcaption></figure>

### Option 1: Pay an invoice in Shopify POS

Simply press the <mark style="color:blue;">**Add custom sale**</mark> tile and enter <mark style="color:blue;">**Invoice**</mark> for the **title**. For the **price**, enter the amount the customer wishes to pay down or if they choose to pay in full enter the full invoice balance due. Choose to charge taxes (if applicable). The balance a customer owes on any given invoice always excludes the additional taxes due, so if taxable items were charged to the account previously you will charge taxes on the invoice payment received.

<figure><img src="/files/2uI4kYzTEvO5Q8zee43U" alt=""><figcaption><p>Pay an invoice from the Shopify POS cart by adding a custom sale titled "Invoice" with price set to the amount to be paid off</p></figcaption></figure>

### Option 2: Pay an invoice from the Shopify Admin

Create a draft order and add the customer to the order by searching for them by email.  Click <mark style="color:blue;">**Add custom item**</mark> and title it <mark style="color:blue;">**Invoice**</mark>. Set the price equal to the amount to be paid toward the invoice balance, or if the NET30 full balance is due or past due, enter the full invoice balance amount. Check to add taxes to the custom item, since the invoice balance is always before taxes and the customer will need to pay taxes on the goods at the time the invoice payment is received.

<figure><img src="/files/f5aVDM3yVPGhCYLCnSWr" alt=""><figcaption><p>Create an invoice payment with a draft order in the Shopify admin</p></figcaption></figure>

## What happens when an invoice is Paid in full?

When an invoice is paid in full, the invoice is closed out and NET30 terms are reset. Pressing the <mark style="color:blue;">**View invoice**</mark> tile of the customer will show the invoice payment transaction and a badge indicating the order that closed out the invoice. As before, a QR code can be shown to the customer as a digital receipt and the Order Print tile can be used to print a hard copy receipt of the transactional details

<figure><img src="/files/CxspNNUX6yNogd5Ck5dk" alt=""><figcaption></figcaption></figure>

## Define an Admin pin and set invoice limits

If you'd like to place tighter controls on your invoicing accounts such that reaching a maximum invoice balance will prevent further charges to the account, you can do so from within the Shopwaive app settings. Then, just add the Shopwaive <mark style="color:blue;">**Admin**</mark> Smart Grid Tile to your Shopify POS cart. When a customer's invoice balance exceeds the Admin max invoice balance defined, the customer's purchasing power is reduced. If an active cart session prior to purchase would cause the invoice balance to exceed the threshold, then the customer is only allotted the lesser of the total amount due or the difference of the max balance and their current balance.&#x20;

<figure><img src="/files/aOY3Of90YqQUZikAcnju" alt=""><figcaption><p>Create an Admin pin and define a max invoice charge balance from within the Shopwaive app</p></figcaption></figure>

> Take for example, if the maximum invoice balance is set by an Admin as $1000 USD, a customer's current invoice balance is $500 USD accumulated from previous purchases, and the customer's new cart total at checkout is $1200 USD, then the customer will only be able to charge an additional $500 USD toward the open invoice, whereas they will need to use a conventional (i.e. CC) form of payment or cash to cover the remaining $700 USD due to complete the transaction.

In the example below, since the invoice limit was set by an Admin to be $1000 USD, the customer's purchasing power is maxed out at $1000 USD. If the customer had an existing balance of $200 USD, then only $800 USD would be available to charge. In the example below, a new form of payment such as credit card or cash is required to pay the remaining $141.70 due to complete the order.

<figure><img src="/files/uKt26bZFRURQdqPAl6mV" alt=""><figcaption><p>In this example, the customer has no existing balance due, but the cart exceeds the invoice limit of $1000</p></figcaption></figure>

In a similar example below, a customer has an existing invoice balance of $11.30 due and a cart subtotal of $1243.00. Since the max invoice balance is set to $1000 USD by the Admin from within the Shopwaive app settings, the customer has a reduced purchasing power of $988.70 charged to the account as shown. Without an admin override, the remaining cart due will require an alternative form of payment.

<figure><img src="/files/aPT2JnTXaK8rog6jrZBq" alt=""><figcaption><p>Net 30 customers have reduced purchasing power when invoice limits are enforced</p></figcaption></figure>

## Admin override of an invoice limit set&#x20;

An admin or store manager can override the invoice limit set if needed. Press the <mark style="color:blue;">**Admin**</mark> Smart Grid Tile and enter the Admin pin to temporarily lift the invoice limit.&#x20;

<figure><img src="/files/qmk0PNtPqYF004tv7B8z" alt=""><figcaption><p>Enter the Admin pin to lift an invoice limit restriction set within the Shopwaive app</p></figcaption></figure>

Now you can proceed with the completing the invoice charge.&#x20;

<figure><img src="/files/aBCboj4c3mkw0vMc16Z1" alt=""><figcaption><p>Invoice limits are lifted after an Admin enters their pin to override the cart restrictions</p></figcaption></figure>

## Refund an invoice

You may erroneously charge to a customers invoice or a customer may wish to return items that were previously charged. You can process a return and refund with Shopwaive's Shopify Flow for Invoicing Refunds using Shopify's native refund process.

To process refunds with Shopwaive Invoicing from Shopify POS follow these steps:

1. Save the [Shopwaive Invoicing Refunds flow](https://storage.googleapis.com/steel-spark-359918.appspot.com/Refund%20invoice%20automatically%20with%20Shopify%20Refunds.flow) to your local drive and then import it into the [Shopify Flow](https://apps.shopify.com/flow) app. After importing, click <mark style="color:blue;">**Turn on flow**</mark>
2. Begin a refund using Shopify's native refund process
3. Select the quantities your customer is returning for each line item
4. Select to Restock items if you wish items to be restocked
5. For <mark style="color:blue;">**Reason for return**</mark>, add the keyword <mark style="color:blue;">**Invoice**</mark> along with any other description you want to add for your own records. For instance, for Reason for return you could enter "Refund <mark style="color:blue;">**Invoice**</mark>. Customer did not need items and can be restocked". Shopwaive uses the <mark style="color:blue;">**Invoice**</mark> keyword to refund items associated with the return
6. For the Refund amount, enter <mark style="color:blue;">**0.00**</mark>. This is the amount you plan to refund to the original form of payment. Since we are crediting a charged invoice that is not associated with any other form of payment, we enter <mark style="color:blue;">**0.00**</mark>. Shopwaive will credit the customer's invoice based on quantities selected after discounts
7. If you would like to use Shopify's native Refund email template to notify your customer, you will need to edit the Refund notification with [Shopwaive's Refund liquid template](https://storage.googleapis.com/steel-spark-359918.appspot.com/Refund.liquid). Contact <support@shopwaive.com> for help making changes to the Refund Notification template

## (Optional) Manually adjust invoice balances

Manual adjustments to a customers invoice balance are not typically required, since the <mark style="color:blue;">**Charge to invoice**</mark> and [Invoice payment actions](#pay-an-invoice) automatically synchronize with a customers invoice and balance due. However, if you need to make a manual adjustment you can in several ways, see below.

### Option 1: Smart Grid Tiles

To increase a customers balance due, add the [Refund tile](/shopify/shopify-pos#refund-with-shopify-pos-smart-grid). To decrease a customers balance due, add the [Debit tile](https://docs.shopwaive.com/shopify/shopify-pos#debit-with-shopify-pos-smart-grid).

### Option 2: Shopwaive app

To adjust a customers balance manually outside of Shopify POS, follow these steps:

* Within the Shopwaive app, import existing customer accounts using the [Bulk import editor](/shopify/accounts/import-accounts) or search for your customer by email using the <mark style="color:blue;">**Customers**</mark> dashboard. Click the customer in the list or click the ellipsis to <mark style="color:blue;">View account</mark>. Developer teams can also use the [Shopwaive API](https://api.shopwaive.com/) to make account changes
* Make edits to your customer available balance, notes, or send an email notification. Once you make edits to a customer account, if an account does not already exists a Shopwaive credit account is automatically created.


# Crowdfunding and Pre-Orders

Issue gift cards or pre-paid store credit in the amount of the pledge or pre-order to facilitate checkout on your launch site

{% hint style="info" %}
**Tip:** Need help with pre-orders or migrating crowdfunding pledges and customers onto your launch site? Use this guide to get started and if you need additional help or have questions contact us at <support@shopwaive.com>&#x20;
{% endhint %}

<div align="center" data-full-width="false"><figure><img src="/files/8ownAW1qj3KhCYiTV5TQ" alt="" width="188"><figcaption></figcaption></figure></div>

<figure><img src="/files/ybL0V5Xrm5rdwQe4K6Ab" alt="" width="188"><figcaption></figcaption></figure>

<div align="center"><figure><img src="/files/oWFIkn0WbeqNLDOifFZg" alt="" width="188"><figcaption></figcaption></figure></div>

## Problem

New creative business ideas and humanitarian causes can find great success with crowdfunding platforms to fundraise as a global audience is captivated by pitching in to help and pledge support. Often, pre-orders are placed on a platform other than a company's launch site or website builder platform (i.e. Shopify).&#x20;

However, it is advantageous to categorize these new supporters, pledges, and pre-orders as effectively new paying customers that belong within your Shopify, ERP, CRM or other website framework for order processing including fulfillment and shipping, marketing, business analytics, and more. But, the paying customer has already pre-paid for their order and you need to somehow migrate the pre-order into Shopify. Discount codes are not an ideal solution since creating them to waive all costs plus the potential to combine them with other discounts is a laborious task. The thought of manually creating these orders one-by-one is nothing short of nightmare with many late nights drinking red bull and burning the midnight oil when you know there has to be a way to do this *faster* and more efficiently so you can focus on higher value work.

## Shopwaive solutions

Enter into the scene, and introducing Shopwaive. Let us help you do this in just a few short minutes following the steps outline below

## Option #1: Give native Shopify store credit

Brands can use Shopwaive to issue [native Shopify store credit](https://www.shopify.com/blog/store-credit) in bulk. With Shopwaive's bulk import editor, use the native Shopify store credit target to make credits to 1,000s of your customers in just a few seconds. Need help? Contact our team at <support@shopwaive.com>, we're happy to serve you.

## Option #2: Give Gift cards for Preorders

Gift cards are ideal for preorders, Backorders and Crowdfunding pledges. Gift cards can be used to waive the cost of all cart and checkout line items, including merchandise costs, shipping, taxes and fees. Shopify Plus merchants should opt to Bulk create [Gift Cards](/shopify/gift-cards) for preorders or Crowdfunding Pledges when you need to zero out your customers balance due at checkout for a seamless experience.  After bulk creating gift cards, you can send a custom email template with merge tags using Shopwaive [Email and Campaigns](/shopify/email-and-campaigns) that sends the gift card redemption code to your customers. Create thousands of gift codes in seconds with our easy drag and drop editor and Shopwaive handles the rest. Emails are sent out in waves of up to 20 per minute.

If you wish to not send gift cards via email, but instead would like a credit balance to apply toward the full cart costs including taxes, shipping, and fees, then see [Extend Store credit with Gift codes](/shopify/checkout-extensions/extend-with-gift-codes).

{% hint style="info" %}
If [Gift cards](/shopify/gift-cards) cannot be used or you do not have [Shopify Plus](https://www.shopify.com/plus), follow the steps below to issue store credit instead. [Store credit](/shopify/accounts) can be used in combination with [Shipping credit](/shopify/accounts/app-embed/shipping-credit) to waive all merchandise and shipping costs at checkout.
{% endhint %}

## Option #3: Give Store Credit for Preorders

1. Create a spreadsheet of your preorders, including the total amount paid by the customer. You may already have one handy or can export it from the preorder site
2. Next give customers credit in the amount they paid, including taxes, and other fees but excluding shipping costs. To cover the shipping cost, you'll waive the cost of shipping the preorder item by issuing a single FREE shipping credit. Use the [bulk CSV import](/shopify/accounts/import-accounts) using the template provided or our [REST API](https://api.shopwaive.com/) to do this in a minute or less. If you've not installed Shopwaive yet, you'll need to do that first
3. Your customers can now log in to your site, add the prepaid items to their cart, and check out with credit applied. Since the credit applied is the precise prepaid amount of the preorder or crowdfunding pledge, the customer checks out without any additional payment needed and the order is created within your Shopify or other site framework.&#x20;
4. If you are are using a Headless site with Shopify powering the backend processes, you can continue to use our [REST API](https://api.shopwaive.com/) to create order links to checkout with the prepaid amount waived by the credit automatically applied
5. Your new customer is now created and their order details including shipping address and fulfillment can now be accessed on the Orders page


# Draft orders

B2B Merchants can now add credit to open Draft orders with the Apply Available Store Credit Admin Extension

{% hint style="info" %}
This feature is designed to make adding a customer or vendor's store credit to a draft order easy. The Admin extension was designed specifically for B2B merchants, but can be used by any store that desires to manually add store credit to a draft order. Requires a minimum of Shopwaive Pro subscription
{% endhint %}

{% hint style="info" %}
When a draft order is paid for or when you set payment terms, the draft order converts to an order and is listed on your [**Orders**](https://admin.shopify.com/orders) page.
{% endhint %}

## Getting started

You can use draft orders to sell directly to consumers or to sell to other businesses. If you regularly sell to other businesses, then review all of Shopify's [business to business (B2B)](https://help.shopify.com/en/manual/b2b) features.

Draft orders are useful when you need to do the following tasks:

* Create an order so you can accept payment for orders later on that are placed over the phone, in person, or by email.
* Send invoices to customers to pay with a secure checkout link.
* Use custom items to represent additional costs or products that aren't displayed in your inventory.
* Re-create orders manually from any of your active sales channels.
* Sell products at discount or wholesale rates.

## How to add store credit to draft orders

To add Shopwaive store credit to a client's draft order that has not yet converted to an order follow the steps below.&#x20;

{% hint style="info" %}
To use this feature Draft orders can be already shipped and fulfilled, so as long as the Draft Order has not yet converted to an order and reached <mark style="color:blue;">**Completed**</mark> status, the Admin extension is available to be used
{% endhint %}

[Create a Draft Order](https://help.shopify.com/en/manual/orders/create-orders) in the Shopify Admin using Shopify's guidance:

1. From your Shopify admin, go to [**Orders**](https://admin.shopify.com/orders).
2. Click **Create order**.
3. Add products to the order.
4. Customize the order:
   * Add a customer
   * Turn taxes on or off
   * Add tags or a note
   * [Change the market](https://help.shopify.com/en/manual/orders/create-orders#change_market-draft-order) to display a different local currency
5. Now <mark style="color:blue;">More actions</mark> button at the top of the draft order details page. Click the <mark style="color:blue;">**Apply Available Store Credit**</mark> button to be momentarily redirected to Shopwaive. If a balance is available, the redirect will add the customers credit to the draft order. If the customer does not have a balance, the redirect returns to the Shopify Admin Draft Order details page without making any changes to the Draft Order.
6. Do one of the following actions:
   * [Send an invoice](https://help.shopify.com/en/manual/orders/create-orders#email-invoice) to the customer. By default, the invoice contains a link to a checkout that your customer can use to pay for the order.
   * [Accept payment](https://help.shopify.com/en/manual/orders/create-orders#accept-payment) from the customer.
   * [Set payment terms](https://help.shopify.com/en/manual/orders/create-orders#payment-terms).
   * Save the order as a draft so that you can update it later from the [**Drafts**](https://admin.shopify.com/draft_orders) page.

{% hint style="info" %}
You can also create orders with pre-filled customer information from existing [customer profiles](https://help.shopify.com/en/manual/customers/customer-service#creating-orders-for-customers).
{% endhint %}

<figure><img src="/files/UAz0OjJBd1ddz3so6k9u" alt=""><figcaption><p>B2B merchants can apply credit to Open Draft Orders with the Admin extension</p></figcaption></figure>

After a successful redirect, a message will appear if the customer had a balance to apply and the draft order was updated.

<figure><img src="/files/W9dA4sv3gbPI0WVr5Wkf" alt=""><figcaption><p>When a Draft order was successfully updated with applied credit, the app redirects back to the Shopify admin</p></figcaption></figure>

The app redirects back to the Draft order details page, where you will note the applied store credit amended to the order as a discount. If you need an alternative solution to applying a discount to the order, refer to our [Gift Cards feature.](/shopify/gift-cards)

<figure><img src="/files/ey25Vp5j5k7RobnQtJzO" alt=""><figcaption></figcaption></figure>

## Send the invoice

Once you've adjusted the draft order with credit, your customer or vendor can proceed with paying the remainder. Send the new invoice using the <mark style="color:blue;">Send invoice</mark> button.&#x20;


# Refunds

Shopwaive keeps your customers satisfied and business in-house. Process Shopify Order returns and exchanges with store credit refunds

<figure><img src="/files/65WdMMbdL0NlkZEAKawa" alt=""><figcaption><p>Full or partial line-items refunds with store credit is made easy with Shopwaive</p></figcaption></figure>

You have two options for issuing store credit refunds with Shopify and Shopwaive. We recommend [Refunds via Shopify Flow](#refunds-via-shopify-flow) if you want to automatically update fulfilled and inventory quantities.

## Refunds via Shopify Flow

If you would like to to issue Shopwaive store credit instead of refunding to the original form of payment **AND** keep inventory and fulfillment levels up-to-date on the Order details page, this refund option is the most recommended. With Shopify Flow, you will automate adjustments to the Order details, including adding tags, notes, update inventory and fulfillment quantities.&#x20;

{% hint style="info" %}
If you plan to manually adjust inventory levels after a refund is processed you can still use this option or see [Refunds via Admin extension](#refunds-via-admin-extension)
{% endhint %}

Contact support\@shopwaive to receive help setting up the Shopify Flow that automates this refund process, we typically respond in an hour or less, or simply follow along below. This process usually takes less than 5 minutes to setup.

With this flow, you will be able to automate refunds with store credit while keeping your inventory and fulfillment data synced. Brands may wish to offer an alternative to conventional refunds to the original form of payment (OFP). In this case, store credit and gift cards are an excellent opportunity to keep customers satisfied while also committed to repurchasing from your shop.&#x20;

{% hint style="info" %}
With each refund method available with Shopwaive, instead of refunding the original form of payment, new store credit is issued to the customer. With both Shopify's native refund process and Shopwaive refunds, your customer service teams have an additional tool available to satisfy customer requests (not either or, but both are available)
{% endhint %}

Shopify's native refund process is associated with payment that is returned (credited) to the original form of payment (OFP). Since with a store credit refund, payment is not refunded to the original form of payment, the order is not marked "Refunded" in the Shopify Admin. This is the correct behavior since if later the customer reaches out to your support team, and even though they were originally satisfied with a store credit, for any number of reasons they may later insist on an OFP refund, because the order has not yet processed a refund to the original form of payment, this option is still available on the order. While, at the same time, with Shopwaive's Refund Flow, you can keep track of the store credit refund on the account with the Order tags and notes placed on the order, as well in the Order timeline.

## Setup&#x20;

**Step 1**: After installing the [Shopify Flow app](https://apps.shopify.com/flow), simply [download](https://storage.googleapis.com/steel-spark-359918.appspot.com/Refund%20Credit%20automatically%20on%20Shopify%20Refunds.flow) and import the Shopwaive refund flow into Shopify Flow. After importing the flow, make sure to turn the flow on by clicking the <mark style="color:blue;">**Turn on workflow**</mark> button

<figure><img src="/files/4w3FS1CuGEEKUHWf6I4o" alt=""><figcaption><p>Refund in store credit, update inventory, and add tags and notes to the order</p></figcaption></figure>

**Step 2**: Initiate a <mark style="color:blue;">**Refund**</mark> from the Order details page using Shopify's native refund process

<figure><img src="/files/obq67df0lDjenIeV0J0g" alt=""><figcaption><p>Click Refund from the top of the Order details page</p></figcaption></figure>

**Step 3**: Choose the items and quantities that you wish to refund in store credit

**Step 4**: For the <mark style="color:blue;">**Reason for refund**</mark> type <mark style="color:blue;">**Shopwaive**</mark>

**Step 5**: For the <mark style="color:blue;">**Refund amount**</mark>, type 0.00. This is the amount to be refunded to the original form of payment. Since we are not crediting the credit card or the original form of payment on file, enter 0.00. In this example, the total amount that will be refunded in store credit is equal to the <mark style="color:blue;">**Refund total**</mark> of $317.50

**Step 6**: (Optional) If you want to restock these refunded items, then check the <mark style="color:blue;">**Restock items**</mark> checkbox

**Step 7**: (Optional) If you want to send an email notification from Shopify's Refund email template, then check the <mark style="color:blue;">**Send a notification to the customer**</mark> checkbox and update your Refund Notification email template from the Shopify Admin with [Shopwaive's modified version](https://storage.googleapis.com/steel-spark-359918.appspot.com/Refund.liquid) and replace the default 6% tax with your tax lines. For a simplified version, you may choose to use the snippet in Step 11. Otherwise, you can leave this unchecked and choose to instead use [Shopwaive's email service](/shopify/email-and-campaigns) to notify the customer of their new store credit balance

**Step 8**: Click the button labeled **Refund $0.00** to process the refund

<figure><img src="/files/vLUKbrKlXYVVnSsADo9a" alt=""><figcaption><p>Enter 0.00 for the Refund amount and type Shopwaive for the Reason for refund</p></figcaption></figure>

**Step 9**: After processing the refund, you will notice the removed items from the order and the Unfulfilled quantities and inventory levels have all been updated and restocked to inventory. You will also notice a **Refunded with Shopwaive** tag added and an order note with the date of the refund.

<figure><img src="/files/0FgG85ZbRU3P0NIYXF47" alt=""><figcaption><p>Refunded order details, including Unfulfilled quantities and inventory levels are automatically updated</p></figcaption></figure>

**Step 10**: Inside the Shopwaive app, the customer's line item refund quantities and store credit balance are updated and can be exported for transactional record keeping purposes.

<figure><img src="/files/3BhdO4RPLWwB97mYm8v2" alt=""><figcaption><p>Customer account as viewed from inside the Shopwaive app</p></figcaption></figure>

**Step 11**: If you would like to continue using Shopify's native Refund email notification template, you can update it with the snippet below. Contact our team at <support@shopwaive.com>, we're glad to help to add this to your template. For a more complex Refund Notification email template, use [this version](https://storage.googleapis.com/steel-spark-359918.appspot.com/Refund.liquid) and replace the default 6% tax with your tax lines.

```liquid
{% if amount != 0 %}
{% capture email_body %}Total amount refunded: <strong>{{ amount | money_with_currency }}</strong>. It may take up to 10 days for this refund to appear in your account.{% endcapture %}
{% endif %}

{% if amount == 0 %}
{% assign total_store_credit = 0 %}
{% assign total_store_credit_lines = 0 %}

{% for refund_line in refund_line_items %}

{% assign total_store_credit = refund_line.line_item.final_line_price | times: refund_line.quantity | divided_by: refund_line.line_item.quantity | plus: total_store_credit%}

{% assign total_store_credit_lines = total_store_credit_lines | plus: 1 %}
{% endfor %}
{% capture email_body %}{% if total_store_credit_lines > 1 %}Total amount refunded in store credit: <strong>{{ total_store_credit | money_with_currency }}.</strong>{% endif %}
<h3 style="margin-top:25px">Total refund summary</h3>
{% for refund_line in refund_line_items %}
<div>
<p>QTY: {{ refund_line.quantity }} / {{ refund_line.line_item.quantity }} of {{ refund_line.line_item.title }} for a total amount of <strong>{{ refund_line.line_item.final_line_price | times: refund_line.quantity | divided_by: refund_line.line_item.quantity | money_with_currency }}.</strong>
</p>
</div>
{% endfor %}
{% endcapture %}
{% endif %}
```

An example of a revised Refund email template

<figure><img src="/files/HE4Yu53rskT4UqTkEeTh" alt=""><figcaption><p>Shopify Refund Template with line item details on refunded store credit</p></figcaption></figure>

## Refunds via Admin extension

{% hint style="info" %}
Inventory levels and fulfillment items are not adjusted on the Order resource if you use this option, only order notes and tags are adjusted. If you need to automate adjustments to inventory and fulfillment line items while processing store credit refunds, see [Refunds via Shopify Flow](#refunds-via-shopify-flow)
{% endhint %}

If you visit the <mark style="color:blue;">**Order details**</mark> page within the Shopify admin, click the <mark style="color:blue;">**More actions**</mark> button at the top, and click <mark style="color:blue;">**Refund Store Credit**</mark>

Shopwaive Refunds allow you to issue store credit to a customer's Shopwaive account that they can redeem on future purchases (i.e. via their Account page, Checkout extension, or Shopify POS Smart Grid Tiles). During the refund process, notes and tags can be added to the original order, which are also added to the timeline, this allows for easily referencing what actions have occurred on the order, and when they were taken.

By contrast, Shopify's native refund process displays a <mark style="color:blue;">**Refunded**</mark> line item on the order details if it exists. Shopify is only able to issue refunds to the original form of payment (OFP). And the amount to be refunded is always reduced by the amount already returned to the original form of payment (if any).

By contrast, with Shopwaive's <mark style="color:blue;">**Refund Store Credit**</mark> Admin extension, you can issue a refund in store credit for any amount on any given order. The refunded amount is deposited in their Shopwaive account, instead of the original form of payment. You can process additional refunds in any amount for the same order, if you desire. Each time you refund in store credit, a new note is displayed on the order, so can keep track if a refund has already been issued.&#x20;

All of the credit refunds are tracked in Shopwaive's databases, so you can export a ledger of each transaction including multiple refunds for the same order if they exist. Teams using Shopwaive have maximum flexibility as the Shopwaive refund process does not place limits on how much credit you can refund or how many times you can refund, this is up to the customer service and web sales teams. In the same way, the refund process also does not impact your inventory levels, if an adjustment on inventory is needed after a credit refund then this is completed manually, depending on the condition of the item (if it can be restocked or discarded).

{% hint style="success" %}
Process partial returns by selecting which line items you want to credit the customer. Partial store credit can be issued for select quantities of product merchandise, shipping costs, taxes, discounts, or prior store credit applied
{% endhint %}

After selecting which items to refund with store credit, you'll be provided the opportunity to send an automated email notification to the customer or edit a custom message that lets them know they've been refunded and provides a backlink to your site to redeem their credit.

<figure><img src="/files/84b5V4wvd3pkXyCzJoCo" alt=""><figcaption><p>Issue partial refunds, select line item refunds with store credit</p></figcaption></figure>

{% hint style="info" %}
Enterprise features require the Shopwaive Checkout subscription plan. Contact us at <support@shopwaive.com> to learn more
{% endhint %}

<figure><img src="/files/seOssAQ9u3bDc8TtJZNH" alt="" width="249"><figcaption><p>Issue partial credit from existing orders from the Shopify mobile app</p></figcaption></figure>

Quickly issue partial store credit with Shopwaive by following these steps

### Give Refunds — Step-by-step:

1. Click the <mark style="color:blue;">**More Actions**</mark> button on the Order details page
2. Select <mark style="color:blue;">**Refund with Store Credit**</mark> from the <mark style="color:blue;">**More Actions**</mark> drop down menu
3. (Optional) For partial refunds, click the line items in the order to adjust the number of quantities to credit
4. (Optional) You can also click the <mark style="color:blue;">**Taxes**</mark>, <mark style="color:blue;">**Shipping**</mark>, <mark style="color:blue;">**Discounts**</mark>, and prior <mark style="color:blue;">**Store Credit**</mark> line items listed in the <mark style="color:blue;">**Totals**</mark> table of the order to add or remove these amounts from the refund total
5. Use the <mark style="color:blue;">**Clear all**</mark> and <mark style="color:blue;">**Reset**</mark> links to quickly zero out all items and reset to the original order quantities, respectively
6. Once you finalize the refund amount, click the <mark style="color:blue;">**Refund**</mark> button to instantly issue store credit to the customer
7. (Optional) You will be given the option to create a message and send an email notification to the customer

{% embed url="<https://youtu.be/YPrxNjYkXlY>" %}
Issue partial credit with Shopwaive Refunds
{% endembed %}

Have questions on any specific features? [<mark style="color:blue;">**Contact us**</mark>](mailto:support@shopwaive.com)

###

###


# Discounts

Create multiple discounts for the same customer each with a unique expiration date, value, and voucher code

The Discount features of Shopwaive are designed specifically for Shopify and Shopify Plus brands, to address their most frequent pain points and eliminate mundane tasks. Use these features to streamline your brand marketing strategies and work flows.

## Product features

Note, Shopwaive store credit and gift cards are tracked and issued separately from rewards and discounts. Store credit and gift cards can be combined with shipping credit, rewards, and discounts but each can be used for a powerful combination strategy to increase CRO and checkout conversions. See feature table below and the full list of Shopwaive's products and their [features](/shopify/features)

<table><thead><tr><th width="250">Feature</th><th width="522.3333333333333" data-type="checkbox">Discounts</th></tr></thead><tbody><tr><td>Combine with other offers</td><td>true</td></tr><tr><td>Single expiry date</td><td>true</td></tr><tr><td>Pro &#x26; Enterprise available</td><td>true</td></tr><tr><td>Multiple expiry dates</td><td>true</td></tr><tr><td>Multiple for same email</td><td>true</td></tr><tr><td>Bulk import available</td><td>true</td></tr><tr><td>Bulk export available</td><td>true</td></tr><tr><td>Requires customer login</td><td>false</td></tr><tr><td>Refunds and exchanges</td><td>true</td></tr><tr><td>Digital wallet functionality</td><td>false</td></tr><tr><td>Shopwaive widget</td><td>false</td></tr><tr><td>Tapcart Integration</td><td>true</td></tr><tr><td>Klaviyo Integration</td><td>false</td></tr><tr><td>Zapier Integration</td><td>false</td></tr><tr><td>Email integration</td><td>true</td></tr><tr><td>Order API</td><td>false</td></tr><tr><td>Customer API and Top ups</td><td>false</td></tr><tr><td>Shopify POS</td><td>true</td></tr><tr><td>Subscriptions and Flows</td><td>true</td></tr><tr><td>Reporting and analytics</td><td>true</td></tr><tr><td>Currency options</td><td>false</td></tr><tr><td>Multilingual  </td><td>true</td></tr><tr><td>Canvas design editor</td><td>false</td></tr><tr><td>Checkout</td><td>true</td></tr><tr><td>Fraud protection </td><td>true</td></tr><tr><td>24/7 Customer Support</td><td>true</td></tr></tbody></table>

{% hint style="success" %}
**Tip:** You have the option to create hundreds of rewards and discounts in seconds with or without assigning sender, recipient, and customer email. With Shopwaive we make it easy to get exactly what you need, and nothing you don't
{% endhint %}

{% hint style="info" %}
Enterprise features require the [Shopwaive Pro](https://checkout.shopwaive.com/b/3csdUBgCg7ZD0G4fZ0) subscription plan. Contact us at <support@shopwaive.com> to learn more
{% endhint %}

## Settings

To enable [Rewards and Discounts](/shopify/discounts) follow the steps outlined below.

Open the app and click the left side menu item labeled <mark style="color:blue;">**Settings**</mark>

<figure><img src="/files/pp3Ge1PZhtkMAgX0hk88" alt=""><figcaption><p>Click <strong>Settings</strong> from the left side menu</p></figcaption></figure>

Once you click <mark style="color:blue;">**Settings**</mark>, scroll down and toggle on the <mark style="color:blue;">**Rewards and Discounts**</mark> setting.

## Create discount codes

{% hint style="info" %}
**Tip:** The terms <mark style="color:blue;">voucher</mark>, <mark style="color:blue;">rewards</mark>, and <mark style="color:blue;">discount</mark> codes are used interchangeably throughout the documentation without any distinguishable difference. These terms all refer to redeeming an offer at the Checkout page by using a unique code in the **Gift card or discount code** field on the Shopify platform. You can also enter these codes in the Shopwaive popup to combine with other offers such as store credit or FREE shipping. See [Combinations](/shopify/accounts/app-embed/combinations)
{% endhint %}

Next, you'll be blown away by how fast and easy it is to create thousands of rewards, voucher, or discount codes in seconds, each with their own criteria you define.

After enabling <mark style="color:blue;">Rewards</mark>, follow these steps to create unique discount codes

### Create Bulk Discount Codes — Step-by-step: <a href="#import-rewards" id="import-rewards"></a>

1. Click the <mark style="color:blue;">**Create Rewards**</mark> button that appears after enabling <mark style="color:blue;">Rewards</mark>
2. Click the <mark style="color:blue;">**Get template**</mark> link to download the template file to your local drive
3. Fill out the template file with your reward definitions using a spreadsheet editor such as Google Sheets, Numbers, or Excel. Many options exist for each reward, but the minimum field requirements are <mark style="color:blue;">OncePerCustomer</mark>, <mark style="color:blue;">Value</mark>, and <mark style="color:blue;">Type</mark>. Ensure you do not make any changes to the header names or format
4. Save and export your template file to <mark style="color:blue;">.CSV</mark> format
5. Click the <mark style="color:blue;">**Upload .CSV**</mark> button to import your rewards into Shopwaive&#x20;
6. If the file is determined to be in the correct format, you'll receive a success message at the bottom of the popup indicating the rewards are ready for import
7. Click the <mark style="color:blue;">**Import**</mark> button to create the rewards

{% hint style="info" %}
If the <mark style="color:blue;">Code</mark> field is left blank in the template file, a random alphanumeric code will be auto-generated. Many brands choose to follow naming conventions for codes for ease of tracking, analytics and reporting. Although not required, you may choose to add a unique suffix or prefix if generating hundreds of codes to make editing or deleting codes after the bulk creation event an easy task
{% endhint %}

{% hint style="success" %}
Only the <mark style="color:blue;">OncePerCustomer</mark>, <mark style="color:blue;">Value</mark>, and <mark style="color:blue;">Type</mark> fields are required for successful reward creation as noted by items marked with a check in the column labeled with an asterisk <mark style="color:blue;">**\***</mark>
{% endhint %}

## Template file description

<table><thead><tr><th width="198">Header</th><th width="213">Description</th><th width="284">Example</th><th width="74" data-type="checkbox">*</th><th>Format</th></tr></thead><tbody><tr><td>Email</td><td>Customer email </td><td>example@gmail.com</td><td>false</td><td>text</td></tr><tr><td>Code</td><td>Discount code</td><td>SUMMER40</td><td>false</td><td>text</td></tr><tr><td>Type</td><td><strong>percentage</strong> or <strong>fixed</strong></td><td>percentage</td><td>true</td><td>enum</td></tr><tr><td>Value</td><td>Must be greater than <strong>0</strong></td><td>40</td><td>true</td><td>decimal</td></tr><tr><td>OncePerCustomer</td><td><strong>true</strong> or <strong>false</strong></td><td>true</td><td>true</td><td>boolean</td></tr><tr><td>Expiration</td><td>Expiry date</td><td>2023-12-31T00:00:00-00:00</td><td>false</td><td>date</td></tr><tr><td>UsageLimit</td><td>Integer greater than <strong>0</strong></td><td>2</td><td>false</td><td>integer</td></tr><tr><td>CollectionIDs</td><td>Entitled collection ids</td><td>[334674428128,334674428120]</td><td>false</td><td>array</td></tr><tr><td>ProductIDs</td><td>Entitled product ids</td><td>[28398293800]</td><td>false</td><td>array</td></tr><tr><td>VariantIDs</td><td>Entitled variant ids</td><td>[90293839983]</td><td>false</td><td>array</td></tr></tbody></table>

{% hint style="info" %}
If the reward is restricted to a single customer using the Email field (optional) and the email is not already associated with a Customer in the Shopify Admin, then you will need to upload the reward template definition twice. The first time a new Customer with email address you have defined will be created, after which point, when you upload the template file a second time the reward definition will be created and assigned to that customer.&#x20;
{% endhint %}

### Example template file

| Email            | Code     | Value | Type       | OncePerCustomer | Expiration | UsageLimit | CollectionIDs | ProductIDs | VariantIDs |
| ---------------- | -------- | ----- | ---------- | --------------- | ---------- | ---------- | ------------- | ---------- | ---------- |
|                  | BCFM2023 | 20    | percentage | false           |            |            |               |            |            |
|                  | SUMMER40 | 40    | fixed      | true            |            |            |               |            |            |
| <shop@gmail.com> |          | 15    | percentage | true            |            |            |               |            |            |

> **Example**: A new high-growth global brand known as Unicorn Shoes has a long list of potential customers from a paid promotional email marketing campaign whom have not yet registered the email account through Unicorn's website. Using Shopwaive, the brand can grant welcome rewards, promotional offers, and discounts to incentivize these new potential customers

## Creating rewards from the template

You can define rewards using any spreadsheet editor. Just copy and paste in your reward definitions into the template file you downloaded above. Then, export the file in <mark style="color:blue;">.CSV</mark> format before uploading to Shopwaive

<figure><img src="/files/LJO5eYeMI8MfE1POtKjJ" alt=""><figcaption><p>Create bulk discount and reward offers with the Shopwaive template</p></figcaption></figure>

### Collection, Product, and Variant IDs

You have the option to restrict rewards and discounts to only be eligible for redemption towards purchases of specific products defined by their collection ID, product ID, or variant ID.&#x20;

{% hint style="info" %}
If the rewards or discount applies to all collections, products, and variants then you can simply leave the cells beneath these headers blank (and skip the remaining portion of this section) Ensure you include the header names themselves (i.e. CollectionIDs, ProductIDs, VariantIDs) in the template file even if you do not define any
{% endhint %}

To find a specific product ID, simply navigate to the **Shopify admin** > **Products** > Select the product to be redirected to the product details page.

When you reach the product details page of the product that the reward or discount applies to, make note of the **id** found in the url at the top of the page. In the example below the product id is **7343146434776**. Include this product ID in the template when defining the rewards definition. If more than one ID, separate each by comma.

<figure><img src="/files/7lQ1yqyrZ8aaP9rIZFii" alt=""><figcaption><p>Find the product ID of a specific product by visiting the product details page</p></figcaption></figure>

### Formatting IDs in the template file

Examples of proper formatting of the collection, product, and variant ID arrays are shown below

| ProductIDs                                                        | Correct format?                                              |
| ----------------------------------------------------------------- | ------------------------------------------------------------ |
| <mark style="color:green;">\[7343146434776, 5343146434770]</mark> | <mark style="color:green;background-color:green;">Yes</mark> |
| <mark style="color:red;">7343146434776 5343146434770</mark>       | <mark style="color:red;background-color:red;">No</mark>      |
| <mark style="color:red;">7343146434776</mark>                     | <mark style="color:red;background-color:red;">No</mark>      |
| <mark style="color:red;">'7343146434776, 5343146434770'</mark>    | <mark style="color:red;background-color:red;">No</mark>      |
| <mark style="color:green;">\[7343146434776]</mark>                | <mark style="color:green;background-color:green;">Yes</mark> |

## Create and upload discounts

{% hint style="success" %}
Refer to the GIF demo below that illustrates how to copy and paste your rewards definition into the template file and upload to Shopwaive. You can export, delete, or edit codes at anytime within the [Shopify](https://docs.shopwaive.com/shopify/www.shopify.com) admin Discounts page
{% endhint %}

Contact our team at <support@shopwaive.com> if you have any questions or need help getting started. We're here and happy to help.

<figure><img src="/files/pCVcEybZNSKbiiWBYX9M" alt=""><figcaption><p>Use Shopwaive to create multiple promotional offers for the same customer or choose to make it available to all customers</p></figcaption></figure>

## Export discount codes

Now that you created rewards with Shopwaive, you can export the list of discount codes in just a few clicks

### Export Discount Codes — Step-by-step:

1. Open the Shopify admin and navigate to <mark style="color:blue;">**Discounts**</mark>&#x20;
2. Click <mark style="color:blue;">**Export**</mark> at the top right corner and then select All Discounts, or choose to filter discounts by the code title or any other attribute
3. You will receive an email with a link to download your exported discounts. Note, if you did not define a discount code in the template file, an alphanumeric code is auto-generated

<figure><img src="/files/rIvdV2TT0GNJzXI9hPBM" alt=""><figcaption><p>Export discount codes in the Shopify admin</p></figcaption></figure>


# Email and Campaigns

Design pixel-perfect email notifications and save them as templates. Send manually and with automations, one-off, and in bulk

{% hint style="info" %}
On Feb. 1, 2024, Google and Yahoo began enforcing new email sender requirements. [Learn more about how to meet the new requirements](https://academy.klaviyo.com/2024-new-sender-requirements-checklist/1817230) from our partners at Klaviyo
{% endhint %}

<figure><img src="/files/SxlWYlE4rc33p8w9yiZ1" alt=""><figcaption><p>Send email campaigns using merge tag templates with Shopwaive</p></figcaption></figure>

## Features and functionality

{% hint style="success" %}
Email messaging provides an opportunity to notify customers of newly issued credit or adjustments from order refunds, but can also be used for marketing, promotions, and new customer acquisition strategies
{% endhint %}

Begin sending email after verifying your sender address and branded sender domain. Follow the steps outlined in [Verify your sender email address](/shopify/install/setup-branded-email#verify-email-sending-address) and [Verify branded sending domain](/shopify/install/setup-branded-email#verify-branded-sending-domain). This is the same email and domain used for Shopify Notifications found in the Shopify admin <mark style="color:blue;">**Settings**</mark> > <mark style="color:blue;">**Email**</mark>

{% hint style="info" %}
[Shopwaive Starter](https://www.shopwaive.com/pricing) comes with 500 emails per month for Free. Shopwaive Pro and Checkout are available with Enterprise messaging features with increased quota
{% endhint %}

## Send email manually, one at a time

Manually send one-off emails to individual customers by selecting <mark style="color:blue;">**View account**</mark> and checking the <mark style="color:blue;">**Send email**</mark> option on the customer profile page. You will have the option to send a basic notification or design a template with HTML markup, add url links to media assets and logos, and more

## Send email in bulk

Option #1: Setup email campaigns with Shopwaive's new [Send email](https://docs.shopwaive.com/shopify/shopify-flow#send-an-email-when-credit-is-deposited) action in Shopify Flow

Option #2: Send bulk or mass email notifications by enabling <mark style="color:blue;">**Email Campaigns**</mark> from the <mark style="color:blue;">**Settings**</mark> panel in Shopwaive. Once your email sending address is [verified](/shopify/install#step-3-verify-email-sending-address), press the <mark style="color:blue;">**Email customer balances**</mark> button to send all customers an email with their current available balance and a link back to your store. Customers that are without credit or a balance are excluded from being notified. A pre-built basic email template is used to notify customers

<figure><img src="/files/9w6xBAeAhftxvWkHeSen" alt=""><figcaption><p>Manually send email campaigns using the default template that notifies customers of their current available balance</p></figcaption></figure>

## Send email with campaigns and templates

Advanced users or brands may wish to send campaign email to customers using a template they design with Shopwaive's in-app HTML editor, powered by [TinyMCE](https://www.tiny.cloud/).

Send campaigns with advanced HTML templates by enabling <mark style="color:blue;">**Email Campaigns**</mark> from the <mark style="color:blue;">**Settings**</mark> panel in Shopwaive. Once your email sending address is [verified](/shopify/install#step-3-verify-email-sending-address), you will be given the option to choose a merge tag template you previously created. Saved templates without merge tags are grayed out and are unable to be associated with campaigns since merge tags are required to send dynamic data (i.e. available balance, email address) to your list of customers.&#x20;

## Store credit email campaigns

If a valid <mark style="color:blue;">Store credit merge tag template</mark> exists and is selected (see the template named **Store Credit Template 001** as shown below), you'll be able to press the <mark style="color:blue;">**Email all store credit balances**</mark> button to send all customers an email with their current available store credit balance using the merge tag template you created. Customers that are without credit or balance are excluded from being notified

<figure><img src="/files/R2yft87GPtUe29KobEUB" alt=""><figcaption><p>Send customers their store credit balance</p></figcaption></figure>

## Gift card email campaigns

Likewise, if a valid <mark style="color:blue;">Gift card merge tag template</mark> exists and is selected (see the template named **Gift Card Template 001** as shown below), you'll be able to press the <mark style="color:blue;">**Email gift card codes with template**</mark> button to send all customers an email with their current available gift card balance using the merge tag template you created. Customers that are without a gift card or balance are excluded from being notified.&#x20;

For both store credit and gift card campaigns, you can further refine your sending audience by selecting a customer segment that you create within the Shopify admin.

<figure><img src="/files/jPrlLLWHA25GuCKlkjB6" alt=""><figcaption><p>Send email campaigns from saved merge tag templates</p></figcaption></figure>

## Create campaign templates with merge tags

You can create merge tag templates using either option described below:

**Option 1**: Copy and paste the customer balance and/or customer email link from the default template into a new template that you designed. If copied from editor to editor, the merge tag associated with these text elements are preserved

**Create Email Campaign Template** — **Step-by-step:**

Open the [TinyMCE](https://www.tiny.cloud/) editor by issuing a test credit to an admin email address or test account. Search for the test email account and click <mark style="color:blue;">**Adjust balance**</mark>. Check the option labeled <mark style="color:blue;">**Send Email**</mark> in the popup and then click <mark style="color:blue;">**Save**</mark>.&#x20;

In the new window that appears, Select <mark style="color:blue;">**TinyMCE HTML Editor**</mark> as the Email Editor preference. Scroll down to the email editor and highlight the available balance amount, in the example below <mark style="color:blue;">**$8.00**</mark> is highlighted. When highlighted, copy to your clipboard using keyboard shortcut **Ctrl+C** (Windows) or **⌘+C** (Mac). Right-clicking the highlighted text to perform the copy/paste of merge tags is not supported as this is reserved for other operations while inside the TinyMCE editor.

<figure><img src="/files/77yZFF7NtsfHfrPdhtEQ" alt=""><figcaption><p>Highlight and copy the available balance merge tag</p></figcaption></figure>

Open a new session of the Shopwaive app with a new browser window or tab. Navigate to the email template you previously saved that you want to add the available balance merge tag. Paste the clipboard contents at the location in the template you want the available balance to appear, and then select <mark style="color:blue;">**Save this email as a template for future use**</mark>**.** We named the new template in the example below **Promo Template with Merge Tags**

<figure><img src="/files/dqliCsfMXLS6R32ob1QB" alt=""><figcaption><p>Add the available balance merge tag to a new template and save</p></figcaption></figure>

After saving the new template with at least one merge tag, you will be able to associate this email template with Campaigns to send all your customers their available balance with one-click. Follow the steps outlined [above](#send-email-with-campaigns-and-templates) to create a new Campaign with the merge tag template

Toggle the Email Campaigns list found in the Settings panel to refresh the list of merge tag templates. Select the newly created merge tag template **Promo Template with Merge Tags**

<figure><img src="/files/ZXp4qWhuyXmccLUCo6PT" alt=""><figcaption><p>Toggle the email template with merge tags to bulk send with dynamic data</p></figcaption></figure>

{% hint style="info" %}
**Tip:** When adding the available balance merge tag, the same process can be used to add the customer email merge tag to a new or existing template. Simply highlight and then copy using shortcut **Ctrl+C** (Windows) or **⌘+C** (Mac) the email address link from the default template and then paste with **Ctrl+V** (Windows) or **⌘+V** (Mac) into your new template. You can copy/paste the merge tags and place them at multiple locations
{% endhint %}

{% hint style="warning" %}
As mentioned previously, right-clicking the highlighted text to perform the copy/paste of merge tags is not supported as this is reserved for other operations while inside the TinyMCE editor
{% endhint %}

**Option 2**: Use HTML merge tags directly inside the source markup of the saved template

**Step-by-step:**

You can simply paste with **Ctrl+V** (Windows) or **⌘+V** (Mac) the merge tags into the template source code. Use the following HTML merge tags

## HTML Merge Tags

### Store credit or gift code balance

Depending if you are designing a store credit template or a gift code template, this merge tag can be used interchangeably to display the customer's available balance or their gift code balance.

```markup
<span id="_credit_value"></span> 
```

### Customer email

This tag is the customer recipient's email address associated with their Shopwaive account.

```markup
<span id="_customer_email"></span> 
```

### Discount code

This tag is used when creating a discount code template that can be referenced in a [Shopify Flow ](/shopify/shopify-flow#create-a-discount-code-and-optionally-send-email)using the [Create discount](/shopify/shopify-flow#create-a-discount-code-and-optionally-send-email) action. Upon any Shopify action or webhook, a discount code can be sent to individual customers or an entire customer segment using the [Create discount](/shopify/shopify-flow#create-a-discount-code-and-optionally-send-email) action. Alternatively, you are not required to send the code via email, simply opt-out of using Shopwaive email and the discount code will be created and can be accessed in your Shopify Discounts admin.

```markup
<span id="_discount_code"></span>
```

### Gift card code

This tag is used when creating a gift code template that can be referenced in a [Shopify Flow](/shopify/shopify-flow#create-a-gift-code-and-optionally-send-email) using the [Create gift code](/shopify/shopify-flow#create-a-gift-code-and-optionally-send-email) action.&#x20;

{% hint style="info" %}
Before you begin using this merge tag, ensure you meet the requirements to use this feature. To use this enterprise feature, you must have an active Shopwaive Checkout subscription plan, a Shopify Plus subscription, and you must enable the Shopwaive Gift Extension in the app. Proceeding without these requirements being met will result in no action taken when attempting to use an HTML template with this merge tag.
{% endhint %}

```html
<span id="_gift_card_code"></span>
```

Navigate to the TinyMCE editor, and select <mark style="color:blue;">**Tools**</mark> > <mark style="color:blue;">**Source code**</mark>

<figure><img src="/files/76yfMWcBRhLKjPSyc0mj" alt=""><figcaption></figcaption></figure>

Paste with **Ctrl+V** (Windows) or **⌘+V** (Mac) the merge tag into the template source code at the location desired. If your HTML markup is not in Shopwaive or in the TinyMCE editor yet, you can simply add the span tags into your template using any preferred editor outside of Shopwaive

<figure><img src="/files/B1Ic5gybdtV3pOrBcuEj" alt=""><figcaption></figcaption></figure>

<figure><img src="/files/9PkcmoKSSBh079Gsm0Tw" alt=""><figcaption><p>Example of using a Merge tag template and GIF animations</p></figcaption></figure>

{% hint style="info" %}
We recommend using <mark style="color:blue;">**Email Campaigns**</mark> and bulk email notification features mindfully, as your sender email address reputation is monitored by AWS and is dependent on the bounce and complaint rate. Excessive sending can result in your address being associated with spam [Learn more](https://docs.aws.amazon.com/ses/latest/dg/monitor-sender-reputation.html)
{% endhint %}

Have questions on any specific features? [<mark style="color:blue;">**Contact us**</mark>](mailto:support@shopwaive.com)


# Klaviyo Email & SMS

Connect your Klaviyo campaigns with Shopwaive to unlock powerful messaging flows

{% hint style="warning" %}
With the 2024-11 Shopwaive API release, this feature has been deprecated. For AI-powered email campaigns, refer to Shopwaive's [Send email](https://docs.shopwaive.com/shopify/shopify-flow#send-an-email-when-credit-is-deposited) action in Shopify Flow
{% endhint %}

<figure><img src="/files/D4RgOAJKqboC57EDbpW7" alt=""><figcaption><p>Connect your Klaviyo account to Shopwaive to unlock powerful marketing campaigns</p></figcaption></figure>

## Introduction

**Klaviyo: The Global Leader in Powerful Automation for eCommerce Brands**

Connecting Klaviyo to Shopwaive offers several benefits:

* **Automated Email and SMS Messaging**: Easily set up and design customized email and SMS flows.

### Automatic emails when credit is given

Enable automatic email and SMS notifications for store credit issuance in Shopwaive.

{% hint style="info" %}
Unlock this powerful feature to bulk import customer accounts into Shopwaive. Automatically trigger emails to thousands of customers instantly.
{% endhint %}

{% hint style="success" %}
To enhance your emails, include the customer's account balance and promotional links to your store, encouraging them to redeem their credit. Utilize Shopwaive's credit expiration feature to add a limited-time restriction, motivating quick redemption.
{% endhint %}

### Trigger event-based email or SMS flows

Implement time delays or trigger workflows when a customer's credit balance changes due to adjustments, refunds, purchases, rewards, or milestones.

#### Examples of event-based flows

> Brand A benefits from setting up low balance alerts when a customer's available balance falls below a set threshold after a purchase. They include a 3-day delay in Klaviyo so the email is sent after this period.
>
> Brand B sends account activation emails that include a welcome credit or reward, encouraging customers to register their email and spend their credit.

## Getting Started

Follow the steps below to get connected in just minutes

### Create a Klaviyo account

First, if you don't already have one you'll need to create a [Klaviyo](https://www.klaviyo.com) account and signup for a subscription plan. Klaviyo offers a free plan to try out many of their most powerful tools and flows that you can connect to Shopwaive. In your Klaviyo account you'll manage all your brand assets, email templates, flows, domains, and API keys.

### Enable Flows within Shopwaive

Connect your Klaviyo account to Shopwaive by first enabling Klaviyo flows in Shopwaive, by clicking the left menu item labeled Settings and toggle on Klaviyo flows. If turned on, the badge will read <mark style="color:blue;">**Flows Enabled**</mark>

<figure><img src="/files/wDwr9P6mWHZKqki5uQ3y" alt=""><figcaption><p>Turn on the Klaviyo Flows toggle in the Shopwaive settings page</p></figcaption></figure>

## Setup a dedicated sending domain

To ensure your email notifications have the greatest likelihood of landing in your customers inbox, you'll need to setup a dedicated sending domain and configure your DNS settings.

<figure><img src="/files/60hLC3hXBIkm1W45i1Qm" alt=""><figcaption><p>Domains settings in your Klaviyo account</p></figcaption></figure>

1. Find your account avatar at the bottom left of the page, and visit **Settings** > **Email** > **Domains**
2. Click **Get Started**

<figure><img src="/files/24Qct2zCdUfMRUnu8LP5" alt=""><figcaption><p>Define your dedicated sending domain and root domain</p></figcaption></figure>

Follow the instructions provided by Klaviyo to make updates to your DNS settings, which include adding the CNAME and TXT records provided

<figure><img src="/files/5LwWmc2srqYPiCsVyDcJ" alt=""><figcaption><p>Update your DNS records to match the host and values provided</p></figcaption></figure>

Once your dedicated domain setup is complete and verified, you're ready to start sending emails from your dedicated domain.

## Create a Klaviyo List

Next, create a list in Klaviyo. We'll use this to trigger your flows later on.

<figure><img src="/files/FT3oXMfVNuApP01FUI7s" alt=""><figcaption><p>Create a list by visiting Audience > List &#x26; Segments </p></figcaption></figure>

Navigate to **Audience** > **List & segments** and then click the button <mark style="color:blue;">**Create List / Segment**</mark>

<figure><img src="/files/Hbs0XMs5zJA8crE9IvBQ" alt=""><figcaption><p>Create a list by choosing List when asked which you'd like to create</p></figcaption></figure>

Choose the <mark style="color:blue;">**List**</mark> option.

Next, enter a name for the list, in our example we named it ***Available Balance List*** and then click the <mark style="color:blue;">**Create List**</mark> button to create the list.

<figure><img src="/files/TFJELeAfJXuvc4oBSRzp" alt=""><figcaption><p>Name your list and then click Create List</p></figcaption></figure>

Now click the ellipsis at the right of the list, and select <mark style="color:blue;">**List Settings**</mark>.

<figure><img src="/files/MQWzN4pOhTONy2jRlWDj" alt=""><figcaption><p>Navigate to the dropdown menu of your list and select List Settings</p></figcaption></figure>

1. Keep a copy of your <mark style="color:blue;">**List ID**</mark> as we'll need it later, in our example below it is **R2S5jQ** but you'll need to use your own unique List ID when setting it up.
2. Select the <mark style="color:blue;">**Single opt-in**</mark> option at the bottom of the page and click <mark style="color:blue;">**Update List Settings**</mark>.

<figure><img src="/files/ifzlPaVIb5Dm4HBcO4C3" alt=""><figcaption><p>Find your List ID and select the single opt-in option</p></figcaption></figure>

## Connect Klaviyo to Shopwaive

Connecting Klaviyo to Shopwaive is quick. Follow the steps below to complete the integration

### Save your Klaviyo API key and List ID in Shopwaive

Next, Log into the Shopwaive app from the Shopify Admin. Navigate to the <mark style="color:blue;">**Flows**</mark> tab.&#x20;

<figure><img src="/files/duHpB1AibEyhalt2SEIp" alt=""><figcaption><p>Select the Unspent balance reminder flow</p></figcaption></figure>

Hover over the <mark style="color:blue;">**Unspent balance reminder**</mark> card and click it to create a recurring flow&#x20;

<figure><img src="/files/dOPwYC1Ql1vQsm3MeuGP" alt=""><figcaption><p>Connect Klaviyo List ID to your Shopwaive account</p></figcaption></figure>

In the popup, enter your <mark style="color:blue;">**Klaviyo Private API Key**</mark> and <mark style="color:blue;">**Klaviyo List ID**</mark>

To locate your API Key, in your Klaviyo account visit **Settings** > **Account** > **API keys**

<figure><img src="/files/iS5rZqBXhFUSScRA5dn6" alt=""><figcaption><p>API key can be found in your Klaviyo Account Settings page</p></figcaption></figure>

If you don't already have one, click the <mark style="color:blue;">**Create Private API Key**</mark> button and copy the Private API Key listed. Ensure you copy the Private API key, as we will not be using the Public API Key.&#x20;

Next, paste your Klaviyo <mark style="color:blue;">**Private API Key**</mark> and your <mark style="color:blue;">**List ID**</mark> you created earlier into the two text fields as shown in Shopwaive. Click <mark style="color:blue;">**Save**</mark>

<figure><img src="/files/k1dqp8hILUkNidTQEdn4" alt=""><figcaption><p>Paste in your Klaviyo Private API Key and List ID</p></figcaption></figure>

If successful, you'll receive a success banner that the Klaviyo to Shopwaive connection was made successfully.

If you receive an error or continue to have trouble getting setup, reach out to our team by sending us a message in the in-app chat, we're here to help. Ensure when you paste your key and ID in the text fields that no extra white space is before or after, as this will prevent the connection from succeeding.

### Give store credit to a customer

If you've not already, give customer store credit. Follow these [steps](/shopify/install#step-3-give-customer-store-credit) to give credit or on the homepage of the app just search for your customer by email and click <mark style="color:blue;">**Adjust balance**</mark>.&#x20;

{% hint style="info" %}
If you're just getting started and want to test out the Klaviyo flow automation with Shopwaive, then you need to give credit to at least one customer before completing the remaining steps below to connect Klaviyo.&#x20;
{% endhint %}

{% hint style="success" %}
If you'd like you can start with a test credit, such as giving credit to yourself, or an admin or support email address.
{% endhint %}

<figure><img src="/files/eQaaiI6uwsLp5rqaPIwi" alt=""><figcaption><p>Give credit to at least one customer, for example and Admin or support email address</p></figcaption></figure>

Enter an amount, such as $50 or any amount. In the popup, you don't need to check the box labeled <mark style="color:blue;">**Send email**</mark> as this option is for Shopwaive's internal email service that is sent manually to a customer and is not connected to Klaviyo. Just click <mark style="color:blue;">**Save**</mark> instead.

## Create a Klaviyo Flow

Next, navigate to the **Flows** page within your Klaviyo account on the left menu pane. Click <mark style="color:blue;">**Create Flow**</mark>

<figure><img src="/files/AJRfNTQipjkGNAVn1myn" alt=""><figcaption><p>Navigate to the Flows page in your Klaviyo account select Create Flow</p></figcaption></figure>

Select <mark style="color:blue;">**Create From Scratch**</mark>

<figure><img src="/files/B93xB6tsLQhD9tt9Qds2" alt=""><figcaption><p>Select Create From Scratch</p></figcaption></figure>

Enter a name for the flow. In our example below, we named it <mark style="color:blue;">**Available Balance Flow**</mark>

<figure><img src="/files/MbIS20qKG0KlhoD1UmsT" alt=""><figcaption><p>Enter a name for your flow</p></figcaption></figure>

### Create a Trigger with Flow Filters

Create a trigger for your flow by following these steps,

Select <mark style="color:blue;">**Metric**</mark>

<figure><img src="/files/mCTIcEAO9Mh1YfTeKMxI" alt=""><figcaption><p>Select Metric from the list of triggers</p></figcaption></figure>

When asked what action will trigger your flow, Select <mark style="color:blue;">**Subscribed to List**</mark>

<figure><img src="/files/IjDZFQxSTQsuKqUAmwUM" alt=""><figcaption><p>Select the Subscribed to List action</p></figcaption></figure>

Next, Click <mark style="color:blue;">**Flow Filters**</mark> and then <mark style="color:blue;">**Add a Flow Filter**</mark>

<figure><img src="/files/ETMahtrM8xYBuMxg1MZh" alt=""><figcaption><p>Restrict the flow to only certain people</p></figcaption></figure>

For condition, select <mark style="color:blue;">**If someone is in or not in a list**</mark>

<figure><img src="/files/qYyIWJATfe3xL7AK4UQS" alt=""><figcaption><p>Create a flow filter condition to if someone is in or not in a list</p></figcaption></figure>

Select the list you created previously from the drop down menu, in our case <mark style="color:blue;">**Available Balance List**</mark>

<figure><img src="/files/ZshWbN8ezF4GPEWc5VRI" alt=""><figcaption><p>Choose the Available Balance List</p></figcaption></figure>

Click the <mark style="color:blue;">**+ AND**</mark> button to add an additional condition that is to be met before the flow is triggered. Select <mark style="color:blue;">**Properties about someone**</mark> from the drop down menu

<figure><img src="/files/k5CCmlxH10O4LvzgCjcl" alt=""><figcaption><p>Add an additional condition named Properties about someone</p></figcaption></figure>

In the <mark style="color:blue;">**Dimension**</mark> drop down, select the custom property named <mark style="color:blue;">**$shopwaive\_credit**</mark>

<figure><img src="/files/MsKoFaGYsnPckc22mBOv" alt=""><figcaption><p>Select the $shopwaive_credit dimension</p></figcaption></figure>

If new credit is given or adjusted for a customer, we want to send email notifications only to customers with balances greater than $0.00. For example, if credit is revoked or deleted by the store owner for a customer, the default behavior would not trigger an email notification since this flow's intent is promotional and to incentivize spend of a customer's available balance.

<figure><img src="/files/c14hgSFa1lGNXBarAOni" alt=""><figcaption><p>Condition ensures customers balance is greater than 0</p></figcaption></figure>

Select <mark style="color:blue;">**is greater than**</mark> and then enter <mark style="color:blue;">**0**</mark> for the amount. For the <mark style="color:blue;">**Type**</mark>, select <mark style="color:blue;">**Number**</mark>.&#x20;

Next, set the <mark style="color:blue;">**$shopwaive\_action**</mark> property equals <mark style="color:blue;">**created**</mark> or <mark style="color:blue;">**adjusted**</mark>. This ensures the email and SMS flows only trigger when credit is adjusted or created. If the <mark style="color:blue;">**$shopwaive\_action**</mark> is equal to adjusted, then you need to also check if <mark style="color:blue;">**$shopwaive\_previous**</mark> is less than <mark style="color:blue;">**$shopwaive\_credit**</mark>. <mark style="color:blue;">**$shopwaive\_previous**</mark> was the customers balance before the most recent <mark style="color:blue;">**$shopwaive\_action**</mark>.

You can also check <mark style="color:blue;">**$shopwaive\_expirationdate**</mark> and <mark style="color:blue;">**$shopwaive\_expires**</mark> for the account expiration date and expiration boolean string. <mark style="color:blue;">**$shopwaive\_expires**</mark> can equal "true" or "false", if the account is set to expire, this property equals the string "true". If the account does not have an expiration date that is enforced (i.e. such that <mark style="color:blue;">**$shopwaive\_expires**</mark> equals "false"), then the value of <mark style="color:blue;">**$shopwaive\_expirationdate**</mark> does not apply and can be ignored.

<figure><img src="/files/TnsH9JATxgsAf01rawGy" alt=""><figcaption><p>Example Klaviyo response from a user profile request</p></figcaption></figure>

<figure><img src="/files/KdWCeZsZQVlB2mRxrFbF" alt=""><figcaption><p>Flow filters that ensure the flow is only triggered when credit is greater than zero, and has been adjusted or created</p></figcaption></figure>

Now the conditions for the Flow Filters are set, click <mark style="color:blue;">**Save**</mark> and then click <mark style="color:blue;">**Done**</mark> to return to main flow.&#x20;

### Create an Email or SMS action

After the flow is triggered, Klaviyo provides you many options to design your flow's timing and intent. For this example, we'll add an email that is sent when the flow is triggered. You can use Klaviyo's Drag & Drop or HTML Editor and choose from any templates to match your brand and messaging, your options are truly endless.

<figure><img src="/files/HCsaIPgLfsguzPow3Pd4" alt=""><figcaption><p>Drag and drop the Email Action into the flow as shown</p></figcaption></figure>

After you drag and drop the <mark style="color:blue;">**Email**</mark> action into your flow. Click <mark style="color:blue;">**Edit.**</mark>

For simplicity, choose the <mark style="color:blue;">**Drag and Drop**</mark> option to design your email message with the customer's available balance.

<figure><img src="/files/JvYvxBOlLl6is82DKMGm" alt=""><figcaption><p>Click Drag and Drop to create email's using Klaviyo powerful drag-and-drop editor</p></figcaption></figure>

You can choose a Promotional template from the vast array of template options that Klaviyo offers to quickly begin.

<figure><img src="/files/CZKm0GxvNahNSBZDuxfV" alt=""><figcaption><p>Choose an example promotional template from Klaviyo's template library</p></figcaption></figure>

Next, we're going to customize the template to include personalization.

Select the text in the first paragraph beneath the <mark style="color:blue;">**On a summer excursion title**</mark>. This opens a text editor in the left menu pane. Click your mouse in the line of text such that your blinking cursor is between <mark style="color:blue;">Redeem your</mark> and <mark style="color:blue;">our most popular</mark> as shown below.&#x20;

<figure><img src="/files/sOQpyGgizcIUtNPSr0wq" alt=""><figcaption><p>Select the text in the email to add personalization</p></figcaption></figure>

Now, click the Personalization icon shaped like a person at the top of the text editor menu that is labeled <mark style="color:blue;">**Add personalization**</mark> if you hover.

<figure><img src="/files/BZLcUxgAwnlF0JyeSIvu" alt=""><figcaption><p>Add personalization by clicking the personalization icon</p></figcaption></figure>

Scroll down the drop down menu and select <mark style="color:blue;">**$shopwaive\_currency**</mark>&#x20;

<figure><img src="/files/bZcf198mSVPAKXNf4q3h" alt=""><figcaption><p>Select $shopwaive_currency</p></figcaption></figure>

And then repeat the steps by clicking the personalization icon once again, scroll down the menu and select <mark style="color:blue;">**$shopwaive\_credit**</mark>.&#x20;

<figure><img src="/files/xLN0wdLVJg7sqZMYX442" alt=""><figcaption><p>Then select $shopwaive_credit</p></figcaption></figure>

If in the Shopwaive app your store currency is set as USD, then adding these personalization properties in-line of the email will combined the <mark style="color:blue;">**$**</mark> symbol with the credit amount to form the credit balance ("$" plus "50.00" will read $50.00). You can change your currency anytime within the **Shopwaive** > **Settings**.

<figure><img src="/files/FWzgu0vuCdzbOVhQB5EL" alt=""><figcaption><p>Your editor should show personalization after adding Shopwaive currency and credit</p></figcaption></figure>

{% hint style="info" %}
(Optional) Change the CTA call-to-action to incentivize your customers to redeem their credit, for example <mark style="color:blue;">**Redeem Credit**</mark> as shown below
{% endhint %}

<figure><img src="/files/DvVpdisUGJJ2rvWyQDP2" alt=""><figcaption><p>Customize the CTA call-to-action, or create A/B Testing to monitor CTA's that convert</p></figcaption></figure>

Copy the personalization text by highlighting and copying it as we will use this in our Subject title. To edit the Subject title, click the <mark style="color:blue;">**Save & exit**</mark> button.

<figure><img src="/files/fvDZ5WIoke1LsZDQlSU9" alt=""><figcaption><p>Copy the personalization text in the email template to use in the Subject title</p></figcaption></figure>

You can personalize the Subject line and Preview text as you wish. You can add the customer's available balance by pasting in the personalization snippets from the email template in the previous step.

<figure><img src="/files/FyLfBVfC2AgCt5gmMMyF" alt=""><figcaption><p>Enter "Redeem your " and then paste your personalization into the subject line</p></figcaption></figure>

Next, click <mark style="color:blue;">**Edit Email**</mark> once more and then <mark style="color:blue;">**Preview & test**</mark>.

You can send a test email to the email address you issued $50 in the previous steps by clicking <mark style="color:blue;">**Send Test**</mark> and enter in the same email address you issued credit, then click <mark style="color:blue;">**Send**</mark>

<figure><img src="/files/oOk2HoVS4Hhzom0g4ij3" alt=""><figcaption><p>Click Send Test and enter your test email address that you issued credit to in the earlier steps</p></figcaption></figure>

The test will send the email and the customer's balance will be reflected in the Subject title and message. Get creative, and design your flows, email templates, CTAs, messaging and customer journey any way you choose to perfectly match your brands goals and objectives. The opportunity with Klaviyo and Shopwaive is enormous.

<figure><img src="/files/923b0fKRaCA3WTYeMc6I" alt=""><figcaption><p>Email received to customer with personalization, including Shopwaive credit balance and CTA</p></figcaption></figure>

## Choose your Smart Sending preference

Return to your Flow and select the <mark style="color:blue;">**Email**</mark> action.&#x20;

<figure><img src="/files/3TXaNdMR5vytsplNgpJ5" alt=""><figcaption><p>Note the green email icon in the Email action. Also note the Smart Sending option is ON</p></figcaption></figure>

By default, <mark style="color:blue;">**Email**</mark> actions have a setting named <mark style="color:blue;">**Smart Sending**</mark> turned ON. This prevents emails from sending to customers if they recently received an email. If you turn this OFF and Flows are connected and enabled in Shopwaive and Klaviyo, then emails will send every time a customers credit changes. If you prefer, you can turn <mark style="color:blue;">**Smart Sending**</mark> ON to prevent same-day emails, however, it should be noted if this is turned ON your customers will not automatically receive email alerts to changes in their available balance if multiple updates are made too frequently.

## Select Recurring options

After creating your primary flow using the steps above, you have two different options for designing the flow to recur on a set frequency.&#x20;

### Option 1: Using Klaviyo time delays with email cloning

The first option enables your primary flow to recur by adding time delays and cloning your existing email message. If you desire, after cloning the email or SMS message within the primary flow, you can make changes to each consecutive clone to show your customers a unique email design or perhaps one that aligns with seasons, holidays, or other calendar events. Though the design can be different, the goal and content of the email is the same. Each email or SMS will show the customers' available balance and a backlink to your site to redeem. For Option 1, only the primary flow exists and multiple emails within it are clones to create the recurring effect.

### Select Klaviyo Recurring Options — Step-by-step:

After your first email message, add a time delay. For quarterly reminders, we set the first delay to 90 days. You can set this frequency to any length of time.

<figure><img src="/files/hV6FXZyk9Zb5a7qrSDXq" alt=""><figcaption><p>90-day time delay is added after your Available balance email</p></figcaption></figure>

The Available Balance email is cloned by selecting the ellipsis to open the drop-down menu

<figure><img src="/files/ZtewnuV6XcHnyCgp6eCF" alt=""><figcaption><p>Select the ellipsis of the Available Balance email and select Clone</p></figcaption></figure>

Drag-and-drop the Available Balance clone after the 90-day delay. Also, change from <mark style="color:yellow;">**Manual**</mark> to <mark style="color:green;">**Live**</mark>

<figure><img src="/files/nxxgZIse2a5nexBGUwXg" alt=""><figcaption><p>Clone the email and place it after the delay</p></figcaption></figure>

Now, you can choose to open the email clone "Copy of Available Balance" to make edits or changes to the design, but is not required. The current available balance of the customer at the time the Copy/clone is sent 90 days after the first email will be accomplished. You can repeat the use of Time delays and email/SMS clones using this process as many times as you like.

### Option 2: Using Date-Property Triggered flows with saved email templates

To create a date-property triggered flow based on the primary flow using saved email templates, we need to save the email we created in our primary flow as a template. We do this because when we create a new flow that recurs at a frequency, it will save time.

### Save your email as a template <a href="#h_01h9q8q4ktar278ahh02wk87h8" id="h_01h9q8q4ktar278ahh02wk87h8"></a>

To change a list-triggered flow to an event-triggered flow, or vice versa, you cannot simply clone the flow. Instead, you'll have to create a brand new flow. You can speed up this process, however, by first saving all the flow emails as templates (we only have 1 in the primary Available Balance flow) so they can be added into your new flow with a few clicks.

In our example, we're going to change a list-triggered flow to an event-triggered flow. Here are the steps to follow:

1. Open the flow builder for your list-triggered flow.
2. Next, [save all the emails as templates](https://help.klaviyo.com/hc/en-us/articles/115000102752#save-an-email-as-a-template). It is helpful to name these templates something clear so you can find them easily when you make your new flow.\
   ![Clicking the arrow next to the Edit Details button on Message Content screen for a flow email will show the Save as Template option.](https://help.klaviyo.com/hc/article_attachments/18583431540763)
3. Once you've saved all the emails associated with the flow, create a new flow by navigating back to the **Flows** tab.
4. When you are building out the content for your new flow, find your previously saved templates by choosing **Drag and Drop** and then **Saved templates** when editing a flow message.\
   ![The Drag and Drop option when editing an email.](https://help.klaviyo.com/hc/article_attachments/18583530935579)\
   ![The Saved templates tab after selecting Drag and Drop.](https://help.klaviyo.com/hc/article_attachments/18583416468635)
5. Once you've done this the email in the primary Available Balance flow, you can create a new flow with a Date-Property trigger

## Create a recurring date-based flow

The primary Available Balance flow created earlier adds customers with Shopwaive credit balance to a list. We can recur messaging to customers on that list using a separate date-based triggered flow.

To create a date property-triggered flow:

1. Navigate to the **Flows** tab.
2. Click **Create Flow**. This will take you to the Flows Library where you can find pre-built birthday and anniversary flows.&#x20;
3. Either select a pre-built flow or create one from scratch. To build it yourself, click **Create from Scratch** and choose the **Date Property** option as the initial trigger.

<figure><img src="/files/Uee2zfjsYE4oAc4ZShCR" alt=""><figcaption><p>Select Create From Scratch and name the recurring flow</p></figcaption></figure>

Select the **Date Property** as a trigger

<figure><img src="https://help.klaviyo.com/hc/article_attachments/5918703799323/mceclip0__9_.jpg" alt="" width="375"><figcaption><p>Choose Date Property for trigger</p></figcaption></figure>

When you first choose the date property trigger, you will be prompted to select which specific property you would like to trigger the flow. All date-based profile properties in your account will appear in the dropdown menu for selection. We will chose the **Created** profile property since this is the date the customer was first created when they Subscribed to the Available Balance list (customers are automatically subscribed when you turn on the Klaviyo Flows in the Shopwaive app)

<img src="https://help.klaviyo.com/hc/article_attachments/5918727432731/image4__3_.jpg" alt="When configuring the date property trigger, there is a dropdown where you can choose from the different date properties in your account. For this recurring flow we will choose the Created property" height="384" width="307">

## Pick when the flow will start and frequency <a href="#pick-when-the-flow-will-start3" id="pick-when-the-flow-will-start3"></a>

After selecting the **Created** date-based profile property, you will need to choose when the flow should start: on or before the actual date. For this example, we will choose **On person's** **Created** date and choose **Monthly** for the flow repeat frequency.&#x20;

### Frequency options for recurring flows  <a href="#choose-how-often-the-flow-will-repeat4" id="choose-how-often-the-flow-will-repeat4"></a>

* **Monthly**\
  Recipients will qualify to enter this flow on a monthly recurring basis on the same day each month; for example, a monthly credit balance alert series. Note that if you schedule this on the 31st, it will automatically pick up on the last day of the month for any month that has fewer than 31 days.
* **Yearly**\
  Recipients will qualify to enter this flow on a yearly recurring basis on the same month/day; for example, a yearly anniversary or birthday series.
* **Should not repeat**\
  Recipients will qualify to enter this flow only once when the full date matches (day, month, and year); for example, a wedding or pregnancy due date

For this example, and as mentioned above, we will choose **Monthly**. Your flow settings should look similar to the screenshot below:

<figure><img src="/files/3qhLA6B5wrARXN5HOg5s" alt=""><figcaption><p>Select Monthly frequency to repeat the flow each month</p></figcaption></figure>

## Drag in the saved email templates or SMS messages <a href="#choose-how-often-the-flow-will-repeat4" id="choose-how-often-the-flow-will-repeat4"></a>

The email templates we saved earlier can now be dragged into this new flow, and edited as desired. After clicking **Save** in the Trigger and Flow Filters section, drag a blank Email and set it after the **Created** trigger. To update the blank Email to a Saved Email Template, use Step 4. from the [Save your email as a template](#h_01h9q8q4ktar278ahh02wk87h8) section above.

<figure><img src="/files/REYvkusUg5eFVwG1pAjR" alt=""><figcaption><p>Select Configure Content and add the Saved Email Template from earlier</p></figcaption></figure>

### Add Additional Filters to the Email <a href="#add-flow-filters5" id="add-flow-filters5"></a>

Now that we've setup a recurring flow based on a date trigger, we will limit the email to only be sent to customers that have an available balance. Select the **Email** we just created from the Available Balance template and under **Settings**, click the **Additional Filters** link.

<figure><img src="/files/Hjgbq6TxARcjYzsGuw28" alt=""><figcaption><p>Select Additional Filters under Settings on the left menu pane to setup a flow filter based on customers available balance</p></figcaption></figure>

For flow filters, choose **Properties about someone** and choose the customer **$shopwaive\_credit** property and then select **is greater than** and then type in **0**. If you want to increase this available balance threshold to further limit emails sent to only customers with at least a $50 balance, for example, you can type in 50.

<figure><img src="/files/2nYZhZzktRaP0x6nC5yB" alt=""><figcaption><p>Choose the $shopwaive_credit property and select greater than 0. Type is set as Number. Click Save</p></figcaption></figure>

Your final flow settings should look similar to below:

<figure><img src="/files/GIyV56Zh0BT9EORv12fJ" alt=""><figcaption><p>Recurring available balance flow that repeats monthly</p></figcaption></figure>

Your final email settings within the recurring flow should look similar to the screenshot below. Ensure the email status is changed to <mark style="color:green;">**Live**</mark> and that **Smart Sending** is turned off if you wish Klaviyo not place filters on how often your customers receive notifications.

<figure><img src="/files/Z4l8JnfE4yzd3CLyvrDY" alt=""><figcaption><p>Email settings within the recurring flow</p></figcaption></figure>

The primary Available Balance flow created in [Create a Klaviyo Flow](#create-a-klaviyo-flow) is used to initialize and sync customer profiles and available balance data between Shopwaive and Klaviyo. Customer data remains synced between Klaviyo and Shopwaive so as long as you enable the integration feature within Shopwaive Settings. The recurring flow created using these instructions ([Option 2](#option-2-using-date-property-triggered-flows-with-saved-email-templates)) will successfully send monthly reminder emails to customers that have a credit balance.&#x20;

{% hint style="info" %}
For Option 2, the primary flow is not cloned. Instead, we saved the email templates from the primary flow so we could drag those in to this new flow, to use a quick starting point. Using this option, recurring email or SMS notifications are sent using a date-property trigger that recurs at a frequency you defined.
{% endhint %}

## Choose Gmail Promotion settings

{% hint style="info" %}
(Optional) If you or your customer's use Gmail, you may find available balance emails sent from Klaviyo arrive in the <mark style="color:blue;">**Promotions**</mark> inbox. Use the steps below to tell Gmail to send to your <mark style="color:blue;">**Primary**</mark> inbox, if you prefer.
{% endhint %}

By default, Gmail may automatically send balance alerts to the Promotions tab. To prevent the alerts from being categorize in the <mark style="color:blue;">**Promotion**</mark> category and to send directly to your customer's <mark style="color:blue;">**Primary**</mark> inbox, you can ask your customer's to drag the email from the Promotions tab into the Primary inbox. A small window will appear at the bottom of the page and you can tell Gmail to do categorize this email in the <mark style="color:blue;">**Primary**</mark> inbox for now on.&#x20;

## Conclusions

Congratulations! Today you setup Klaviyo's powerful email services to seamlessly integrate with Shopwaive's leading credit accounting platform. If you have any questions, just send us a message in the chat, we're here to help.


# Troubleshooting branded sending domain issues

Setup your branded sending domain with ease. If you are not successful, follow these steps to troubleshoot any issues you might have. Or feel free to contact our team directly at support\@shopwaive.com

### What you'll learn <a href="#h_01hcn6grmagq6x1ckav6qstx4h" id="h_01hcn6grmagq6x1ckav6qstx4h"></a>

Learn how to diagnose verification issues when setting up your branded sending domain (also known as a dedicated sending domain) in Shopwaive.&#x20;

A branded sending domain enables you to send emails that appear from your brand, rather than from Shopwaive's shared domain.&#x20;

Google and Yahoo have announced new sender requirements that they are planning to start enforcing Feb. 1, 2024. While already best practice, setting up a branded sending domain will be a requirement for bulk senders to land in Gmail inboxes.

Google considers those who send 5,000 or more emails to Google accounts per day to be "bulk senders." All traffic from a sender counts towards that 5,000 email threshold, including transactional emails.&#x20;

Learn more about [Gmail and Yahoo’s upcoming sender requirements](https://www.klaviyo.com/blog/gmail-update) from our partners at Klaviyo.

### Before you begin <a href="#h_01hcn6grmagwcfd88k2b4sdmb8" id="h_01hcn6grmagwcfd88k2b4sdmb8"></a>

Before starting the troubleshooting steps below, confirm that you have attempted to verify your sending domain in Shopwaive and are seeing errors.

We recommend giving time for the DNS to propagate and for the cache to clear. Depending on your DNS provider, this process could take up to 48 hours.&#x20;

### Troubleshooting DNS authentication <a href="#h_01hcn6grmastbgnvqfc0fn4zew" id="h_01hcn6grmastbgnvqfc0fn4zew"></a>

Shopwaive requires 3 CNAME records for email authentication, one TXT (SPF) record and one MX record to confirm a custom MAIL FROM domain. When setting up a branded domain in Shopwaive, you’ll see similar records presented based on your subdomain choice.&#x20;

If your brand chooses to use a 2nd level subdomain like *example.message.yoursite.com*, the root domain would be *message.example.com* and the sending domain would be *example.message.yoursite.com.*

In an example where the intended sending domain is *message.yoursite.com*, with “message” as the subdomain and “*yoursite*.co&#x6D;*”* as the root domain, the expected DNS records would be the following:&#x20;

<table data-header-hidden><thead><tr><th></th><th></th><th></th><th data-hidden></th><th data-hidden></th></tr></thead><tbody><tr><td><strong>Type</strong></td><td><strong>Host name</strong></td><td><strong>Value</strong></td><td><strong>Value</strong></td><td><strong>Record Type</strong></td></tr><tr><td>CNAME</td><td>su7yhggdkncv9jsjfhks0oplkg6s43jdn._domainkey</td><td>su7yhggdkncv9jsjfhks0oplkg6s43jdn.dkim.amazonses.com</td><td>u161779.wl030.sendgrid.net</td><td>CNAME</td></tr><tr><td>CNAME</td><td>dfse99udhs63dhssskmnbzawqukgh._domainkey</td><td>dfse99udhs63dhssskmnbzawqukgh.dkim.amazonses.com</td><td>sw.domainkey.u161779.wl030.sendgrid.net</td><td>CNAME</td></tr><tr><td>CNAME</td><td>ksldjnb64729jd7h231dsfdgjj3fj34hdf._domainkey</td><td>ksldjnb64729jd7h231dsfdgjj3fj34hdf.dkim.amazonses.com</td><td>sw2.domainkey.u161779.wl030.sendgrid.net</td><td>CNAME</td></tr><tr><td>TXT</td><td>message</td><td>v=spf1 include:amazonses.com ~all</td><td><em>shopwaive</em>-site-verification=public_API_key</td><td>TXT</td></tr><tr><td>MX</td><td>message</td><td>feedback-smtp.us-east-1.amazonses.com</td><td></td><td></td></tr></tbody></table>

{% hint style="info" %}
If a priority is available when adding your MX record, use a priority of **10**
{% endhint %}

A helpful set of tools to check if your records are propagating correctly are MxToolbox's DNS lookups:&#x20;

* [DNS lookup](https://mxtoolbox.com/SuperTool.aspx)
* [TXT lookup](https://mxtoolbox.com/TXTLookup.aspx)

You can use the DNS lookup tool to search the host for each of the CNAME records, and the TXT lookup tool for the TXT record.&#x20;

{% hint style="info" %}
**CNAME lookup tip:** Use the DNS check option from the dropdown on MxToolbox. Based on whether you are seeing values returned by the queries, there are some common errors that may be the source of the issue.
{% endhint %}

### If queries are returning values  <a href="#h_01hcn6grmas8snrv1jmhph1xy5" id="h_01hcn6grmas8snrv1jmhph1xy5"></a>

In order for your sending domain to be successfully verified in Shopwaive, the values returned by your queries must match those presented in Shopwaive exactly. Ensure that there are not any discrepancies between the values you are seeing returned, and those in Shopwaive.&#x20;

#### Root domain being appended to values automatically <a href="#h_01hcn6grmayynyxdds28j97mb2" id="h_01hcn6grmayynyxdds28j97mb2"></a>

Some DNS providers expect a period (.) at the end of the added value. Without this period, the DNS provider assumes that the entire value field is a subdomain of the domain being configured, and will automatically add the root domain.

### If queries are not returning values  <a href="#h_01hcn6grmbefepymjkghaptfhj" id="h_01hcn6grmbefepymjkghaptfhj"></a>

#### Root domain duplicated in the hostname <a href="#h_01hcn6grmbjjn4g58ccvn4y6a5" id="h_01hcn6grmbjjn4g58ccvn4y6a5"></a>

We also recommend checking if your DNS provider expects only the subdomains in the host name fields, and automatically appends the root domain. For example, if you add the CNAME record *message.domain.com* it would automatically become *message.domain.com.domain.com*.&#x20;

Instead, you might need to only add the “message” subdomain in this instance for the record’s host name to be *message.domain.com.* Compare your other DNS records to see if you need to append it or if your provider automatically does this.

#### Records being proxied <a href="#h_01hcn6grmbb5kpz56g0w33ebvt" id="h_01hcn6grmbb5kpz56g0w33ebvt"></a>

If your DNS provider allows you to proxy records, you will see issues with the setup of the branded domain in Shopwaive if this feature is enabled. This commonly happens with Cloudflare but is possible with other DNS providers too. You’ll need to disable the proxying of your records for them to resolve over the internet, and so their presence can be verified by the sending domain set up tool in Shopwaive. Record proxying will need to stay disabled after the set up process as well for emails to authenticate as expected.&#x20;

### Other DNS provider issues  <a href="#h_01hcn6grmbxkk7wkzhyanwhyfj" id="h_01hcn6grmbxkk7wkzhyanwhyfj"></a>

#### DNS provider does not support @ symbol  <a href="#h_01hcn6grmb3jbpt21x59ytkxje" id="h_01hcn6grmb3jbpt21x59ytkxje"></a>

In cases where a DNS provider does not support the symbol “@”, the root domain would need to be set as the hostname for the site verification record. The “@” symbol is the shorthand for the root domain (yourwebsite.com), so you can use either option depending on what your DNS provider supports.&#x20;

#### DNS provider does not support underscores <a href="#h_01hcn6grmb7tjhf94tax0q29jr" id="h_01hcn6grmb7tjhf94tax0q29jr"></a>

Some DNS providers do not support underscores for CNAME records. However, in order for your sending domain to be functional within Shopwaive, these underscores are necessary.

If your DNS provider does not support underscores in your CNAME, we suggest first reaching out to your DNS provider’s support team and seeing if they can create the record for you. Often DNS providers will be able to manually adjust your CNAME to include the underscore if you reach out to them.

If your DNS provider ultimately cannot support underscores, [consider using another provider](https://www.hostinger.com/tutorials/how-to-change-domain-nameservers) as these will be necessary to your domain setup in Shopwaive.

#### A TXT value already exists on the root domain <a href="#h_01hcn6grmb1r5jq1b1wtfhhnp7" id="h_01hcn6grmb1r5jq1b1wtfhhnp7"></a>

If there is an existing TXT record on your root domain, you can append the Shopwaive value to your existing field. As long as the Shopwaive requested value is present, the record will be successfully validated when setting up your branded domain in Shopwaive.&#x20;

### DMARC <a href="#h_01hcn6grmbsgjw42wfaehkrevg" id="h_01hcn6grmbsgjw42wfaehkrevg"></a>

For emails to be [DMARC compliant](https://help.klaviyo.com/hc/en-us/articles/4402601857307), the root domain on your account needs to align with the from-address domain of your emails.&#x20;

For example, if you send an email using *<sales@example.com>* as the from-address, where example.com is protected by DMARC, your account will need to use a branded sending domain like *message.example.com* for all emails sent from Shopwaive to meet DMARC authentication requirements.


# Install

Launching Shopwaive on your store is easy. Use the steps outlined below to get started

{% hint style="info" %}
If you need help, just send us a message in the chat and one of our team members will be glad to guide you through setup
{% endhint %}

## Install on Wix

Install Shopwaive on your [Wix](https://docs.shopwaive.com/wix/www.wix.com) store by visiting the [Wix AppMarket](https://www.wix.com/app-market/shopwaive-store-credit) and installing the app by clicking <mark style="color:blue;">Add to Site</mark>

<figure><img src="/files/ovdNHuQUTu72CGmaGjzj" alt=""><figcaption><p>Install Shopwaive on the Wix AppMarket</p></figcaption></figure>

##

## Get started with these steps

<details>

<summary>Step 1: Navigate to the Shopwaive Admin</summary>

If you are using Shopwaive on Wix, after installing the app visit the Shopwaive Admin by navigating to **Wix Admin** > **Apps** > **Manage Apps**. Then navigate to the list of installed apps and click <mark style="color:blue;">**Open**</mark> beside the Shopwaive app

</details>

<figure><img src="/files/txkrTXmaSZmnVP9vKntD" alt=""><figcaption><p>Navigate to the Shopwaive within the Wix admin</p></figcaption></figure>

Click Open to launch the Shopwaive app

<figure><img src="/files/hpHgU6VNTIbJ3lrccKnF" alt=""><figcaption><p>Launch the Shopwaive app from the Wix admin</p></figcaption></figure>

## Install on your own hosted site

If you have a custom website not hosted by Wix or Shopify, Shopwaive can be installed with the help of our team. Contact us and we can provide integration [support](mailto:undefined) to get you setup.


# Product features

Shopwaive develops advanced internet business and digital commerce technology for global CMS and website builder platforms

## Features and functionality

{% hint style="info" %}
**Tip:** New features are continuously being rolled out. If your brand would like to submit a feature request, contact our team at <support@shopwaive.com> we'd be glad to assist
{% endhint %}

<table><thead><tr><th width="250">Feature</th><th width="379" data-type="checkbox">Store credit via Payment codes</th></tr></thead><tbody><tr><td>Combine with other offers</td><td>true</td></tr><tr><td>Single expiry date</td><td>false</td></tr><tr><td>Pro &#x26; Enterprise available</td><td>true</td></tr><tr><td>Multiple expiry dates</td><td>false</td></tr><tr><td>Multiple for same email</td><td>false</td></tr><tr><td>Bulk import available</td><td>true</td></tr><tr><td>Bulk export available</td><td>true</td></tr><tr><td>Requires customer login</td><td>true</td></tr><tr><td>Refunds and exchanges</td><td>true</td></tr><tr><td>Digital wallet functionality</td><td>true</td></tr><tr><td>Shopwaive widget</td><td>true</td></tr><tr><td>Tapcart Integration</td><td>false</td></tr><tr><td>Klaviyo Integration</td><td>false</td></tr><tr><td>Zapier Integration</td><td>true</td></tr><tr><td>Email integration</td><td>true</td></tr><tr><td>Order API</td><td>false</td></tr><tr><td>Customer API and Top ups</td><td>false</td></tr><tr><td>Subscriptions and Flows</td><td>false</td></tr><tr><td>Reporting and analytics</td><td>true</td></tr><tr><td>Currency options</td><td>true</td></tr><tr><td>Multilingual  </td><td>true</td></tr><tr><td>Canvas design editor</td><td>false</td></tr><tr><td>Checkout</td><td>true</td></tr><tr><td>Fraud protection </td><td>true</td></tr><tr><td>24/7 Customer Support</td><td>true</td></tr></tbody></table>

{% hint style="info" %}
Enterprise features require the [Shopwaive Pro](https://checkout.shopwaive.com/b/3csdUBgCg7ZD0G4fZ0) subscription plan. Contact us at <support@shopwaive.com> to learn more
{% endhint %}

Have questions on any specific features? [<mark style="color:blue;">**Contact us**</mark>](mailto:support@shopwaive.com)

###

###


# Store credit

Get started with Shopwaive by importing existing customer accounts, issuing refunds with store credit, and more

{% hint style="info" %}
Need assistance? Send us a message in the chat, and our team will gladly guide you through the setup.
{% endhint %}

{% hint style="success" %}
This guide assumes you already installed Shopwaive on your [Wix](https://www.wix.com) store, staging, or development store as outlined in the prior steps. Confirm you can access the Shopwaive app in the [Wix](https://www.wix.com) admin before proceeding. See [Installation](/wix/install) for more details
{% endhint %}

<details>

<summary>Step 1: Give store credit</summary>

* Import existing customer accounts using the [Bulk import editor](/shopify/accounts/import-accounts) or search for your customer by email using the <mark style="color:blue;">**Customers**</mark> dashboard, click <mark style="color:blue;">Adjust balance</mark>
* Make edits to your customer available balance, notes, or send an email notification. Once you make edits to a customer account, a Shopwaive credit account is automatically created
* If a customer has only subscribed to your email newsletter through a previous marketing campaign, they will still need to visit your site and create login credentials to access their credit and for you to search and issue credit for that email

</details>

<details>

<summary>Step 2: Customers redeem store credit</summary>

* Customers will log into their account they created on your website using the email address that you issued credit. If the customer has a Shopwaive credit account and balance, the Shopwaive widget appears at the bottom of the page
* Before or after logging in, customers add items to their cart
* Your customers have the option to redeem their full available balance or apply partial credit towards a purchase. By clicking the widget, customers can apply any amount to their checkout
* After entering the amount they wish to redeem, customers click <mark style="color:blue;">**Get payment code**</mark> to generate a payment voucher. They click the code to copy it to their clipboard and then can paste it into the promo field at Checkout

</details>

<figure><img src="/files/IjHlXIbdnjjyh6rIC60V" alt="" width="563"><figcaption><p>Redeem credit for a payment code to be entered at Checkout</p></figcaption></figure>

Have questions on any specific features? [<mark style="color:blue;">**Contact us**</mark>](mailto:support@shopwaive.com)


# Import accounts

Giving customers credit should be easy. Thats why with Shopwaive we made it that way

## Open the app

First, just open the Shopwaive app and click the left menu item labeled <mark style="color:blue;">**Import**</mark>

<figure><img src="/files/h6x5fuTGYhwLINKjCv8m" alt=""><figcaption><p>Click Import from the left side menu</p></figcaption></figure>

## Get the template

In the popup that appears, click <mark style="color:blue;">**Get template**</mark> to download a template CSV file to your local drive.&#x20;

## Add your customers into the template

<figure><img src="/files/9CQZgkBnVpVIpMu9ei21" alt=""><figcaption><p>Example template file with customer data being prepared to import into Shopwaive</p></figcaption></figure>

Copy and paste into their respective columns your customer's email address, existing credit balance, and any note you'd like to attach to the customer import transaction. The email and balance are required, while any transaction note is optional. Shipping credits are not yet supported.

{% hint style="success" %}
The credit column can be any numeric value greater than or equal to 0. It does not require a currency symbol, but you can include it if it is convenient. Your credit currency will always be defined by the currency setting defined in <mark style="color:blue;">**Settings**</mark>
{% endhint %}

{% hint style="info" %}
The total number of customers that can be imported and at any given time is limited depending on your Shopwaive subscription plan. Our team can temporarily lift these restrictions upon request and based on need, please email us at <support@shopwaive.com>
{% endhint %}

## Upload your customers

Ensure you save or export the template with your customer data as CSV (.csv). Then simply click <mark style="color:blue;">**Upload CSV**</mark>  to import your data into Shopwaive. When the file upload is successful, your page will appear similar to the example provided below.

<figure><img src="/files/7Tec3bbR9GVcPfeFDSp0" alt=""><figcaption><p>Customer accounts are successfully uploaded and ready for import</p></figcaption></figure>

{% hint style="info" %}
If you receive errors highlighted in <mark style="color:red;">**red**</mark>, follow the troubleshooting steps below
{% endhint %}

If you have trouble importing your customer data, try the troubleshooting steps listed here, otherwise you can skip this section and continue to <mark style="color:blue;">**Confirm and Import your customers**</mark>

## Troubleshooting imported customers

To ensure you are successful with importing your existing customer data, follow the guidance and requirements outlined below.

1. Ensure you use the CSV template file by clicking <mark style="color:blue;">**Get template**</mark>
2. Only include data for the three columns in the template, and do not change the column titles
3. Check to be sure your customers email addresses are valid and are in the correct format
4. Only include numerical amounts greater than or equal to zero in the <mark style="color:blue;">**Credit**</mark> column. Currency symbols are optional, but consider removing them if you receive errors. Define your store credit currency in the app <mark style="color:blue;">**Settings**</mark>
5. If you exceed the limit for max number of customers imported, contact our support team at <support@shopwaive.com>, depending on your subscription plan we may lift these restrictions.

## Confirm and Import your customers

After you confirm the data is ready, click <mark style="color:blue;">**Import**</mark> to proceed to import your customers into Shopwaive. If you have customers that did previously have a Shopify account, a Shopify account is created for them.&#x20;

{% hint style="success" %}
This is a very powerful tool, such that you can give store credit to new leads or potential customers that have opted-in for email notifications. You can then send emails manually within Shopwaive or connect your Klaviyo account and send automated Account activation requests with a store credit offer to encourage first-time customers to visit your site and spend their welcome rewards. Pretty neat, right? Yeah, we think so too! 🎉 🙌
{% endhint %}

## Successful import

If the import is successful, you'll receive a success message. You can close the popup, you're done and your customer's credit is ready to be redeemed.

<figure><img src="/files/F9zdJGeMywmUO69ZbtcX" alt=""><figcaption><p>A success message appears when customer accounts are imported without issue</p></figcaption></figure>


# Export accounts

Exporting data for your third-party reporting and analytics teams is as easy as one click

## Export customer balances

Export all your customer account balances with just one click. Follow the steps below to get a real-time snapshot of your customer account balances.

Open the app and click the left side menu item labeled <mark style="color:blue;">**Export**</mark>

<figure><img src="/files/jW92Gekx1oPevMoDZea9" alt=""><figcaption><p>Click Export from the drop down menu</p></figcaption></figure>

Once you click <mark style="color:blue;">**Export**</mark>, you will receive a CSV of all your customer account data.

## Export customer transactions

If you'd like to receive a full ledger of all your customer transactions, including issuance and redemption of credit, follow the steps below.

Open the app, and click the left side menu item labeled <mark style="color:blue;">**Recent Activity**</mark>. Then click <mark style="color:blue;">**Export to CSV**</mark>

<figure><img src="/files/7tsmIB4Nu1DKFzBTAMax" alt=""><figcaption><p>Select customers and then click Export to CSV </p></figcaption></figure>

Once you click <mark style="color:blue;">**Export to CSV**</mark> you will receive a CSV of all your customer transaction data to be used for reporting and analytics by you or your third-party partners.


# Settings

Setup Shopwaive the way you want. Enable features, adjust widget location, and currency settings

{% hint style="info" %}
If you need help, just send us a message in the chat and one of our team members will be glad to guide you through setup
{% endhint %}

{% hint style="success" %}
This guide assumes you already installed Shopwaive on your [Wix](https://www.wix.com) store, staging, or development store as outlined in the prior steps. Confirm you can access the Shopwaive app in the [Wix](https://www.wix.com) admin before proceeding. See [Installation](/wix/install) for more details
{% endhint %}

## Override button appearance and pop-up&#x20;

The default setting for the Shopwaive button is to appear on your site only after (1) a user logs into their account AND (2) the customer has a credit balance greater than 0 that you created within the Shopwaive app.&#x20;

On your store you may wish to override this default behavior and hide the Shopwaive credit button by default. Brands may choose to do this so that the modal pop-up is launched by a native button or click event inside a pre-existing menu or other HTML element. In this way, customers can still redeem their credit using a native button click without the default Shopwaive credit button.

### Natively launch Shopwaive on Wix — Step-by-step:

Follow these steps to hide the Shopwaive button and connect the pop-up to a different button on your site.&#x20;

1. Email our team at support\@shopwaive, letting us know you'd like to hide the default Shopwaive button
2. Find the HTML selector for the button you wish to connect. To do this, you will need to access the developer console to inspect your page using Chrome or Safari browser.&#x20;

Example using **Chrome**:&#x20;

Visit your website and navigate to the button you wish to connect to. Right click the button, and select <mark style="color:blue;">**Inspect**</mark> from the menu. In the example below, we are connecting to the menu item labeled "Platform".

<figure><img src="/files/LUoA5uWhxQEbV7fOfrqG" alt=""><figcaption><p>Inspect the button in an embedded menu on your Wix site</p></figcaption></figure>

The developer console window will pop up on the right, with the button or selector element highlighted in blue as show below, right click the highlighted area and select <mark style="color:blue;">**Copy**</mark> > <mark style="color:blue;">**Copy selector**</mark>

<figure><img src="/files/S8AffdNGKPPJHKG1Qbti" alt=""><figcaption><p>Right click the element in the developer console and copy the selector</p></figcaption></figure>

Once you copy the selector, paste the selector in the code below, such that <mark style="color:blue;">**SELECTOR**</mark> is replaced by your selector. In the example above, our selector is <mark style="color:blue;">**#comp-l6tpt9x00label**</mark>

```javascript

<script>

setTimeout(function () {
    $("SELECTOR").unbind().on("click", function (e) {
      $("#shopwaivetab").trigger("click");
    })
}, 1500);
 
</script>

```

Once you replace with your selector, copy the code and navigate to your Wix admin, select <mark style="color:blue;">**Settings**</mark> and scroll to the bottom to select <mark style="color:blue;">**Custom code**</mark>. Click the <mark style="color:blue;">**+ Add Custom Code**</mark> button at the top right.

1. In the popup menu, paste in your code in the code snippet text box
2. Enter a name of your code, such as <mark style="color:blue;">**Shopwaive**</mark>
3. Select <mark style="color:blue;">**All pages**</mark>, and <mark style="color:blue;">**Load code on each new page**</mark>
4. Select to <mark style="color:blue;">**Place Code**</mark> in <mark style="color:blue;">**Head**</mark>
5. Click <mark style="color:blue;">**Apply**</mark>

<figure><img src="/files/DmhbyuOTlgv8X9T83tWZ" alt=""><figcaption><p>Create custom code to connect your native button to the Shopwaive modal popup </p></figcaption></figure>

You are finished, go ahead and test by following these steps:

1. Email our team at <support@shopwaive.com> to let us know you would like the default behavior or the Shopwaive button to be hidden
2. Open the Shopwaive app within your Wix dashboard
3. Search for a test customer with an email account that already has completed registration on your site, i.e. support or admin email address
4. Give store credit
5. Log into your store with the same email address as the one issued credit in the previous step
6. Navigate to a page that has the native button or menu you connected and click to test the Shopwaive popup appears

<figure><img src="/files/Z8D3eDxFFVzoeVhPSDAg" alt=""><figcaption><p>Completed example of connecting the Shopwaive popup to a native Wix button or menu item</p></figcaption></figure>

Have questions on any specific features? [<mark style="color:blue;">**Contact us**</mark>](mailto:support@shopwaive.com)